Configuring Datameer
- Charles Bishop (Deactivated)
- Judy Bergstresser (Deactivated)
Hadoop provides scalable data storage using the Hadoop Distributed File System (HDFS) and fast parallel data processing on a fault-tolerant cluster of computers. Learn more about Hadoop.
See Hadoop and Datameer to learn more about Hadoop and how to use it with Datameer.
Configuring Hadoop Cluster
To configure the Hadoop cluster settings in Datameer, you need to know which type of mode you are using and the appropriate settings for that mode such as file system or root directory within HDFS. If you don't have this information readily available, you might need to contact someone within your own organization who can assist you.
The Hadoop cluster can be configured to use local, Hadoop cluster, or Kerberos secured. These are described in the sections that follow.
General configuration
- Click the Admin tab.
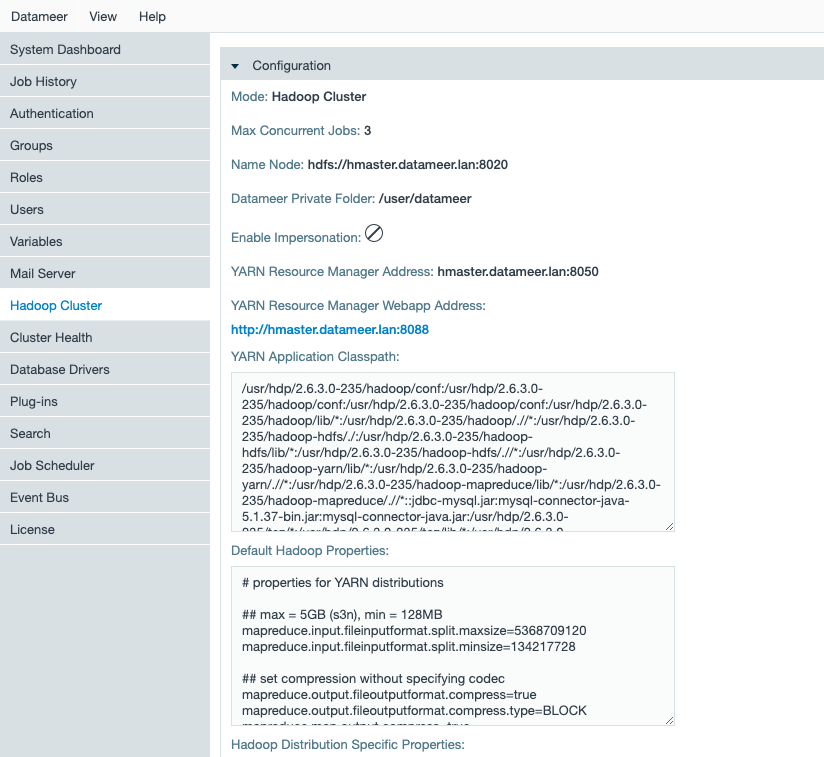
- Click the Hadoop Cluster tab at the left side. The current settings are shown.
- Click Edit to make changes.
- Click Save when you are finished making changes.
Hadoop cluster settings
To edit Hadoop Cluster settings:
- Click the Admin tab.
- Click the Hadoop Cluster tab at the left side. The current settings are shown.
- Click Edit to make changes.
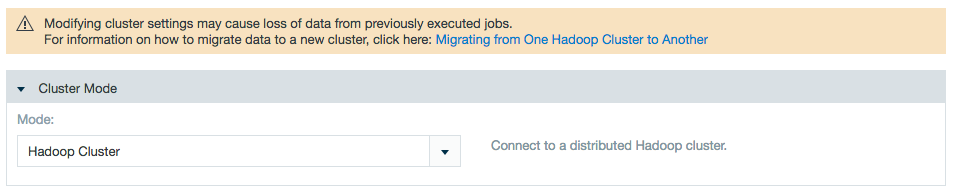
- Select Hadoop Cluster for the mode.
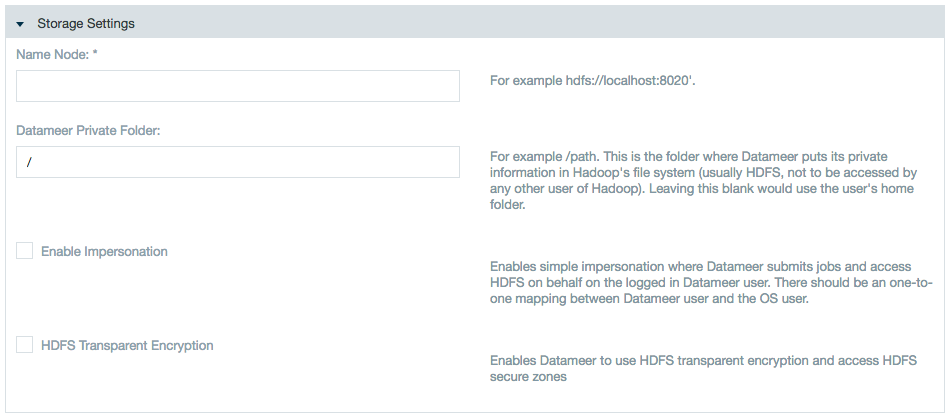
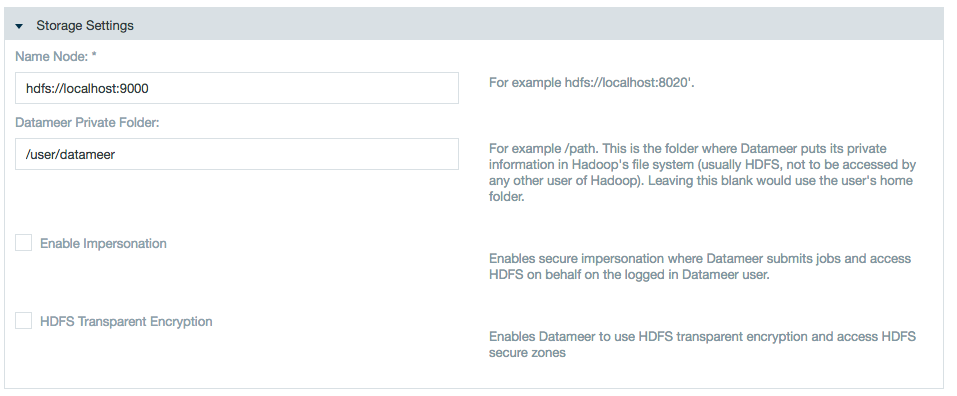
Specify the name node and add a private folder path or use impersonation if applicable.
Whitespaces aren't supported for use in file/folder paths. Avoid setting up Datameer storage directories (storage root path, temp paths, execution framework specific staging directories, etc.) with a whitespace in the path.Impersonation notes:
- There is one-to-one mapping between the Datameer user and the OS user.
- The OS user who is launching the Datameer process must be a sudoer.
- The temp folder for the Datameer installation local file system as well as in the Hadoop cluster (for Datameer) should have read/write access.<Datameer_Installation_Folder>/tmp(Local FileSystem)<Datameer_Private_Folder>/temp(Hadoop Cluster and MapR)
Learn about Enabling Secure Impersonation with Datameer.
- Specify YARN settings.
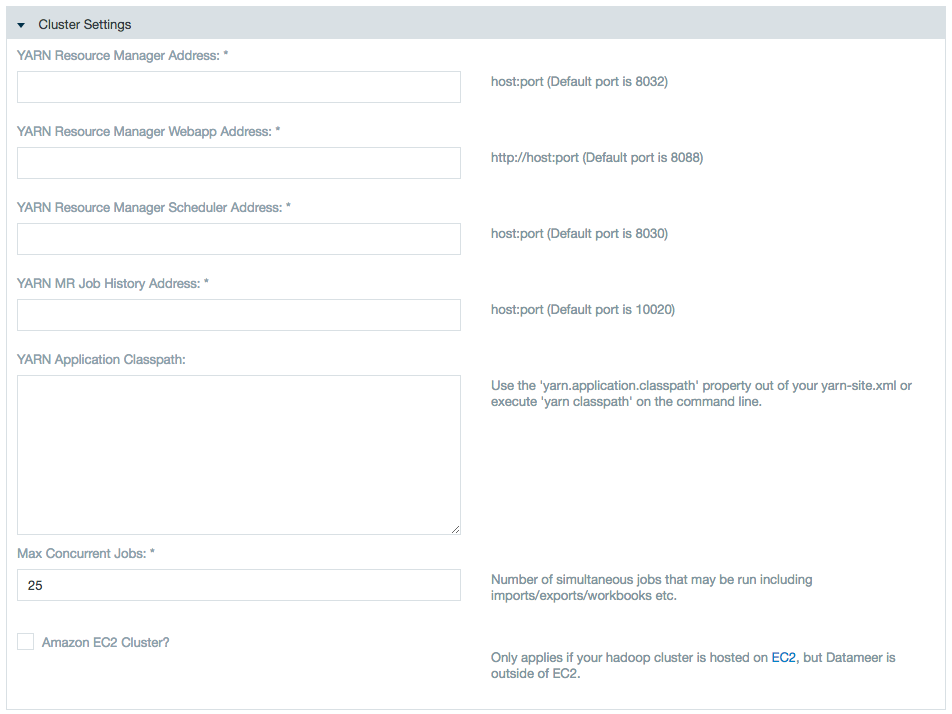
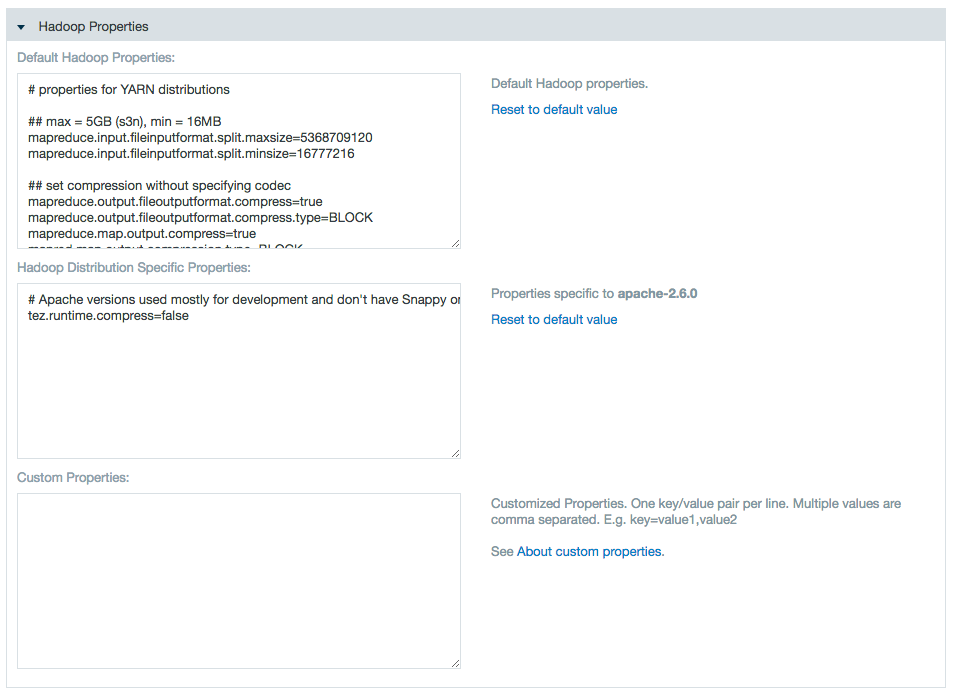
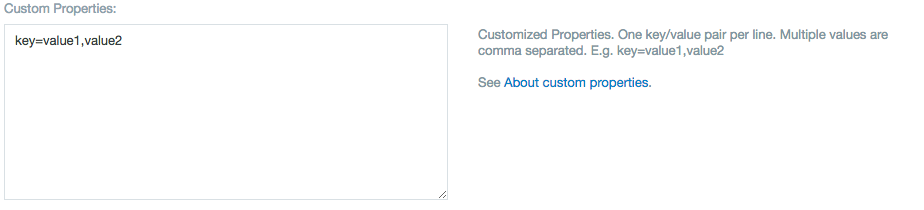
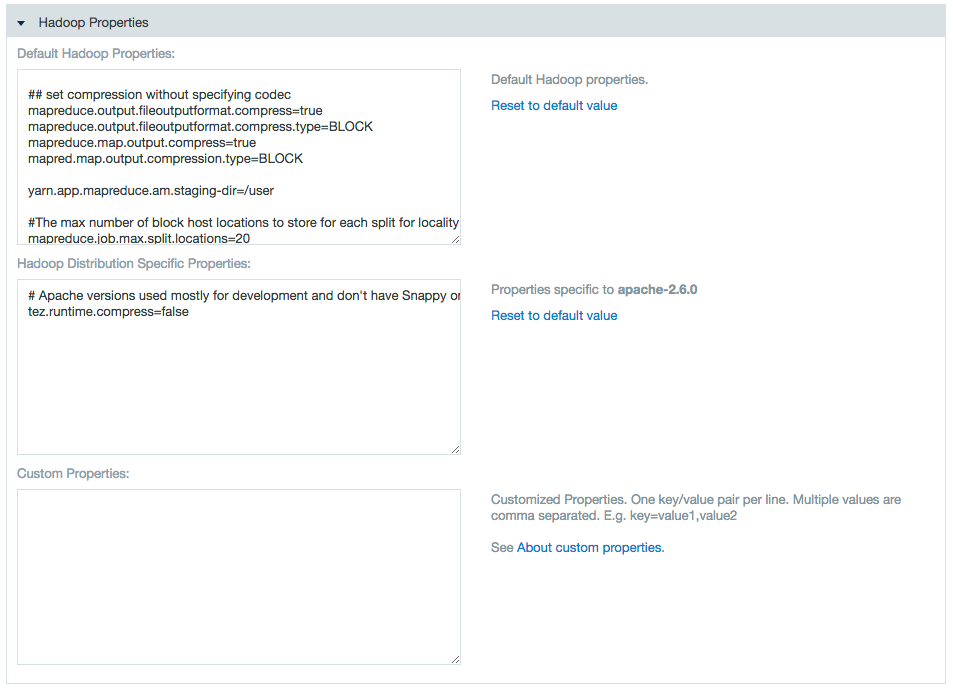
Use the properties text boxes to add Hadoop and custom properties.
Enter a name and value to add a property, or delete a name and value pair to delete the property.Within these edit fields, backslash (
\) characters are interpreted by Datameer as an escape character rather than a plain text character. In order to produce the actual backslash character, you have to type two backslashes:example.property=example text, a backslash \\ and further text
The second backslash is needed as you are effectively editing a Java properties file in these edit fields.
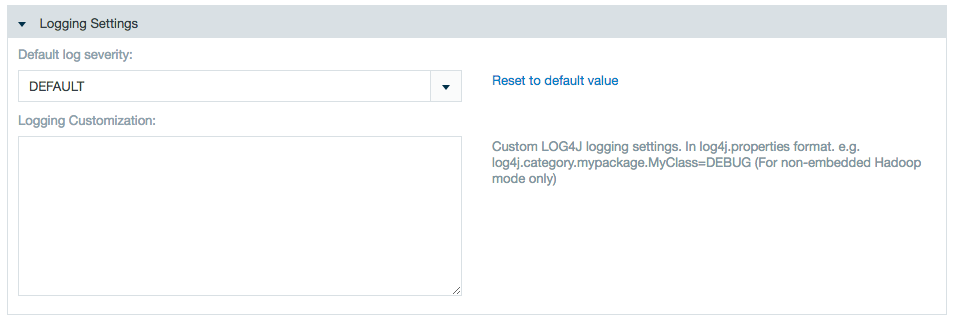
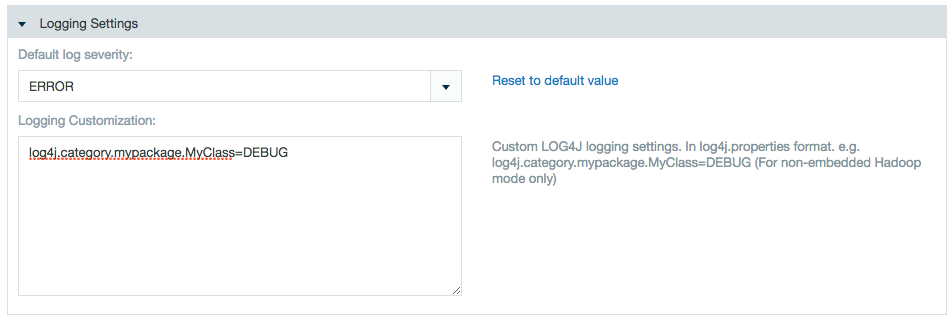
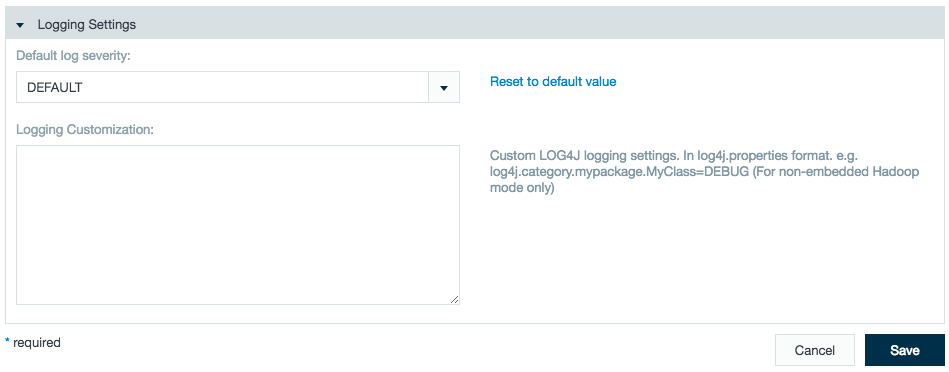
- Logging options. Select the severity of messages to be logged. The logging customization field allows to record exactly what is needed.
- Click Save when you are finished making changes.
Local execution settings
Not available with Enterprise.
To edit Local Execution settings:
- Click the Admin tab.
- Click the Hadoop Cluster tab at the left side. The current settings are shown.
- Click Edit to make changes.
- Enter a name and values in the properties text boxes. Enter a name and value to add a property, or delete a name and value pair to delete that property.

- Click Save when you are finished making changes.
Kerberos secured Hadoop
Kerberos authentication is available with Datameer's Advanced Governance through a plug-in. If you used Kerberos prior to 5.11, make sure to install this plug-in when upgrading.
Prerequisites:
- Mapping 1:1 the Datameer Service Account between hosts (Datameer and all HDFS nodes)
- Adding the Datameer service account to the HDFS supergroup
Utilizing the correct
krb5.confin order for Datameer to communicate with the key distribution center (KDC) correctly. By default, Datameer assumes that the file is in/etc/krb5.confon the Datameer application server. If the file is in another location, specify the path.etc/das-env.shexport JAVA_OPTIONS="$JAVA_OPTIONS -Djava.security.krb5.conf=/home/datameer/krb5.conf"
To edit settings for a Kerberos secured Hadoop cluster:
- Click the Admin tab
- Click the Hadoop Cluster tab at the left side. The current settings are shown.
- Click Edit to make changes and choose Kerberos Secured Hadoop in the Mode list if needed. Click the link in the dialog box to learn more.

- Specify the URI for the name node, the private folder Datameer should use, whether impersonation should be enabled, and whether to enable HDFS transparent encryption.
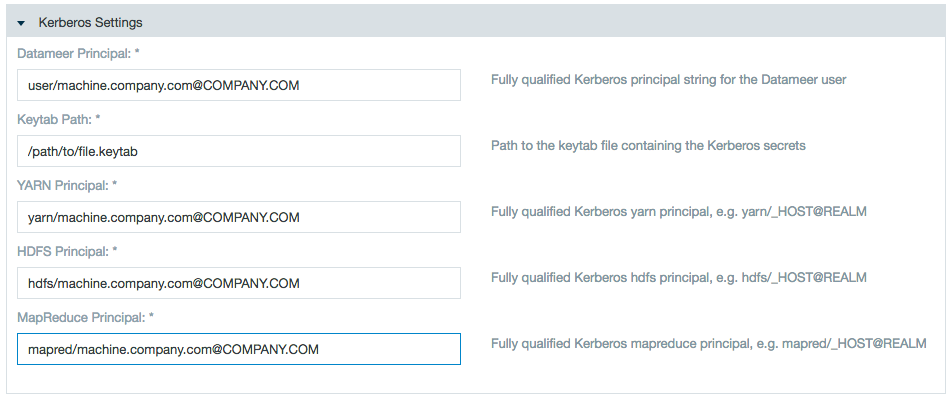
- Enter the necessary Kerberos information: the Kerberos principal for the Datameer user, the path to the keytab containing Kerberos secrets, the Kerberos principal for YARN, the Kerberos principal for HDFS, and the Kerberos principal for MapReduce.
- Use the Custom Properties text box to add custom properties. Enter a name and value to add a property, or delete a name and value pair to delete that property.
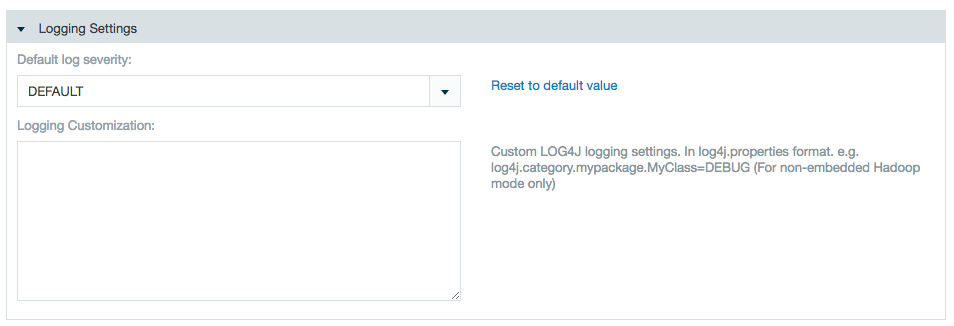
- Logging options. Select the severity of messages to be logged. It is also possible to write custom log settings to record exactly what is needed.
Click Save when you are finished making changes.
Autoconfigure grid mode
This feature is not supported with Cloudera Manager Safety Valve.
In Autoconfigure Grid Mode, Datameer evaluates your cluster and automatically configures the optimal Hadoop cluster settings. You connect Datameer to your Hadoop cluster by installing a properly configured Hadoop client package on the Datameer server (using an installation manager such as ClouderaM or Ambari or manually) and then providing Datameer with a path to that client.
The Autoconfigure Grid Mode reads all the cluster's property files and evaluates the following properties:
spark.master
das.yarn.available-node-memory
das.yarn.available-node-vcores
spark.yarn.am.cores
spark.yarn.am.memory
spark.yarn.am.memoryOverhead
spark.driver.cores
spark.driver.memory
spark.yarn.driver.memoryOverhead
spark.executor.cores
spark.yarn.executor.memoryOverhead
das.spark.context.max-executors
das.spark.context.auto-scale-enabled
spark.executor.memory
spark.submit.deployMode
You can connect Datameer to a Hadoop cluster by installing a properly configured Hadoop client package on the Datameer server (using an installation manager such as ClouderaM or Ambari or manually) and then providing Datameer with a path to that client.
- Go to Admin tab > Hadoop Cluster.
- Select Autoconfigure Cluster in the Mode field.
- In the Hadoop Configuration Directory field, enter the directory where the configuration files for Hadoop are located.
- Enter the path to the folder where Datameer puts its private information in Hadoop's file system in the Datameer Private Folder field.
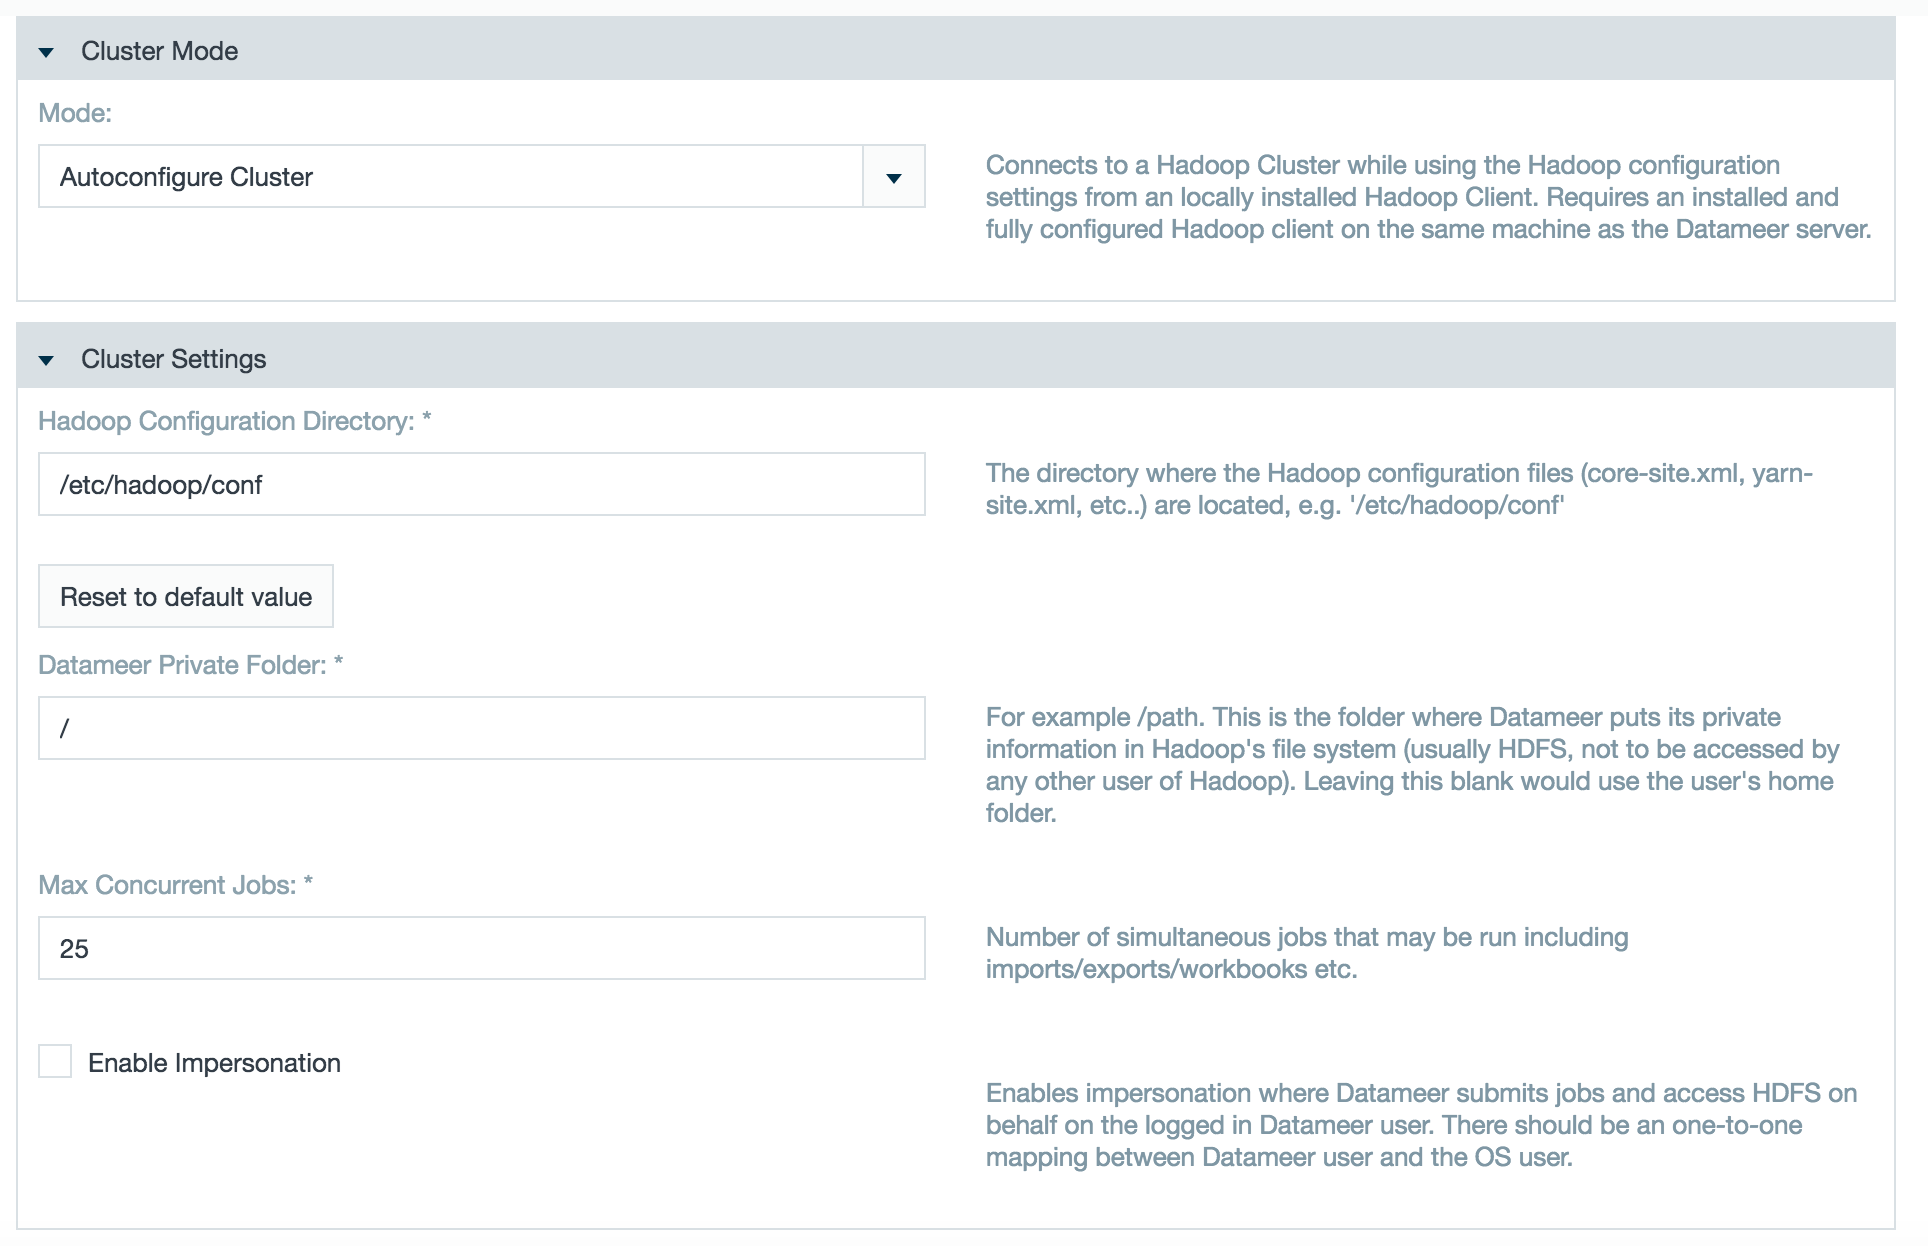
- Enter the number of concurrent jobs.
- Select whether to use secure impersonation.
- Edit the Hadoop or custom properties as necessary.
If theyarn.timeline-service.enabledproperty is true in the Hadoop conf files, setyarn.timeline-service.enabled=falseas a custom property. (This change is not needed as of Datameer v6.1)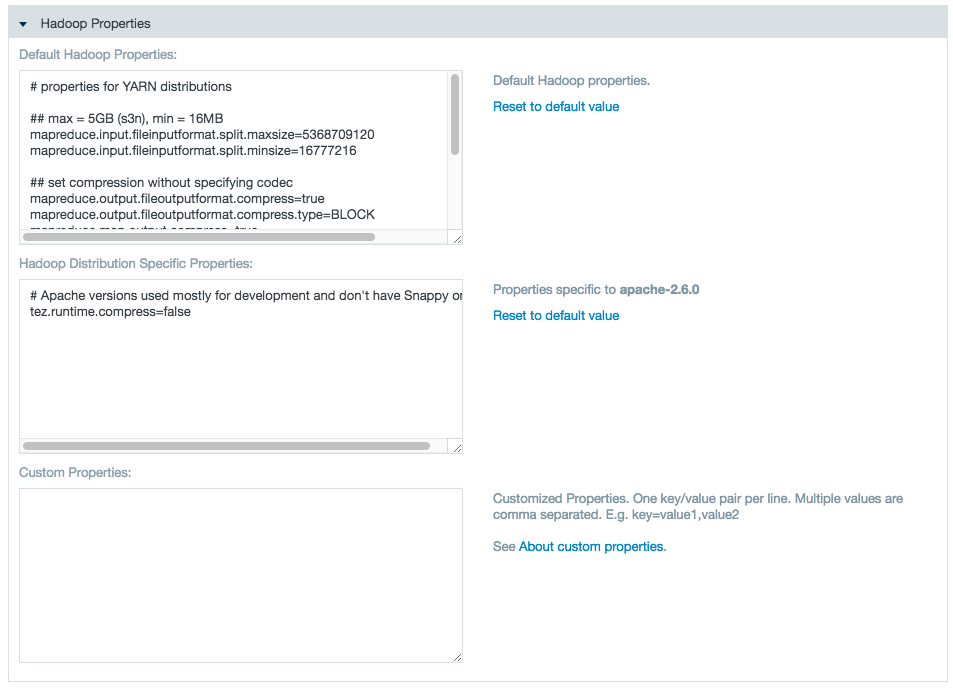
- Click Save.
To update your Datameer Autoconfig Grid Mode cluster configuration, click Edit on the Hadoop Cluster page and click Save. After saving has been completed, the updated configuration has been applied. New updates to the settings are not shown in the conductor.log but are displayed when clicking again on Edit for Autoconfigure Grid Mode under the Hadoop Properties label.
Autoconfigure Grid Mode should not be used when servers in your Hadoop cluster require specific settings for specialized tasks.
MapR
To edit settings for clusters using MapR:
- Click the Admin tab at the top of the page.
- Click the Hadoop Cluster tab at the left side. The current settings are shown.
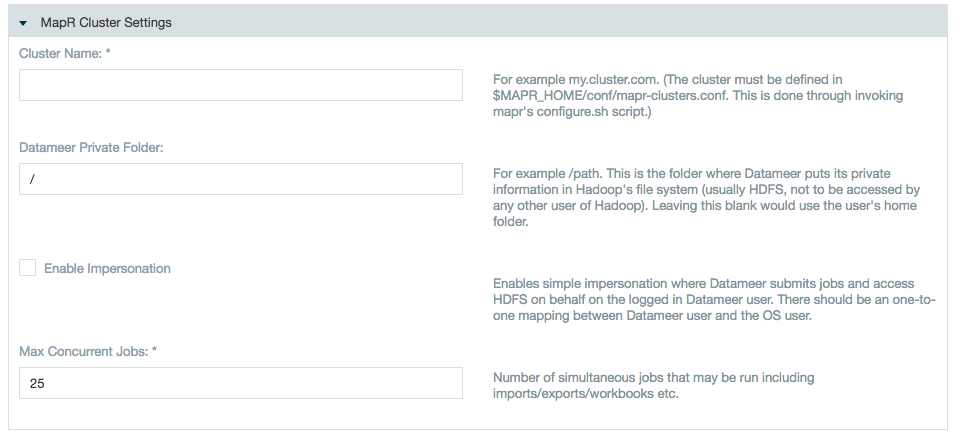
- Click Edit to make changes and choose MapR in the mode list.

Add the cluster name, the Datameer private folder, and check the boxes if using Simple Impersonation for Datameer to submit jobs and access the HDFS on behalf of Datameer user, and the Max Concurrent jobs.
There is one-to-one mapping between the Datameer user and the OS user.
The OS user who is launching the Datameer process must be a sudoer.
The temp folder for the Datameer installation local file system as well as in the hadoop cluster (for Datameer) should have read/write access.<Datameer_Installation_Folder>/tmp(Local FileSystem)<Datameer_Private_Folder>/temp(Hadoop Cluster and MapR)
Connecting to a secure MapR cluster
1) Obtain the MapR ticket for the user who is running the Datameer application. Execute the following command on the shell:
maprlogin password -user <user_who_starts_datameer>
2) Install Datameer and open
<Datameer_Home>/etc/das-env.shand add the following system property to the Java arguments:-Dmapr.secure.mode=true
3) Start and configure Datameer using MapR Grid Mode.
The option to connect using Secure Impersonation is now available.

4) (Optional) If there is a failure in saving the configuration:
Caused by: java.io.IOException: Can't get Master Kerberos principal for use as renewer
Add the following custom Hadoop properties under the Hadoop Admin page:
yarn.resourcemanager.principal=<value>
The value for this property can be found in the
yarn-site.xmlfile in your Hadoop cluster configuration.The steps to achieve impersonation are same as for a secured Kerberos cluster.
- If required, enter properties. Enter a name and value to add a property, or delete a name and value pair to delete that property.
- Logging options. Select the severity of messages to be logged. It is also possible to write custom log settings to record exactly what is needed.
- Click Save when you are finished making changes.
Configuring High Availability
HDFS NameNode (NN)
Setting a HA enabled Hadoop cluster with Datameer is almost same as setting an ordinary Hadoop Cluster with following customizations:
- Specify the NameService to which the Datameer instance should be working with in HDFS NameNode text box: hdfs://nameservice1
Specify the following Hadoop properties in Custom Property field:
Custom Properties### HDFS Name Node (NN) High Availability (HA) ### dfs.nameservices=nameservice1 dfs.ha.namenodes.nameservice1=nn1,nn2 dfs.namenode.rpc-address.nameservice1.nn1=<server-address>:8020 dfs.namenode.rpc-address.nameservice1.nn2=<server-address>:8020 dfs.client.failover.proxy.provider.nameservice1=org.apache.hadoop.hdfs.server.namenode.ha.ConfiguredFailoverProxyProvider
If HDFS HA is configured for automatic failover by using Quorum Journal Manager (QJM), you need to add the following additional custom properties:
### HDFS HA Autotmatic Failover
# By using the Quorum Journal Manager (QJM)
dfs.ha.automatic-failover.enabled=true
ha.zookeeper.quorum=<zookeepperHost1>.<domain>.<tld>:2181,<zookeepperHostn>.<domain>.<tld>:2181
Check the current NameNode (NN) setting within the database:
mysql -udap -pdap dap -Bse "SELECT uri FROM data" | cut -d"/" -f3 | sort | uniq
The command above should have only one result, the former <host>.<domain>.<tld>:<port> value configured under Admin tab > Hadoop Cluster > Storage Settings > HDFS NameNode.
Update the paths to the new location in the Datameer DB:
./bin/update_paths.sh hdfs://<old.namenode>:8020/<root-path> hdfs://nameservice1/<root-path>
Check to ensure the new NameNode has been applied to the database and that the path is correct:
mysql -udap -pdap dap -Bse "SELECT uri FROM data" | cut -d"/" -f3,4,5 | sort | uni
The command above has only one result, the virtual NameNode value including the path configured under Admin tab > Hadoop Cluster > Storage Settings > Datameer Private Folder.
YARN
Specify the resource manager with which the Datameer instance should be working in Yarn Resource Manager Address field: yarnRM.
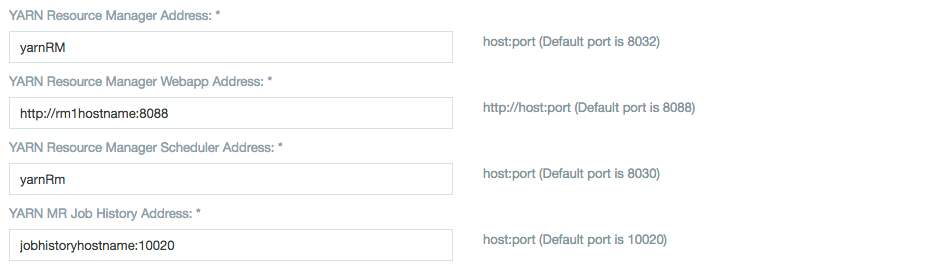
YARN Application Classpath is a comma-separated list of CLASSPATH entries.
Specify the following Hadoop properties in Custom Property field:
Custom Properties### Resource Manager (RM) YARN High Availability (HA) ### yarn.resourcemanager.cluster-id=yarnRM yarn.resourcemanager.ha.enabled=true yarn.resourcemanager.ha.rm-ids=rm1,rm2 yarn.resourcemanager.recovery.enabled=true yarn.resourcemanager.store.class=org.apache.hadoop.yarn.server.resourcemanager.recovery.ZKRMStateStore yarn.resourcemanager.zk-address=<server-adress>:2181 ## RM1 ## yarn.resourcemanager.hostname.rm1=<server> yarn.resourcemanager.address.rm1=<server-adress>:8032 yarn.resourcemanager.scheduler.address.rm1=<server-adress>:8030 yarn.resourcemanager.webapp.address.rm1=<server-adress>:8088 yarn.resourcemanager.resource-tracker.address.rm1=<server-adress>:8031 ## RM2 ## yarn.resourcemanager.hostname.rm2=<server> yarn.resourcemanager.address.rm2=<server-adress>:8032 yarn.resourcemanager.scheduler.address.rm2=<server-adress>:8030 yarn.resourcemanager.webapp.address.rm2=<server-adress>:8088 yarn.resourcemanager.resource-tracker.address.rm2=<server-adress>:8031
Using Custom Properties
Custom properties consist of a name (key) and value pair separated with a '='. These properties are used to configure Hadoop jobs.
For example you can specify the output compression codec for jobs by entering mapred.output.compression.codec=org.apache.hadoop.io.compress.DefaultCodec into the custom property field.
Datameer sets a group of default properties for Hadoop jobs which are not visible in the user interface but can be overridden using it. You can find these properties inside the conf folder:
das-common.properties, used locally and on the clusterdas-job.properties, used on the clusterdas-conductor.properties, used only locally
There are some additional Datameer specific properties as well. These are:
Name | Default value | Description | Location | Since |
|---|---|---|---|---|
| -1 (unlimited) | The maximum number of errors that should be written per MR task. |
| |
| 1 | The replication factor for the error-logs which are getting written for dropped records |
| |
| 100 | Maximum array size that a function may return for previews. If this value is exceeded the excess records are chopped off. This is only used on the Datameer server to keep the previews small. |
| |
| 52428800 (50MB) | Maximum size of memory which is used to cache values before falling back to file. This property is used in self joins and from the join strategies REDUCE_SIDE and PRE_SORT_MAP_SIDE |
| |
| 15728640 (15MB) | Maximum size for the smaller join file of a join. Datameer uses different join strategies. The fastest join strategy is when one input of the two fits into memory. This property marks the upper bound when a file, depending on its size, is assumed to fit into memory. Note that depending on compression and record-structure a 15 MB file on disk can easily blow up to 500 MB in memory. |
| |
| empty | A comma separated list of Join strategies which should explicitly not be used. Available are MEMORY_BACKED_MAP_SIDE, REDUCE_SIDE and PRE_SORT_MAP_SIDE |
| |
| datameer.dap.common.util.ZipCodec | Additional compression codecs that are added to io.compression.codecs |
| |
| Datameer merges multiple small files into combined splits and splits large files into multiple smaller splits. Setting this property can control the maximum number of splits that should be created. This is good to reduce the number of file handlers due to a lack of RPC resources. | |||
| Sets the minimum number of splits that should be created. This could be used in increase the number of map-tasks for smaller jobs to better utilize the cluster. | |||
| 50 | Sets the JDBC batch size for export jobs. Helpful on debugging export issues during JDBC batch commit. | ||
| TRANSACTION_READ_COMMITTED | The jdbc transaction-level which should be used for imports from database. You can choose between TRANSACTION_NONE, TRANSACTION_READ_UNCOMMITTED, TRANSACTION_READ_COMMITTED, TRANSACTION_REPEATABLE_READ and TRANSACTION_SERIALIZABLE which corresponds to the transaction-isolation levels from java.sql.Connection. |
| |
das.debug.job | false | Shortcut property for enabling a set of debug related properties for map-reduce jobs like periodic thread-dumps, periodic counter dumps, task-log retrieval, etc.. | 1.4.8 | |
| (-1=disabled, >0 enabled) | A thread dump is taken every x ms and logged to stdout (so it ends in the task-logs). | ||
| (-1=disabled, >0 enabled) | A hadoop-counter dump is taken every x ms and logged to stdout (so it ends in the task-logs). | 1.4.8 | |
| 20 | Number of task-logs which getting copied into job-artifacts folder when job completes. | ||
| false | When true, copies the task-logs into job-artifacts folder even when job completes successfully. | ||
das.sampling.lookahead.maxdepth | 5 | Smart sampling uses information from the downstream sheets in a workbook while sampling data for the preview of a sheet. This parameter sets the number of downstream levels which are considered. | 2.0 | |
das.job.trigger.type | Tells who/what triggered a job. (USER, SCHEDULER, RESTAPI, IMPORTJOB, EXPORTJOB, WORKBOOK) | 3.1 | ||
| The name of the owner for each file and folder that will be created during a job run in HDFS | 3.1 | ||
das.job.hdfs.groupname | The name of the group for each file and folder that will be created during a job run in HDFS | 3.1 | ||
| The name of the user thats executes the job. | 3.1 | ||
| The name of the user thats the owns the configuration of the job. | 3.1 | ||
das.map-tasks-per-node | 10 | Set the number of map tasks per node. | 5.0 | |
das.reduce-tasks-per-node | 7 | Set the number of reduce tasks per node | 5.0 |
Custom properties exclusive for Datameer Smart Execution
| Name | Default value | Description | Location | Since |
|---|---|---|---|---|
tez.am.shuffle-vertex-manager.desired-task-input-size | 50 | Set the input size for each TEZ sub-task | das-common.properties | 5.0 |
| smart | Force a job to be run with a specific execution framework Spark Smart Execution = Smart Local Mode = local (default and the only execution framework in local mode) | 5.0 | |
das.execution-framework.small-job.max-records | 1000000 | Set a threshold size for number of records to choose execution framework | 5.0 | |
das.execution-framework.small-job.max-uncompressed | 1000000000 | Set a threshold size for uncompressed file size to choose execution framework | 5.0 |
Configuring Number of Hadoop Cluster Nodes
Datameer, per default, utilizes all nodes within the Hadoop cluster. This might conflict with Datameer users under a node-based license that have more nodes in their cluster than their contract allows. Control the number of nodes Datameer interacts with using a VCore (virtual cores) allocation method.
VCore allocation method 1 (recommended)
VCore allocation method with Hadoop versions starting from 2.7
Comply with a node-based license by configuring Datameer to recognize a specific number of vcores from nodes within the Hadoop cluster.
- Add all available vcores from both head and worker nodes.
- Divide total number of vcores by the number of nodes in the cluster. This average constitutes the size of a single node. (If the node-based license allows 3 nodes, 3 times the average number of vcores can be used.)
Update the YARN scheduler on the Hadoop cluster to the number of specified vcores.
yarn.scheduler.capacity.<queue_name>.maximum-allocation-vcores=12
Add a custom Hadoop property in Datameer to recognize the number of available vcores.
For Tez:
tez.queue.name=<queue_name>
For Spark:
spark.yarn.queue=<queue_name>
VCore allocation method 2
VCore allocation method with Hadoop versions before 2.7
Add a custom Hadoop property in Datameer to recognize the number of available vcores.
yarn.nodemanager.resource.cpu-vcores:4
This isn't the preferred method as latency can be an issue when searching for data stored on a non-named node.
Encrypting Data on Transport
Datameer doesn't require any configuration changes when working with an SSL enabled cluster, however in MR2 architecture Datameer uses the ResourceManager webserver to get node and cluster metrics.
For this to work properly, the Java TrustStore and its password must be accessible to the Datameer application.
Add the following system properties:
etc/das-env.shexport JAVA_OPTIONS="$JAVA_OPTIONS -Djavax.net.ssl.trustStore=${JAVA_HOME}/jre/lib/security/cacerts -Djavax.net.ssl.trustStorePassword=<password>"Optional: To configure the HTTP endpoint for YARN daemons, set the following values:
Custom Properties### HTTP Policy ### yarn.http.policy=HTTPS_ONLY
Optional: If Resource Manager (RM) High Availability is configured, set the following properties:
Custom Properties## RM1 ## yarn.resourcemanager.webapp.https.address.rm1=<server-adress>:8090 ## RM2 ## yarn.resourcemanager.webapp.https.address.rm2=<server-adress>:8090
Optional: If your key management server (KMS) also serves using HTTPS and is configured to do so in
/etc/hadoop-kms/conf/kms-site.xml, set in the following properties:Custom Propertieshadoop.security.key.provider.path=kms://https@<host>:16000/kms dfs.encryption.key.provider.uri=kms://https@<host>:16000/kms tez.dag.recovery.enabled=false
For more information see Hadoop in Secure Mode - Data Confidentiality, Securing the Key Management Server (KMS), and Managing Key Trustee Server Certificates.
Temporary Folder
Datameer's <datameer-install-path>/tmp folder stores temporary files required for Datameer.
Look at best practices for configuring the temp folder during installation.
# Move the cache for workbook-previews and dfs
sed -i "s/\(localfs.cache-root=\).*\$/\1\/var\/cache\/datameer/" conf/default.properties
After completing the recommended configuration, the temp file is left with three directories as well as a cache of specific framework plug-ins. These directories are required and can't be moved or purged.
Folders:
das-plugins<id>.folder- A cache of all installed plug-ins.start<id>.properties- Datameer's startup configuration.jetty-0.0.0.0-8080-conductor-_-any-<id>.dir- A working directory for the embedded Jetty web service.
Example cache file of a framework plug-in:
tmp/tez-plugin-jars
If the /tmp folder is consuming too much space and other files are present in the folder, Datameer suggests it is safe to purge files that are older than three days.
Distributed File System Cache
Datameer's Distributed File System cache <datameer-install-path>cache/dfscache is used for or caching data link and import job sample records as well as log and jdbc files.
Datameer's default settings clean dfscache entries when the threshold passes 10,000.
dfscache configuration settings can be found in modules/dap-common/src/main/resources/ehcache.xml.
 <cache
        name="dfsCache"
        maxEntriesLocalHeap="10000"
        timeToIdleSeconds="60"
        timeToLiveSeconds="60"
        eternal="false"
        diskPersistent="false"
        overflowToDisk="false"
    >
This dfscache grows in size as the number of sample records from import jobs and data links is increased. Follow the troubleshooting guide if the Datameer filesystem is full due to excessive reduce-part-#### files generated in dfsCache folder.
The dfscache folder and its contents can be moved to a different location if needed by following the guide in our knowledge base.
Configuring Time Zones
Define the time zone that should be used for displaying the date in the UI and for parsing date strings that do not specify a timezone. Use default as the value to use the local server's time zone.
In conf/default.properties you can change the value designating the time zone:
system.property.das.default-timezone=default |
If the time zone is changed on the machine where Datameer is running, Datameer must be restarted to show the new default time zone configuration.
Examples
Time zone | Description |
|---|---|
| default | Local server time |
PST | Pacific Standard Time |
PST8PDT | This time zone changes to daylight saving time (DST) in the spring. The GMT offset is UTC/GMT -7 hours (PDT) during this time. In the fall it changes back to standard time, the GMT offset is then UTC/GMT -8 hours (PST). |
CST | Central Standard Time |
America/Los_Angeles | Time zone for Los Angeles (USA), this time zone changes to daylight saving time (DST) in the spring. The GMT offset is UTC/GMT -7 hours during this time. In the fall it changes back to standard time, the GMT offset is then UTC/GMT -8 hours. |
EST5EDT | This time zone changes to daylight saving time (DST) in the spring. The GMT offset is UTC/GMT -4 hours (EDT) during this time. In the fall it changes back to standard time, the GMT offset is then UTC/GMT -5 hours (EST). |