Upgrading Datameer
General Information
INFO
If you have a completely new Datameer X installation, upgrading Datameer X is not necessary.
The following is recommended before the upgrade is executed:
- Make a plan for the application downtime scheduling, notifications and create a maintenance window for Datameer.
- A database backup will be performed by the Upgrade Tool automatically. Locally stored Datameer X data must be copied in the 'das-data' folder - the HDFS data remains intact.
- Since it is recommended to not copy old configuration files or scripts to the new location, note the changes you have made in the previous setup.
INFO: You will need this information to make necessary changes in the new configuration files. - A property file exists so Job Scheduler and Event Bus settings adjusted in the UI are read during Datameer X start up.
- The property file "overrides.properties" is not written on Datameer X but your systems HOME folder. (Path = <home>/.datameer/overrides.properties)
- This property file is auto-created when adjusting the Event Bus or Job Scheduler settings under the 'Admin' tab.
INFO: This file can also be manually added and edited. - This is the last properties file read on start up. (E.g., it overrides other property files like default.properties and deployMode.properties)
- This file can be modified to allow for storing and the restoring of custom properties.
Requirements
- System requirements must be fulfilled.
- The required Datameer X version must have been downloaded. Please get in touch with Datameer Support or your Datameer representative to receive the installation package download link.
Make sure you have at least Datameer X version 10.1 before upgrading to Datameer X version 11.
- A compatible SQL connector jar file must be provided in the file package: '/etc/custom-jars'.
Upgrading Preparation
Upgrading From an Older Datameer X Release
INFO
Sometimes it is necessary to update in several release version steps, e.g. from Datameer. Updating from Datameer X versions lower than version 10.1 must first be upgraded to the latest Datameer X version 10.1.x. Upgrading directly to Datameer X version 11 is only from version 10.1 possible.
Updating the Installation Symlink
TIP
Symlinks that were created through the Datameer X installation must be updated through the updating process.
To update the symlink:
Remove the existing symlink:
rm current
Create a new symlink and change the working directory:
ln -s Datameer-<package> current
cd current
Disabling Housekeeping/ Compaction Services
INFO
Housekeeping and Compaction services must be disabled to allow for a possible roll back and to avoid any potential data loss.
To disable the Housekeeping and Compaction services:
- Open the file ' /<Datameer X new version installation directory>/conf/default.properties'.
- Disable the Housekeeping Service by setting the property '
housekeeping.enabledto 'housekeeping.enabled=false'. - Disable the Compaction Service by setting the property '
auto-compaction.enabled'to 'auto--compaction=false'. - Restart Datameer X to apply the changes.
Migrating Workbooks and Other Artifacts
INFO
Workbooks and other JSON files downloaded as a backup in older versions of Datameer X are not supported in newer versions of Datameer.
When upgrading to a newer version of Datameer X ensure that all needed workbooks and files are part of the migration process so that they can be used in your new version of Datameer.
Processing Workbook Validation Before Upgrading Datameer
INFO
Execute a Workbook Health Check to detect broken workbooks and review a workbook's structure and report any logical issues.
The Workbook Health Check is available as of 11.0.0 for Datameer X 11.
Backing Up Keyfiles and Keystore
If you have set up password encryption and/or enabled SSL with custom certificates , backup your Keystore and Keyczar keyfiles.
Upgrading Process
INFO
The upgrading process consists of two parts:
- upgrading the Datameer X application
- upgrading the database
Upgrading the Application
INFO
Updating Datameer X using user/ group 'root' is recommended to change the permissions to the user/ group 'datameer' for security reasons.
INFO
View current running or queued jobs and pause the job scheduler so that jobs are not submitted to the cluster.
INFO
INFO: Do not copy the entire old 'conf/' directory or 'conductor.sh' script to the new location. You only need to make changes in the new file for the changes you made previously.
To upgrade the application:
Stop the Datameer X application gracefully.
<Datameer X Application Folder>/bin/conductor.sh stop
Unzip the upgrade file and move the MySQL JDBC driver located in <Datameer X path>/das-data/jdbc-jars to the new installation's <New Datameer X path>/das-data/jdbc-jars> folder.
export DAS_DEPLOY_MODE=live
When upgrading in Workgroup or Enterprise versions, consider allocating additional memory in 'etc/das-env.sh'. Make the necessary changes to the 'etc/das-env.sh' file.
INFO: Memory requirements and the main JAVA options have not changed in Datameer X version 10., so the values introduced in the previous version could be re-used.# Adjust max available memory (-Xmx) according to your needs # WARNING: Path variables that may contain blanks should be added to jetty.sh start_das() method (see DAP-6342) export JAVA_OPTIONS="-Xmx2048m -XX:MaxPermSize=384m -Xms256m -XX:MaxNewSize=448m -XX:SurvivorRatio=6 -XX:+UseConcMarkSweepGC -XX:CMSInitiatingOccupancyFraction=80 -XX:+HeapDumpOnOutOfMemoryError -XX:+CMSClassUnloadingEnabled -XX:+CMSPermGenSweepingEnabled" export JAVA_OPTIONS="$JAVA_OPTIONS -Dfile.encoding=utf-8"
If needed, change the container sizing of the Map, Reduce and AM containers which respectively correspond to MapReduce and Tez jobs. Therefore change the settings of the properties:
das.job.map-task.memory=2048
das.job.reduce-task.memory=2048
das.job.application-manager.memory=2048
If existing, copy the files from the 'das-data' folder of the old distribution to the new location.
INFO: Keep the original 'das-data' information as a backup.cp -r /<old-location>/das-data /<new-location>/
If needed, update the folder in which plug-in configurations are stored. Therefore open the 'default.properties' file from the file system of the previous Datameer X version, search for 'system.property.plugin.configs.dir=<folder name>' and open the 'default.properties' file from the file system of the Datameer X upgrade version. Now check or update the new property value to be the same folder name in the previous version and if needed, copy the contents of the previous plug-in configurations folder into the file system of the new upgraded version of Datameer.
INFO: Plug-in zip files from an older version are not compatible with newer versions. Request updated plugin versions from support or your Technical Account Manager.# Defines the folder where to store plugin configurations system.property.plugin.configs.dir=<folder name>
- If you made changes in the configuration files in your 'conf/' directory, apply the same changes to the new 'conf/' directory of your upgraded instance.
Example: If you made changes in 'live.properties' or 'log4j-<xyz>.properties, change them also in the upgraded instance. If needed, copy over the native libraries that you have added.
INFO: You don't have to copy over the native libraries that are already bundled with Datameer.cp -r /<old-location>/lib/native/* /<new-location>/lib/native/
- If you made changes to the 'conductor.sh' script, apply the changes to '/<new location>/bin/conductor.sh' again.
Example: Changes to enable SSH values. Migrate the SSL values from the previous 'start.ini' to the new one.
# Set up a demonstration keystore and truststore
jetty.keystore=etc/keystore
jetty.truststore=etc/keystore
# Sets the demonstration passwords
# OBF passwords aren't secure. They are only protected from casual observation.
# See http://www.eclipse.org/jetty/documentation/current/configuring-security-secure-passwords.html
jetty.keystore.password=OBF:1vny1zlo1x8e1vnw1vn61x8g1zlu1vn4 # storepwd
jetty.keymanager.password=OBF:1u2u1wml1z7s1z7a1wnl1u2g # keypwd
jetty.truststore.password=OBF:1vny1zlo1x8e1vnw1vn61x8g1zlu1vn4 # storepwd
- If needed, copy the JVM keystore.
- If needed, copy the JVM truststore.
- If you use password encryption, copy the appropriate keys from the old installation folder. Find more details under 'Set Up Password Encryption in Datameer'.
- If needed, copy over the native libraries that you have added.
- Copy over the files from 'etc/custom-jars'.
INFO: These files could be database drivers or 3rd party libraries. - If needed, place Datameer X plug-ins that are not part of the standard installation package to the 'etc/custom.plugins/' directory, e.g. Advanced Governance.
- If using custom Datameer X plugins (jar archives stored under 'etc/custom.plugins'), update those with the SDK to be in sync with the new Datameer X version.
- If existing, copy the files from the 'das-data/' folder from the old distribution to the new location.
- Disable the 'Housekeeping/ Compaction Services'. Updating the application is finished.
Upgrading the Database
INFO
The following applies as prerequisites:
- your database version must be from the latest 10.1 version, otherwise you have to upgrade to Datameer X 10.1 (latest version). When starting Datameer X a version check is performed. The booting process stops, when the database doesn't have the correct version.
- HSQL upgrades are not supported
- a compatible SQL connector jar file must be provided in the file package: '/etc/custom-jars'
- a database backup is taken by the Database Upgrade Tool
To upgrade the database, use the script provided in the Datameer X distribution installation folder.
- For Datameer-X versions 11.0.7 and 11.1.1 or later, use the "database.sh" script by executing "
./bin/database.sh upgrade" from inside the distribution installation folder. - For earlier versions of Datameer-X 11, use the "upgrade_db.sh" script by executing "
./bin/upgrade_db.sh
The upgrade script will automatically:
- create a database dump before the upgrade (the "database.sh" script stores this in "
./das-data/backups/" while the "upgrade-db" script stores it in "/bin/upgrader") - validate the correct schema from the database
- select only necessary upgrades, SQL and Java upgrades in the correct order
- log the execution to the command line and also to a dedicated log file ("database.sh" logs to "
./logs/database-tool.log" while "upgrade-db" logs to "./bin/upgrader/logs")
The Datameer X upgrade is now completed and you can launch the application.
MySQL Thread Stack Overrun During the Database Upgrade
INFO
If you receive an error message that the thread stack overrun during an upgrade, raise the MySQL stack size.
Example:
mysqld -O thread_stack=192k
or higher if necessary.
Upgrading Post-Processing
Updating YARN Path Settings
INFO
This applies only in case the Hadoop cluster has been upgraded.
INFO
Path settings are used to lookup and load libraries. Therefore incorrect path settings may lead into unexpected behavior.
INFO
The correct YARN application class path can be found via command:
yarn class path | tr ':' ','
To check or update the path settings:
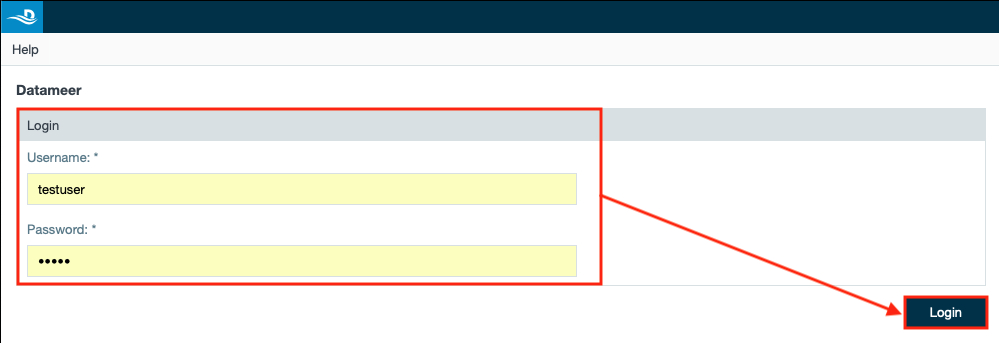
Start the Datameer X application and log in. The Datameer X UI opens.
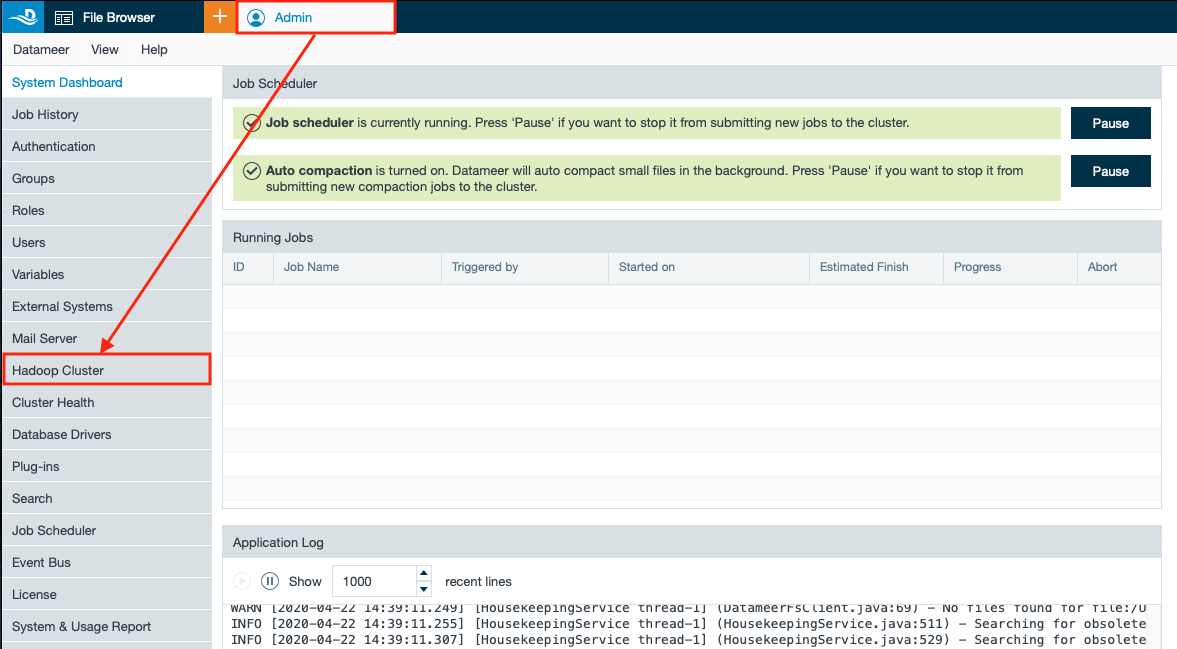
- Open the "Admin" tab and then "Hadoop Cluster". The 'Admin' configuration overview page opens.
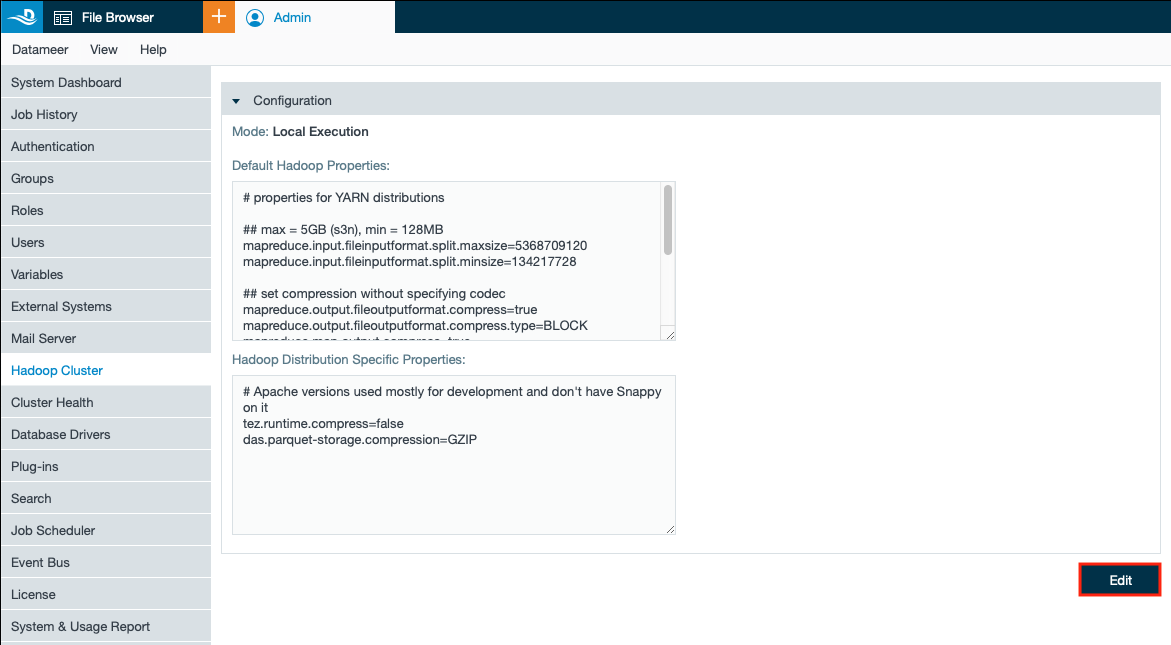
- Click on "Edit". The configuration page for the Hadoop cluster opens.
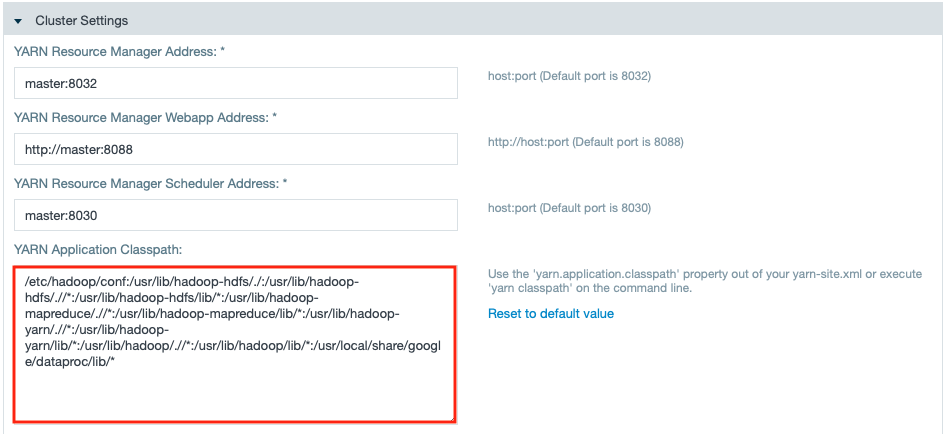
- Navigate to the section "Cluster Settings" and then to "YARN Application Classpath" and update the 'YARN application class path' if needed.
- Navigate to the section "Custom Properties" and update the 'LD_LIBRARY' path if needed.
- Confirm with "Save". Updating the path settings is finished.
Retriggering the Search Index
INFO
The search settings to enable file search within the 'File Browser' are retriggered automatically after the upgrade.
Enabling SSL
INFO
If you need to enable SSL have a look at the SSL configuration page.
Validating the Datameer X Upgrade
INFO
After the application and database upgrade has completed, perform a test to validate a successful update.
Processing Workbook Validation After Upgrading Datameer
INFO
Ask your Datameer X users to review their most critical use-cases and ensure that they work as expected after the upgrade.
Execute a Workbook Health Check again to detect broken workbooks and review a workbook's structure and report any logical issues. In case there are workbooks that have been broken by the upgrade, check the error messages contained in 'conductor.log' and decide whether you can fix them manually or need to roll back and get Datameer X support assistance on the issue.
Performing the Validation
INFO
fields that were made unnecessary on the AD/LDAP configuration page have been removed
the difference between AD and LDAP can be configured in field input.
Username Attribute: uid (LDAP), sAMAccountName (AD)
- Group Definition: objectClass=groupOfNames (LDAP), objectClass=group (AD)
- there is no longer a drop down box to switch between simple and custom group definition. (LDAP only)
To perform the validation:
- Start Datameer.
- If applicable, upload recompiled plug-ins.
- Validate the upgrade by preforming tests with baseline jobs that could previously be run without errors.
- If applicable, test custom plug-ins.
- Create a connection where the data is stored, import the data, add and modify the data in a workbook, and run the data.
INFO: If no unexpected error occur the upgrade has been validated.
Recompiling Plug-Ins
INFO
Custom plug-ins that were created by using the 'Plug-in SDK' need to be recompiled - therefore, adjust the versioning and create the plug-in again under the new 'Plug-in SDK'
To recompile the plug-ins:
- Check if any plug-ins are located in '<OLD Datameer X version installation folder>/etc/custom-plugins/'.
- Request a Datameer X representative to provide these plug-ins recompiled for the Datameer X version you are upgrading to.
- Copy the new versions of the plugins to '<NEW Datameer X version installation folder>/etc/custom-plugins/'.
Enabling Housekeeping/ Compaction Services
INFO
Housekeeping and Compaction services can be enabled after the upgrade.
To enable Housekeeping/ Compaction services:
- Perform the upgrade validation testing and make sure the upgrade is validated successful.
- Open the file ' /<Datameer X new version installation directory>/conf/default.properties'.
- Enable the Housekeeping Service by setting the property '
housekeeping.enabled'to 'housekeeping.enabled=true'. - Enable the Compaction Service by setting the property '
auto-compaction.enabled'to 'auto–compaction=true'. - Restart Datameer X to apply the changes.


