...
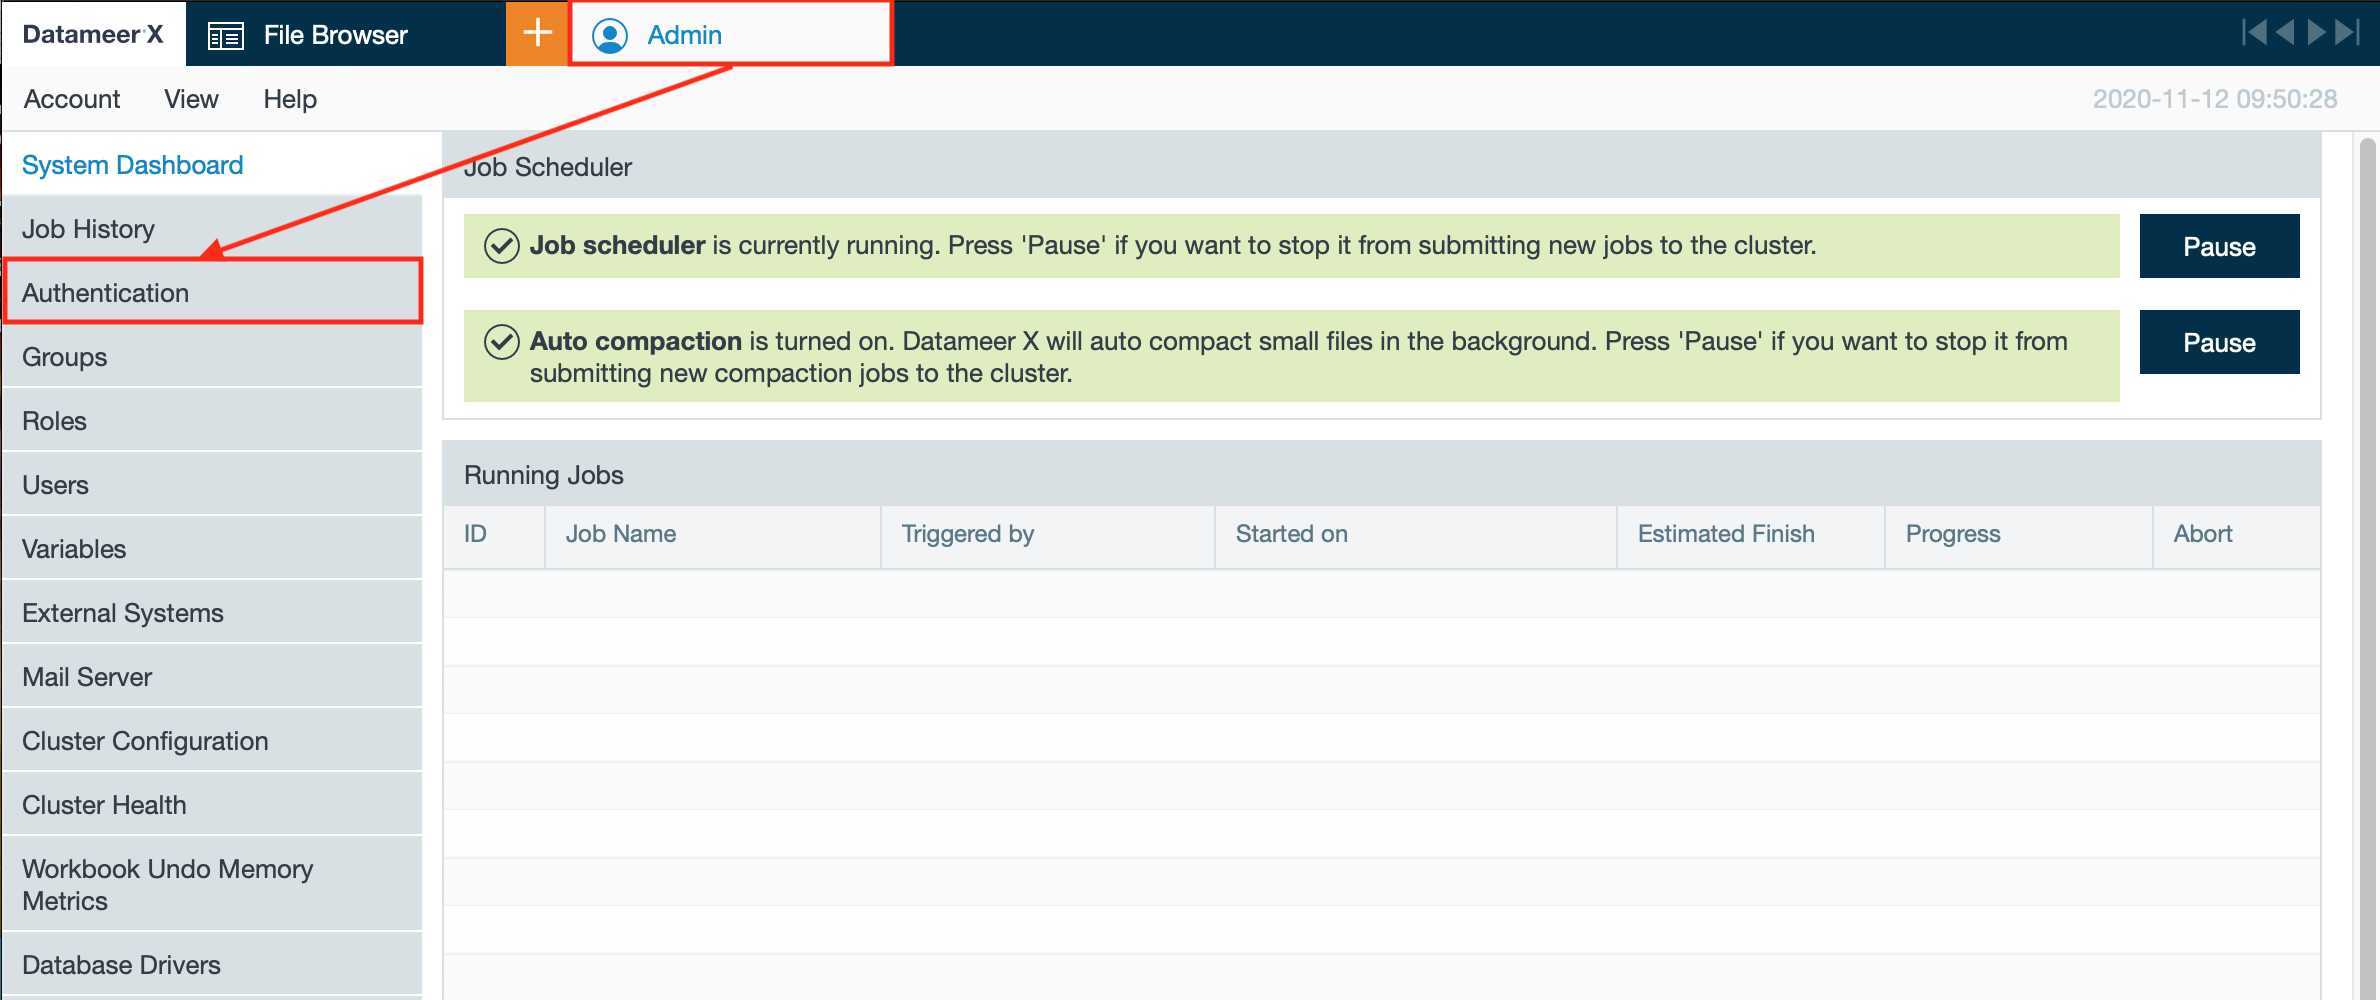
- Click on the "Admin" tab and select "Authentication". The page 'Authentication' opens.
- Click "Edit". The authentication configuration page opens.

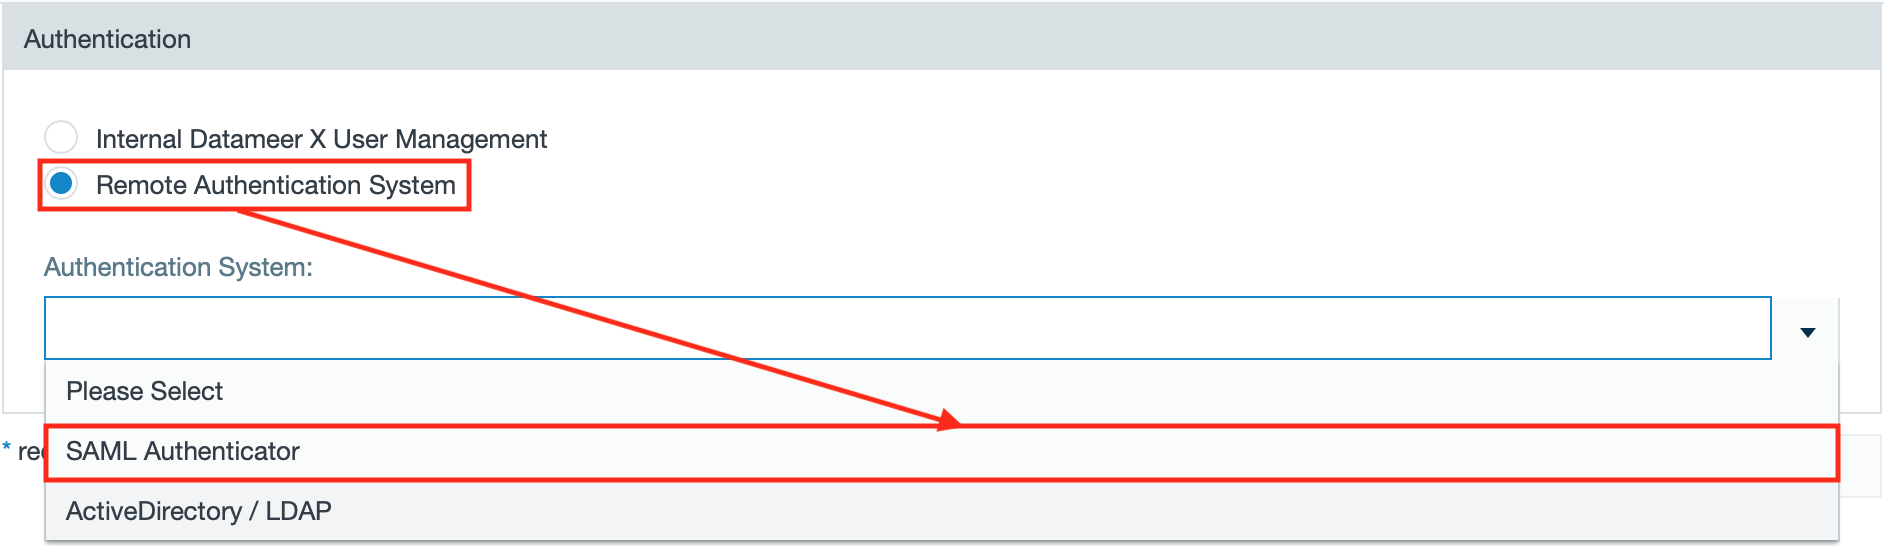
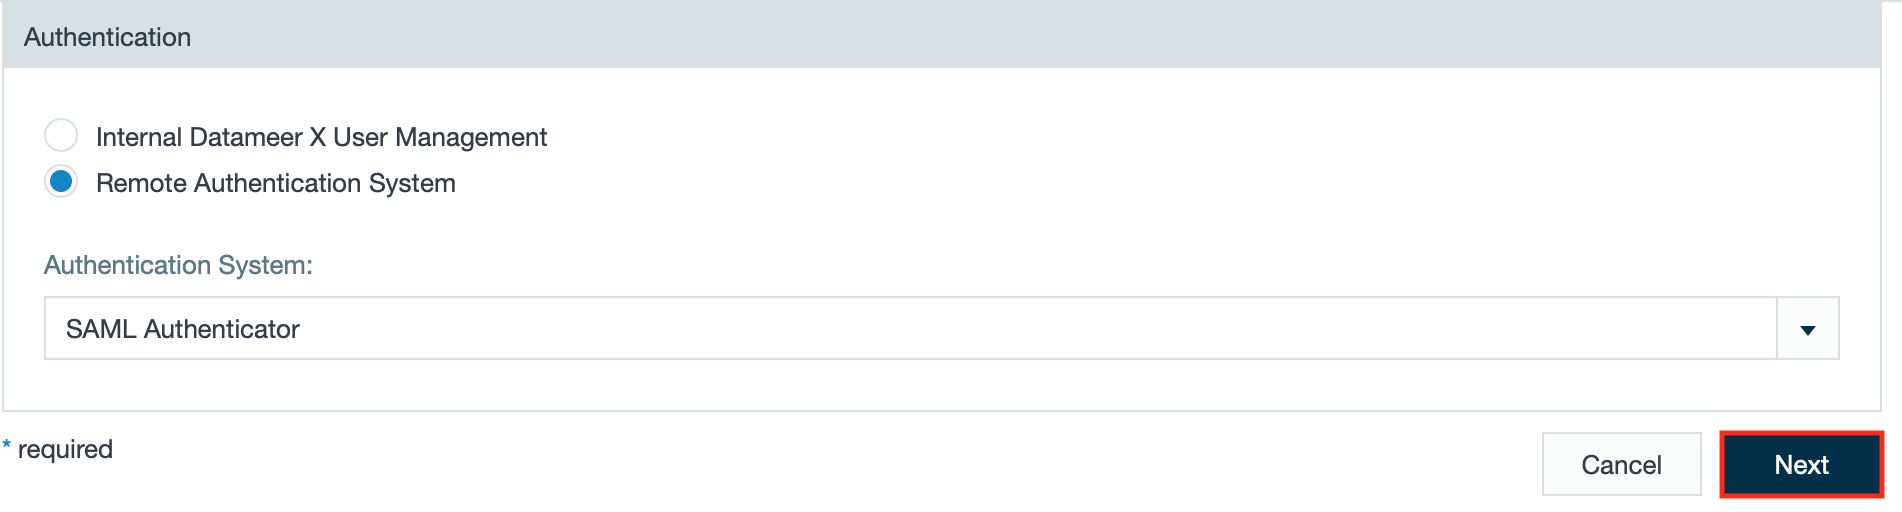
- Select "Remote Authentication System" and select "SAML Authenticator" from the drop-down.
- Click "Next".
- Select from where to load the metadata.
INFO: The documentation describes the case 'Load Metadata from File on the Datameer Server File System'.
INFO: You can upload a file, load the metadata from the Datameer X Server File System or load it from a HTTP URL.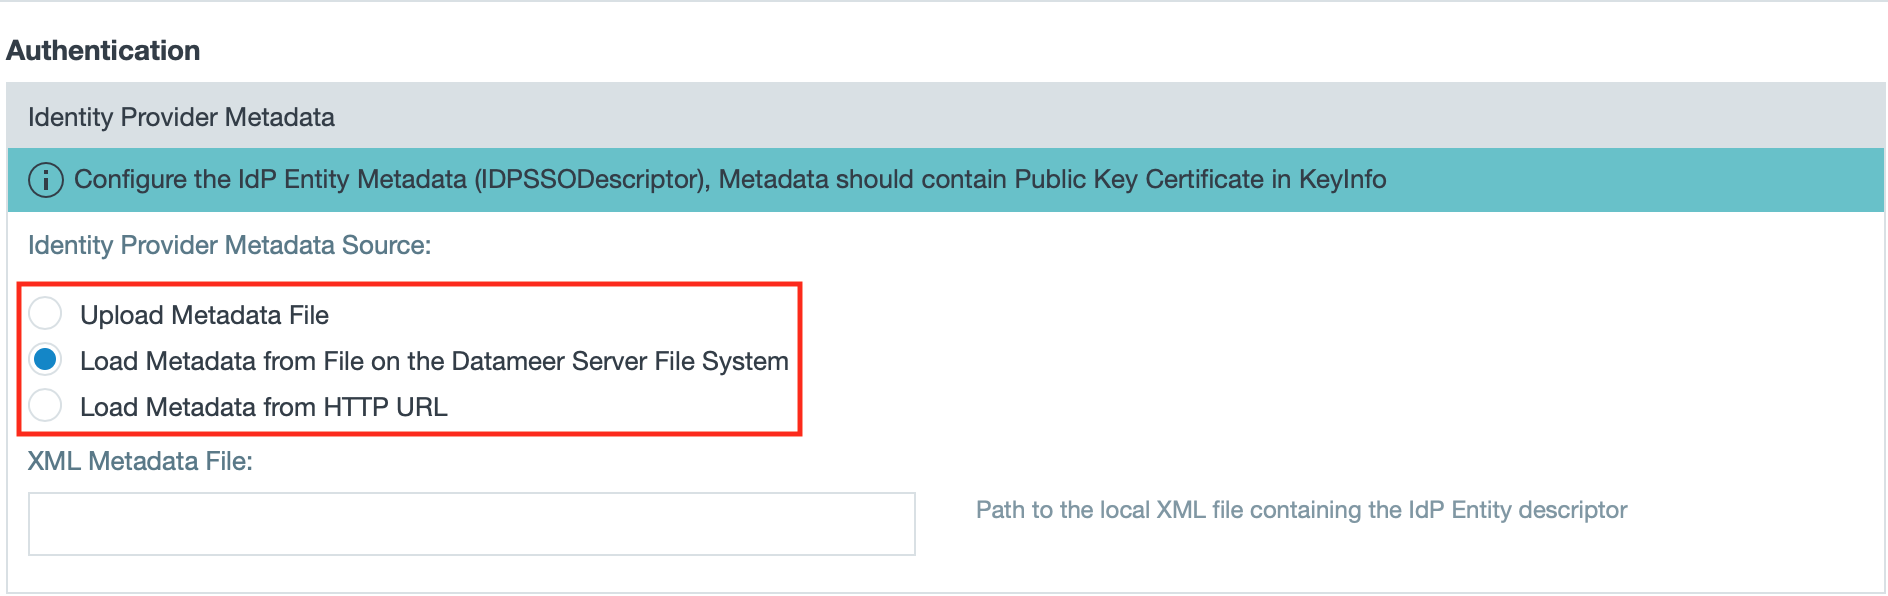
- Enter the fully qualified URI of the Datameer server.
INFO: If needed, activate the checkbox "Load Balancer Mode" to enable SAML, if Datameer X is running behind a load balancer that terminates SSL/ TLS. If you are using a third-party single sign-on application, add '/saml/SSO' to the end of the URI.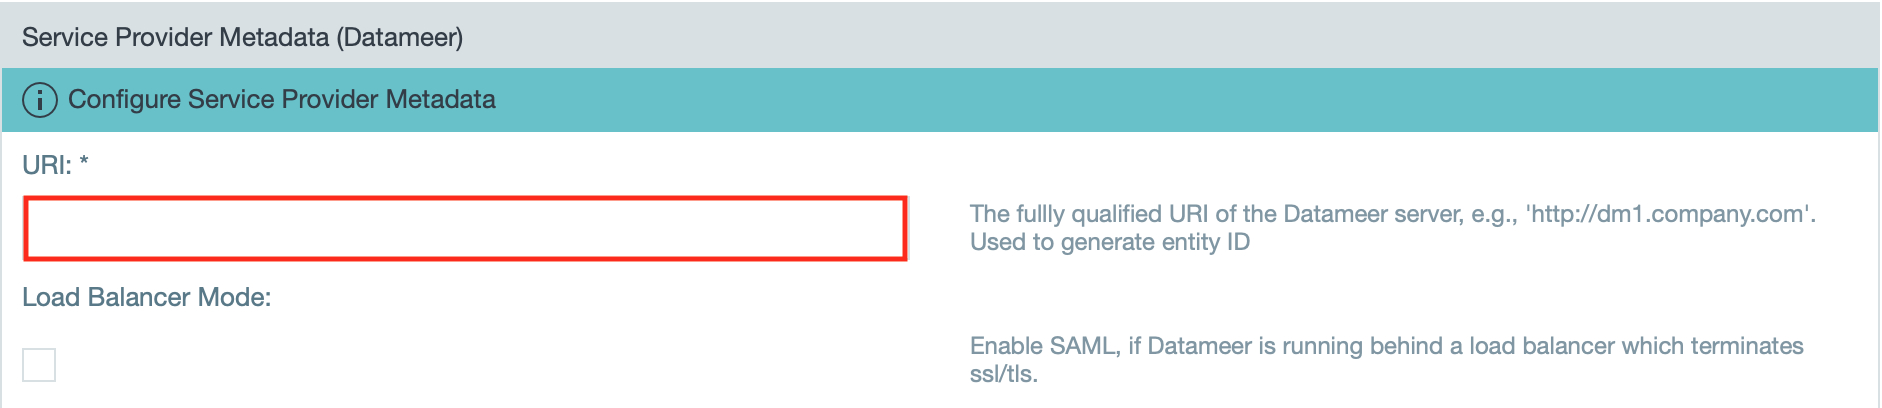
- If using a KeyManager, enter the 'KeyStore Path', 'KeyStore Password', 'Service Provider Key Alias' and the 'Service Provider Key Passphrase'.
INFO: A KeyManager is needed when signing messages is enabled.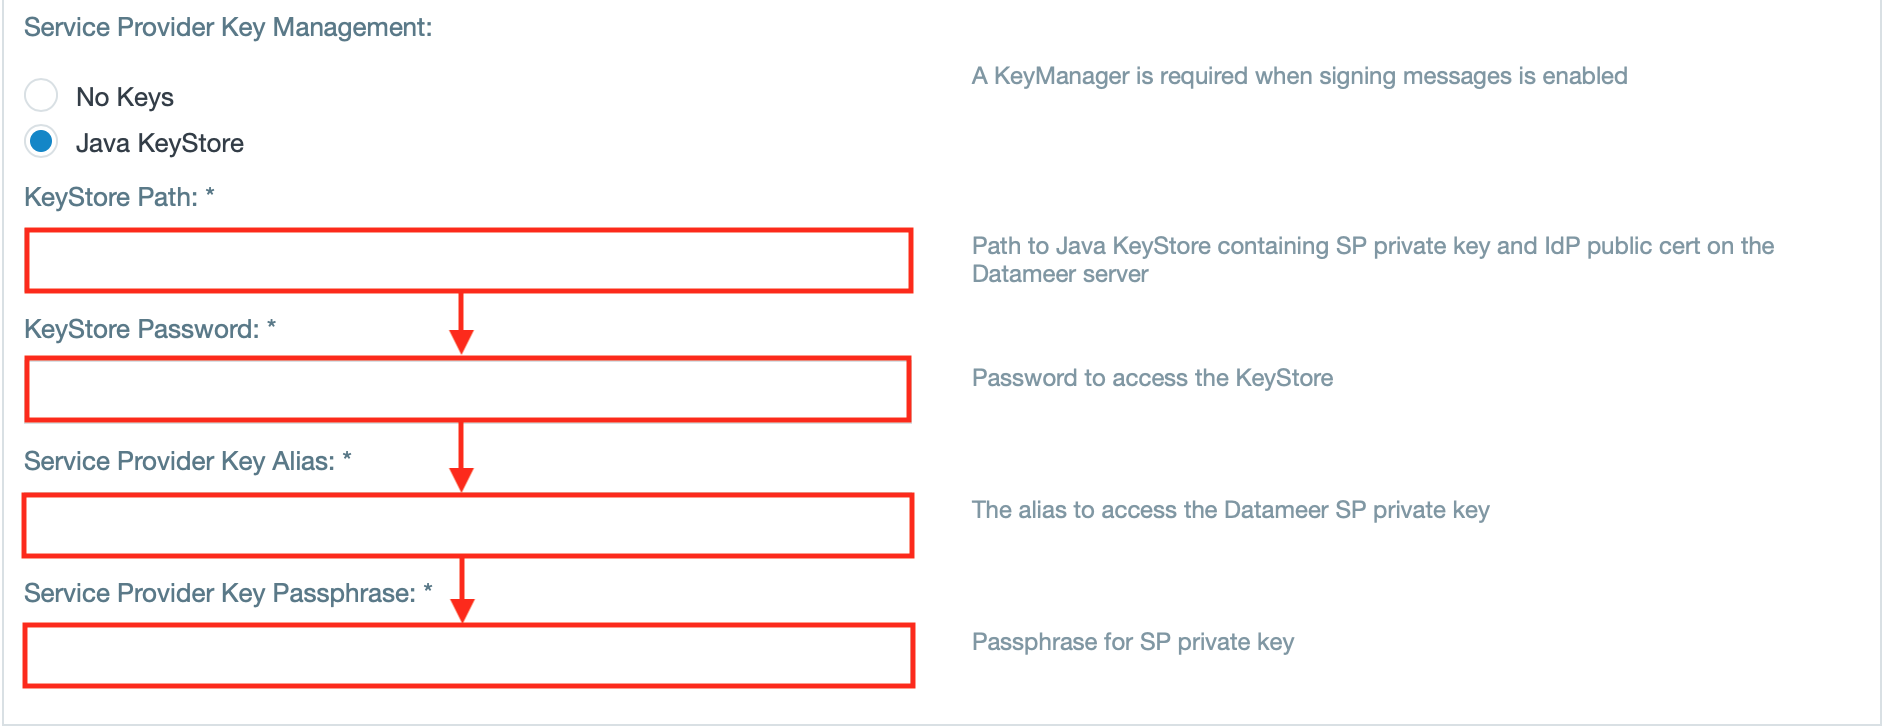
- Select the "Saml Ldap Authenticator Repository" as the directory service.
INFO: You can set up this directory service through the SAML SSO SDK Extensions.
- Enter the server URL and enter the username and password.
INFO: If needed, select "Use default user" instead to use the default user to connect to the server.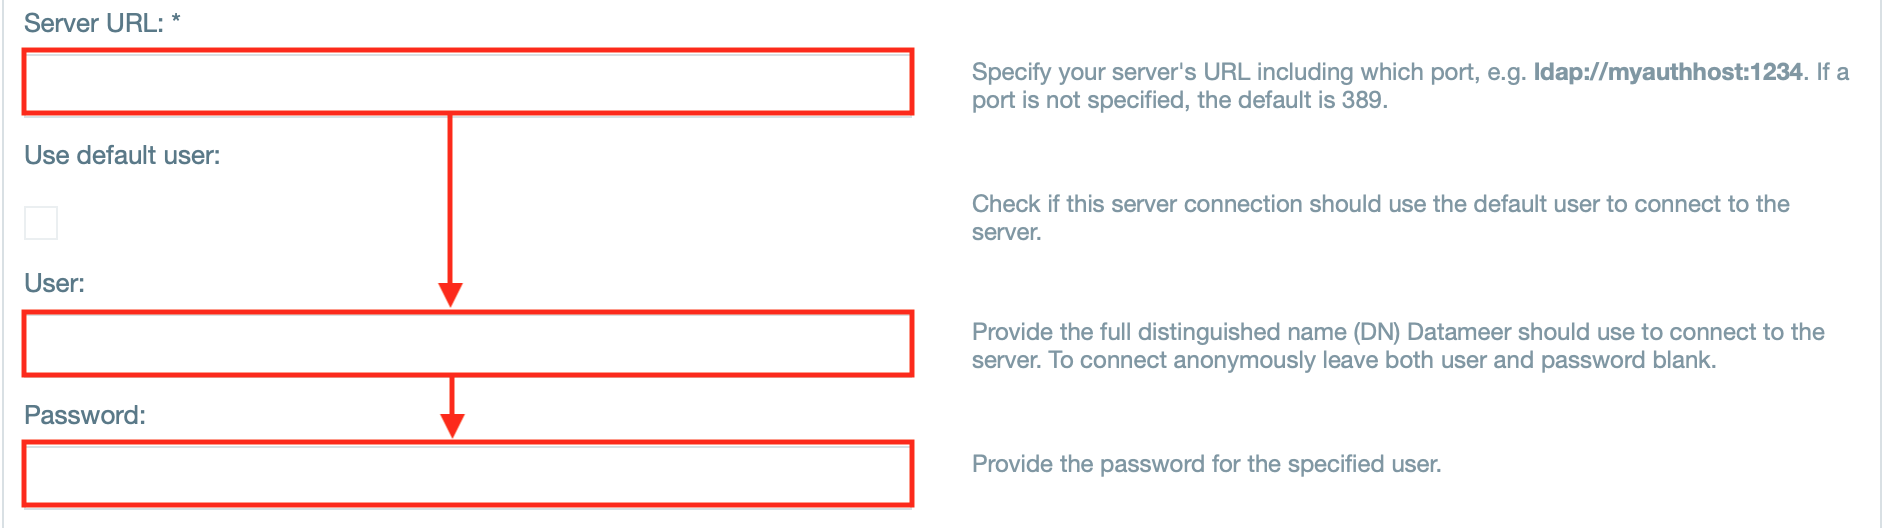
- Enter the search base query and the user definition query.
INFO: If needed, enter the filter query for the groups.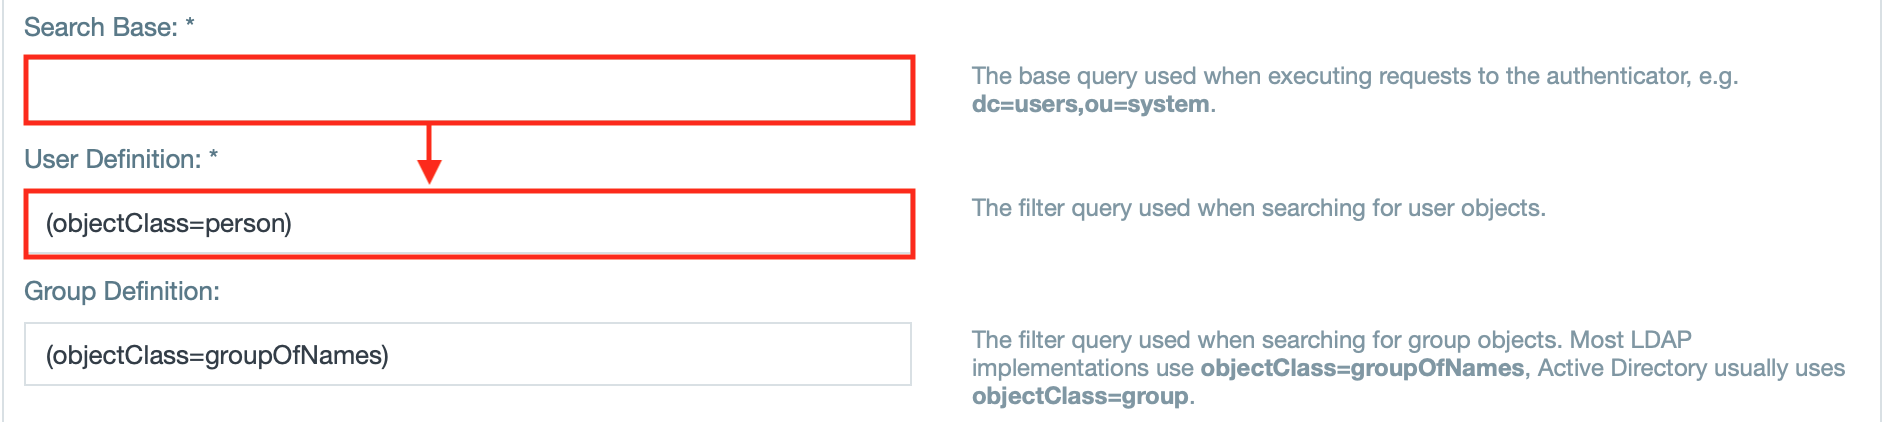
- If needed, define the pagination control.

- Enter the username attribute that defines a username and must be unique across all users.

- Enter the email attribute.

- If needed, enter the attributes for impersonation and/ or salt.

- Enter the attribute for group names.

- If needed, enter further group related attributes as well as group related fields, e.g. 'Virtual Group'.
INFO: The checkbox 'Mixed mode' is enabled by default and enables both internal user management as well as SAML. Having this disabled, the internal user management is disabled.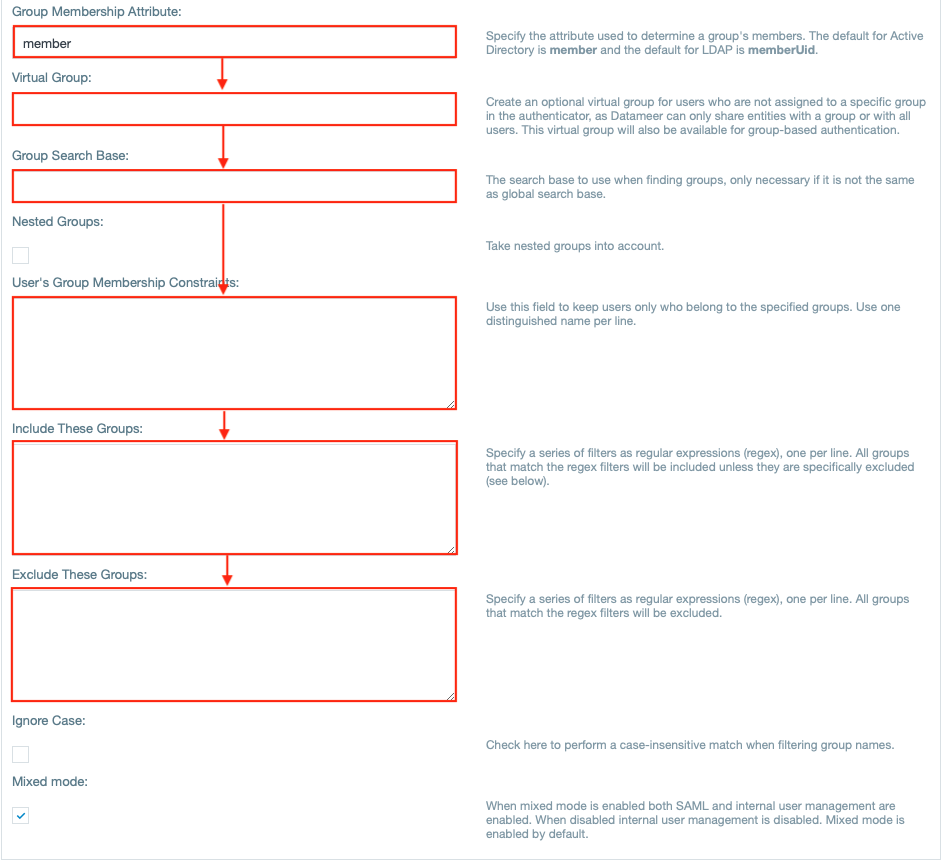
- View that the SAML attribute user provider is enabled.

- If needed, enable the checkbox "Use roles from Directory".
INFO: The roles for a user can be defined in the saml assertion or in the user directory. By default the roles comming with the saml assertion are used. In case these roles are not defined in saml, we can read these rules from the directory configured above.
- If needed, enter properties for the saml username, email, roles and groups assertion.
INFO: The default 'SAML Attribute User Provider' uses the following SAML attributes: 'datameer.user.name' as username, 'datameer.user.email' as email, 'datameer.user.groups' as list of groups and 'datameer.user.roles' as list of datameer roles.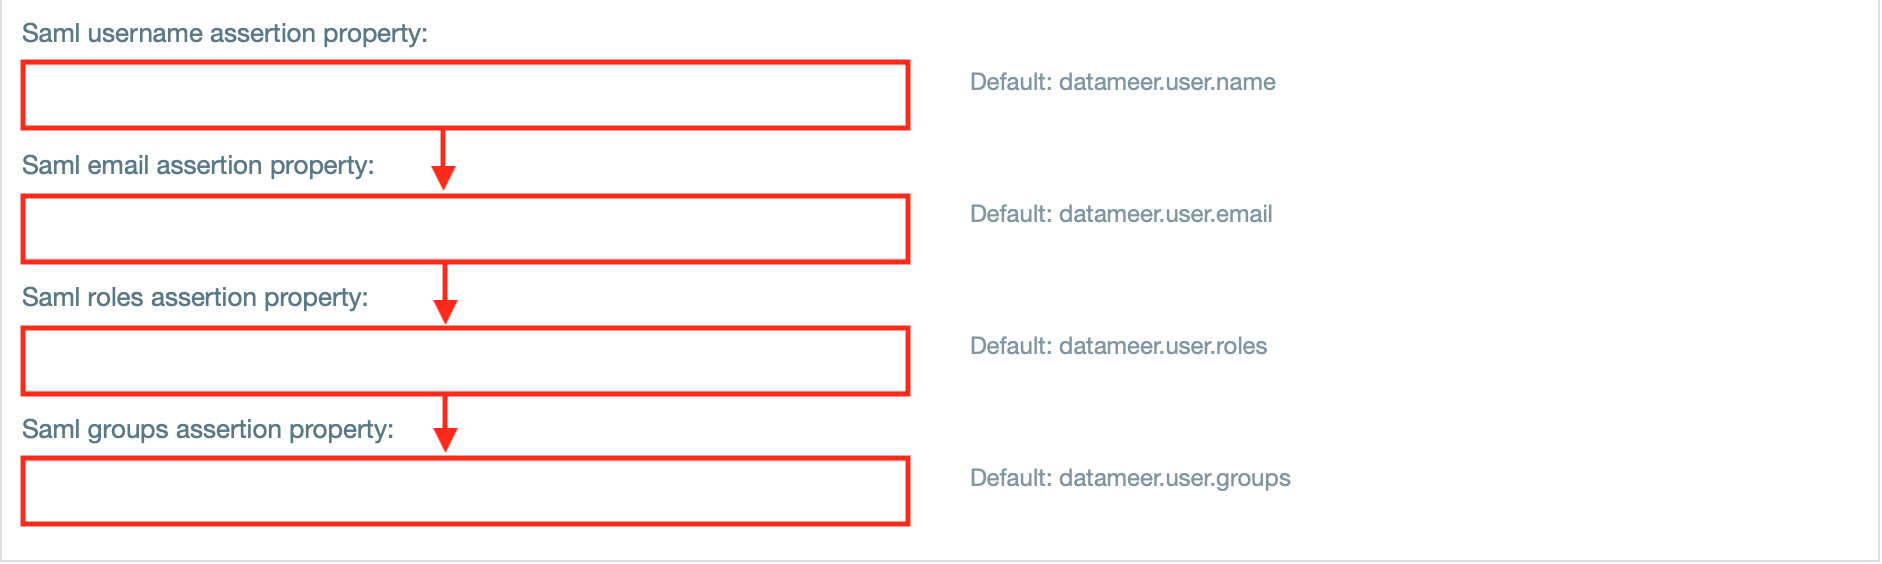
- If needed, change the advanced SSO options to your needs.
INFO: They provide /wiki/spaces/DASSB110/pages/20221237204.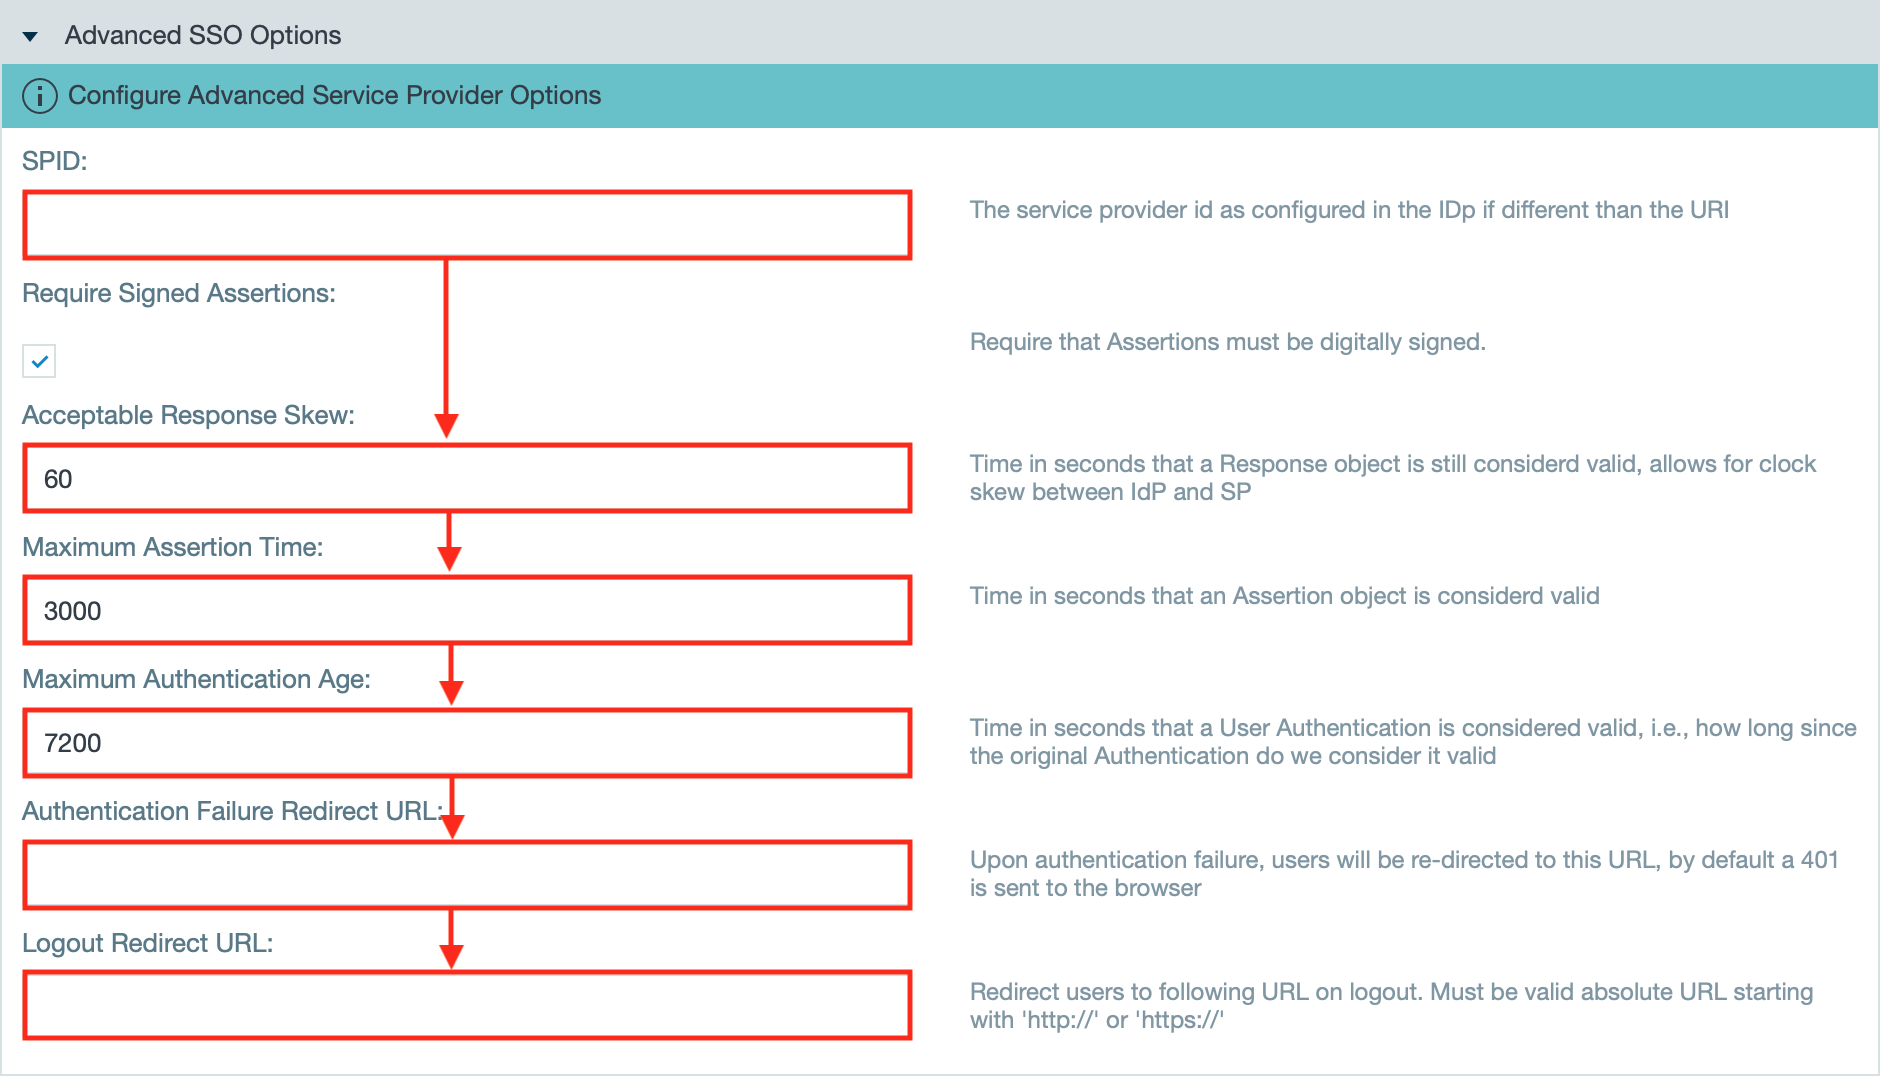
- Confirm with "Save". The configuration is finished.

Setup SAML with Okta integration
When setting up Okta app integration, an additional configuration within Okta is necessary.
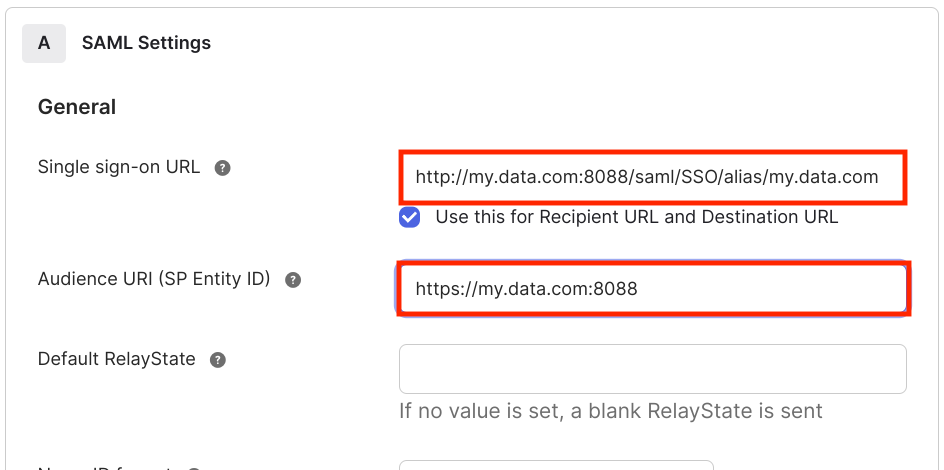
Open the SAML settings in your Okta app and enter a value for "Single sign-on URL" and "Audience URI".
The full qualified URI gets the suffix /saml/SSO/alias/my.data.com:
Enabling SAML Debugging
To enable debugging of SAML edit the 'log4j-production.properties' file and add the following:
...