You can use the authentication provided by Datameer X or use a remote authentication system such as LDAP or Active Directory.
To use remote authentication, you might need to write a plug-in. There is a plug-in tutorial available. If a plug-in already exists, you might be able to configure it from the Admin tab by selecting Plug-in in the left column. If the plug-in can be configured, there is a Configure link available. The options available are determined by the person who wrote the plug-in.
| Table of Contents |
|---|
...
When you use internal authentication, you are authenticating against the list of users and groups that you set up with the Admin tab.
Whether authenticating using the user interface or through REST, the default login security gives each user name three attempts. A CAPTCHA on Datameer's user interface login screen is required for each additional attempt after three unsuccessful attempts by a user to authenticate. The failed.login.attempts.max=3 property value can be updated in the default.properties. The CAPTCHA security feature can be disabled by setting the login attempts to "0".
Configuring LDAP/Active Directory authentication
To set up authentication:
- Click the Admin tab at the top of the page.
- Click the Authentication tab in the left column.

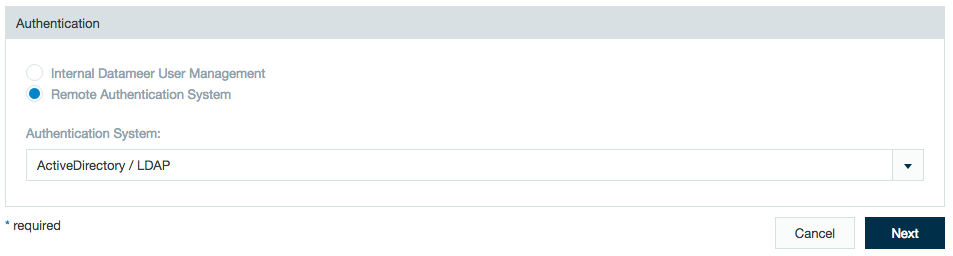
- Click Edit and click Remote Authentication System. Choose the authentication system and click Next.
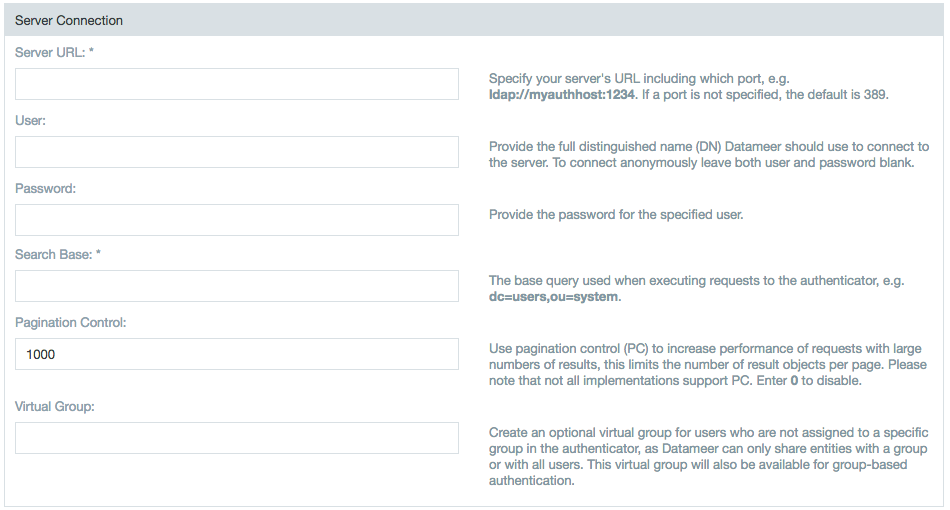
- Provide the server information including the username and password Datameer X uses to connect.
Update the field to enable paged results when a large amount of records (1000+) are being processed. The page size sets the amount of results per page.
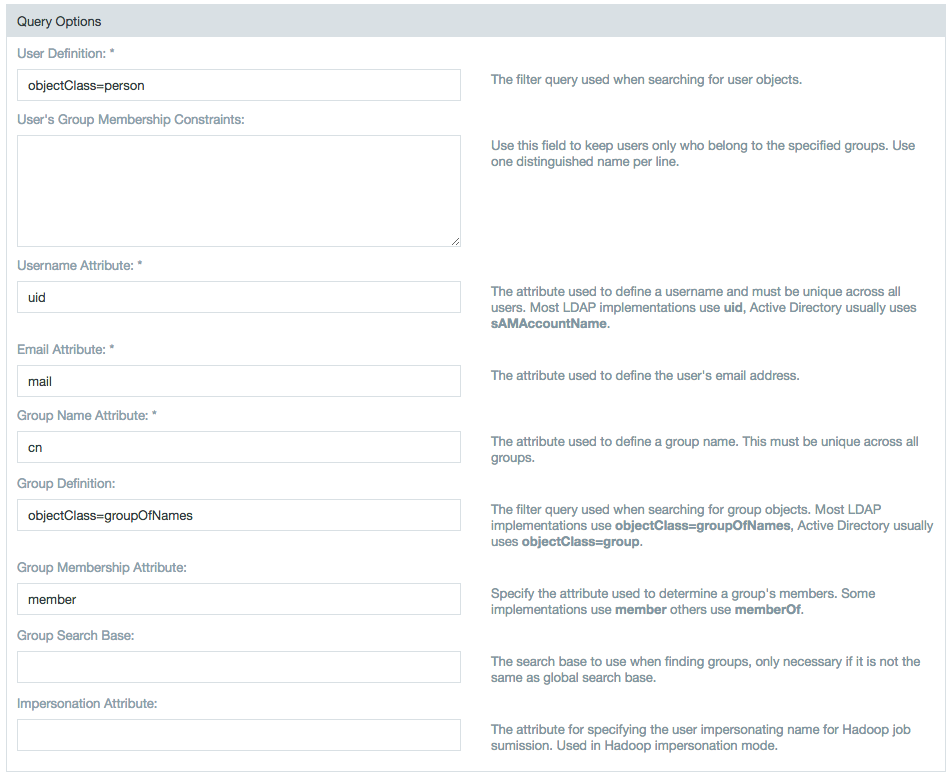
- Click Query Options to set up additional filters and attributes such as user definition, email attribute, and others.
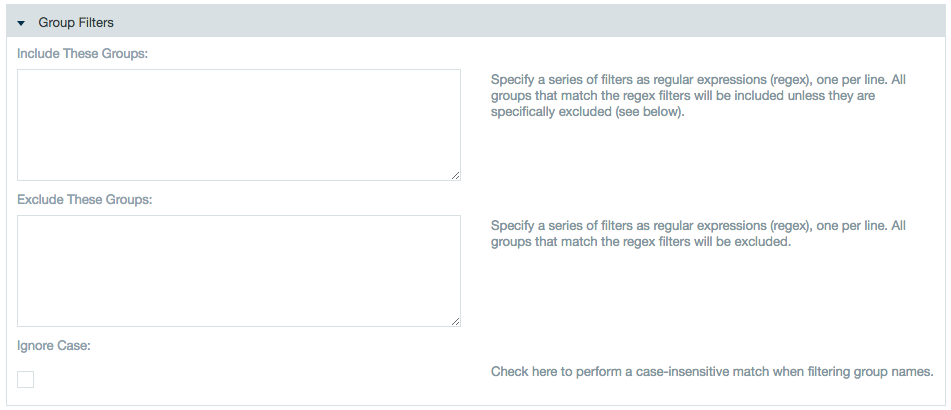
- Specify which groups to include or exclude.
- Click Save.
After saving changes to LDAP, the authentication screen allows the administrator to edit the specifications, set a cache refresh interval, or manually select to rebuild the cache by clicking Rebuild Cache.
| Warning | ||
|---|---|---|
| ||
Setting the Cache Refresh Interval to "0" turns this feature off. It is recommended NOT to turn this feature off as there might be slower performance. |
Roles
Roles are solely maintained by Datameer. In Datameer X two (ADMIN, ANALYST) roles set as default with the option of customizing roles for users.
Superuser Setup
There is an option to activate a superuser account in your Datameer X distribution. This account is a security measure for Datameer X system administrators to correct misconfigurations (e.g., external authentication services not functioning) within Datameer X if they are unable to do so with another account. This user is only designed to modify configurations in Datameer X and is not suitable to be treated as a normal user who owns and runs Datameer X jobs.
This superuser account is not enabled by default. To enable the superuser account, change the property das.superuser.enabled= to the value "true" in <Datameer X install folder>/conf/default.properites. Save the file and restart Datameer.
| Panel |
|---|
|
Disabling Security
If you want to disable security in Datameer X set the property security.enabled to false in file <Datameer X install location>/conf/live.properties.
...
| Child pages (Children Display) |
|---|