Exporting to Google Cloud Storage (GCS)
Requirement: Configuring Google Cloud Storage as a Connection
A Google Cloud Storage connection with Datameer X must be created before exporting data.
INFO
Learn about setting up a connection between Datameer X and Google Cloud Storage.
Configuring Export Jobs with Google Cloud Storage
To export a worksheet through a GCS connector:
- Click the "+" button and choose "Export Job" or right-click in the file browser and select "Create New" → "Export Job". The 'New Export Job' tab appears in the menu bar.
 or
or 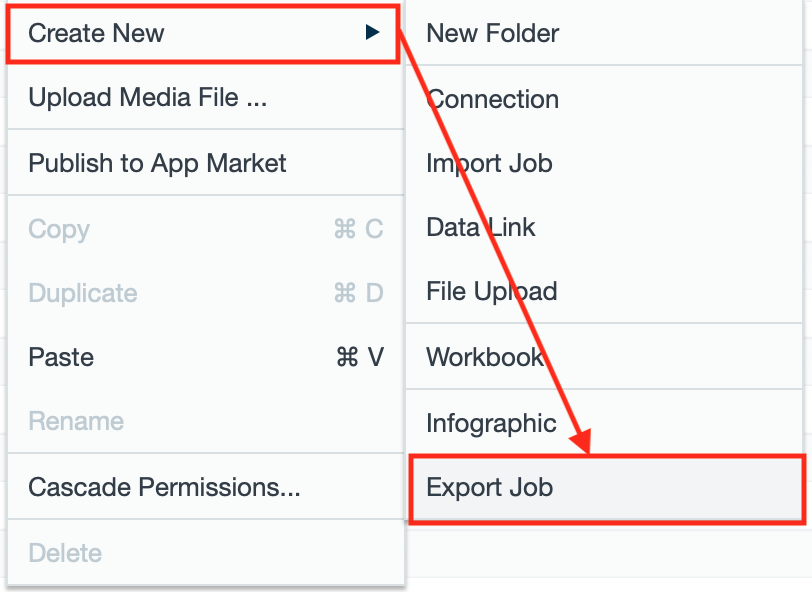
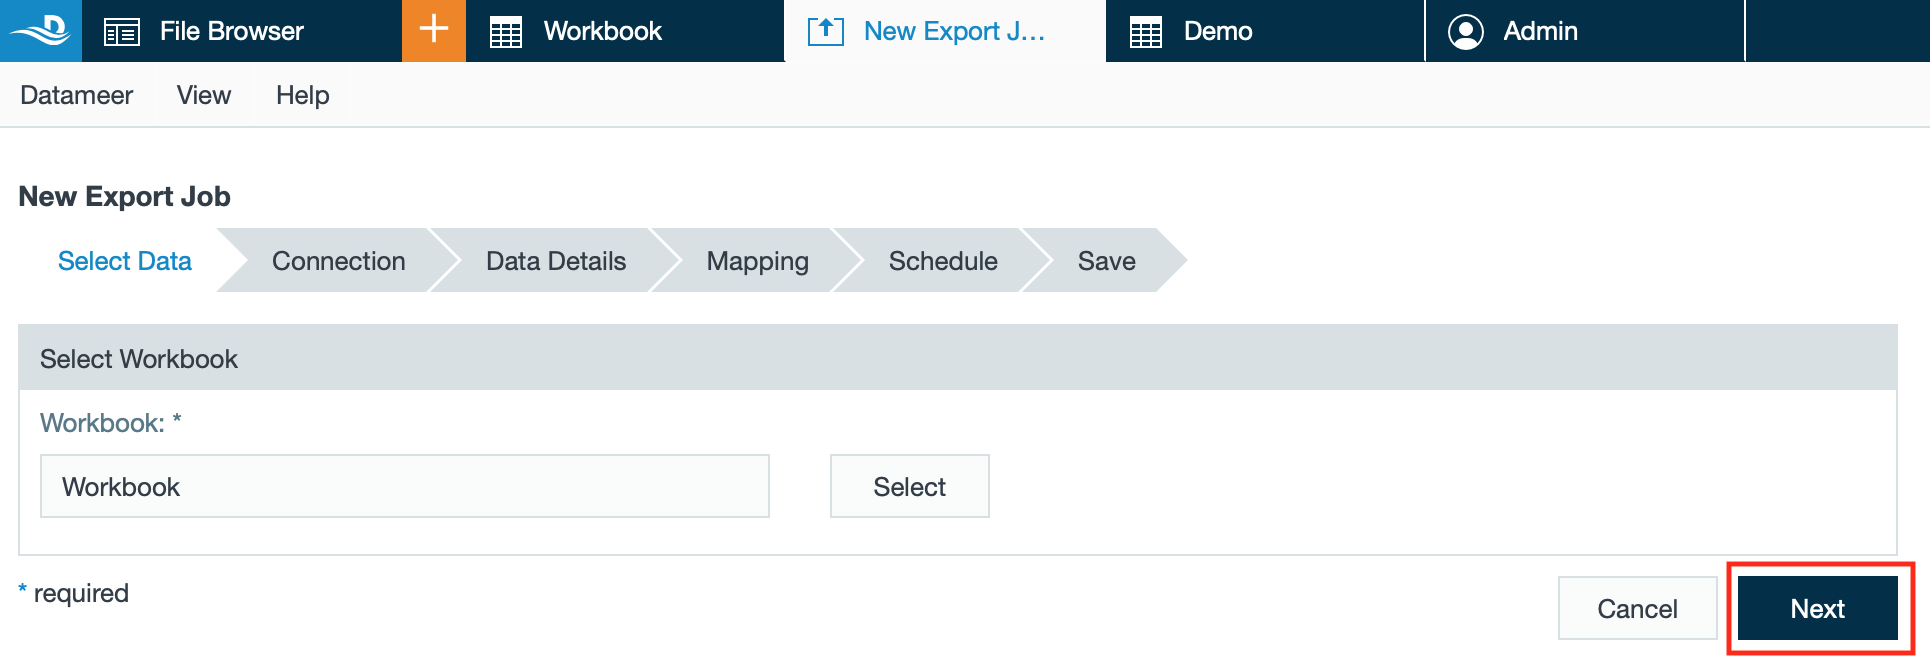
- Select the workbook to export from in the browser by clicking on "Select". The dialog "Select Workbook" opens.
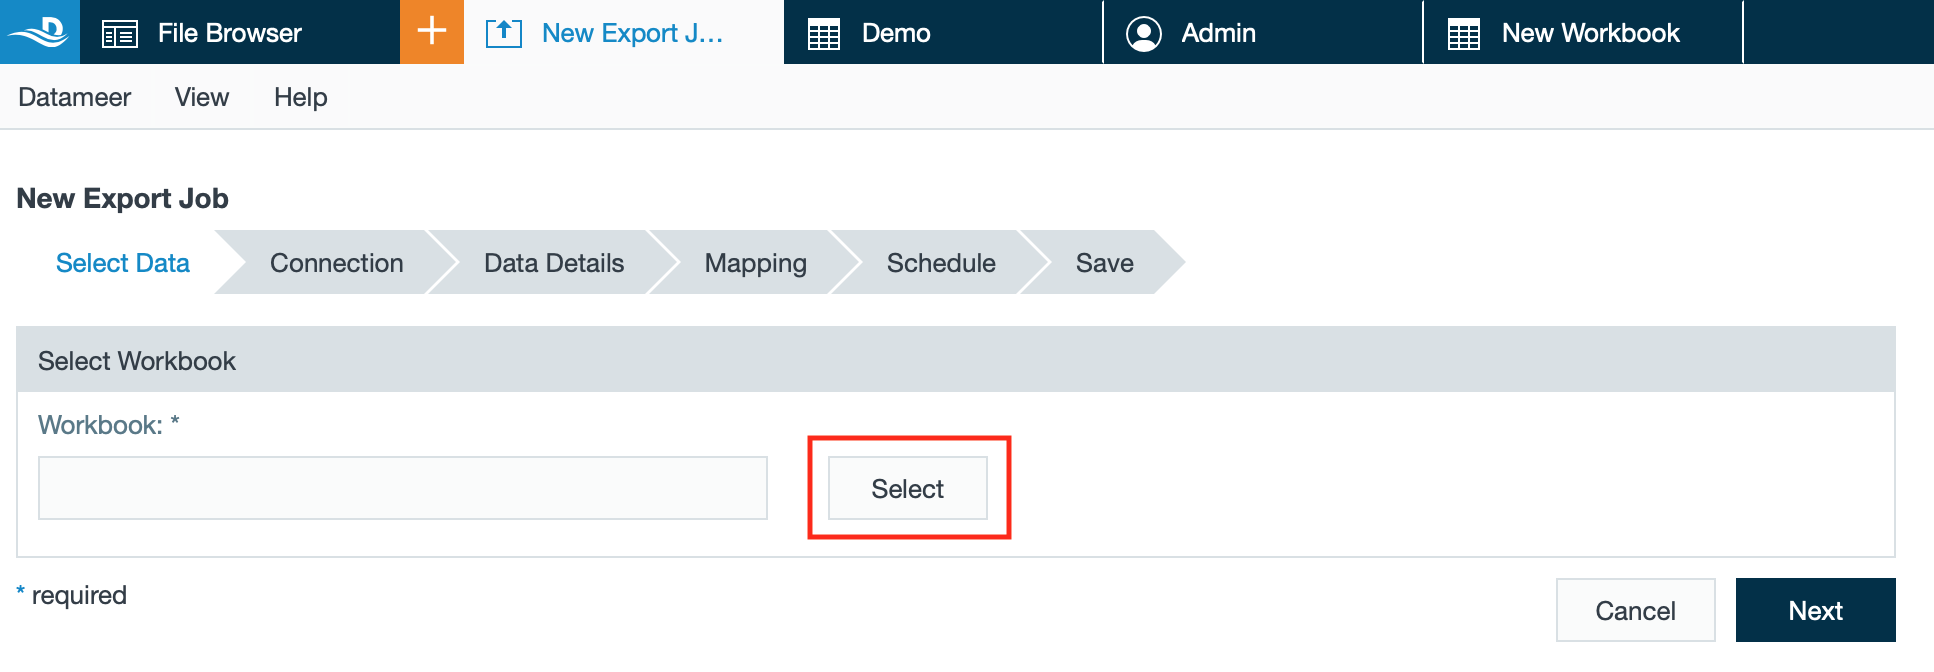
- Select the workbook and confirm with "Select". The name of the workbook appears in the workbook field. INFO: To take a step back during the whole process, click on "Cancel".

- Click "Next".
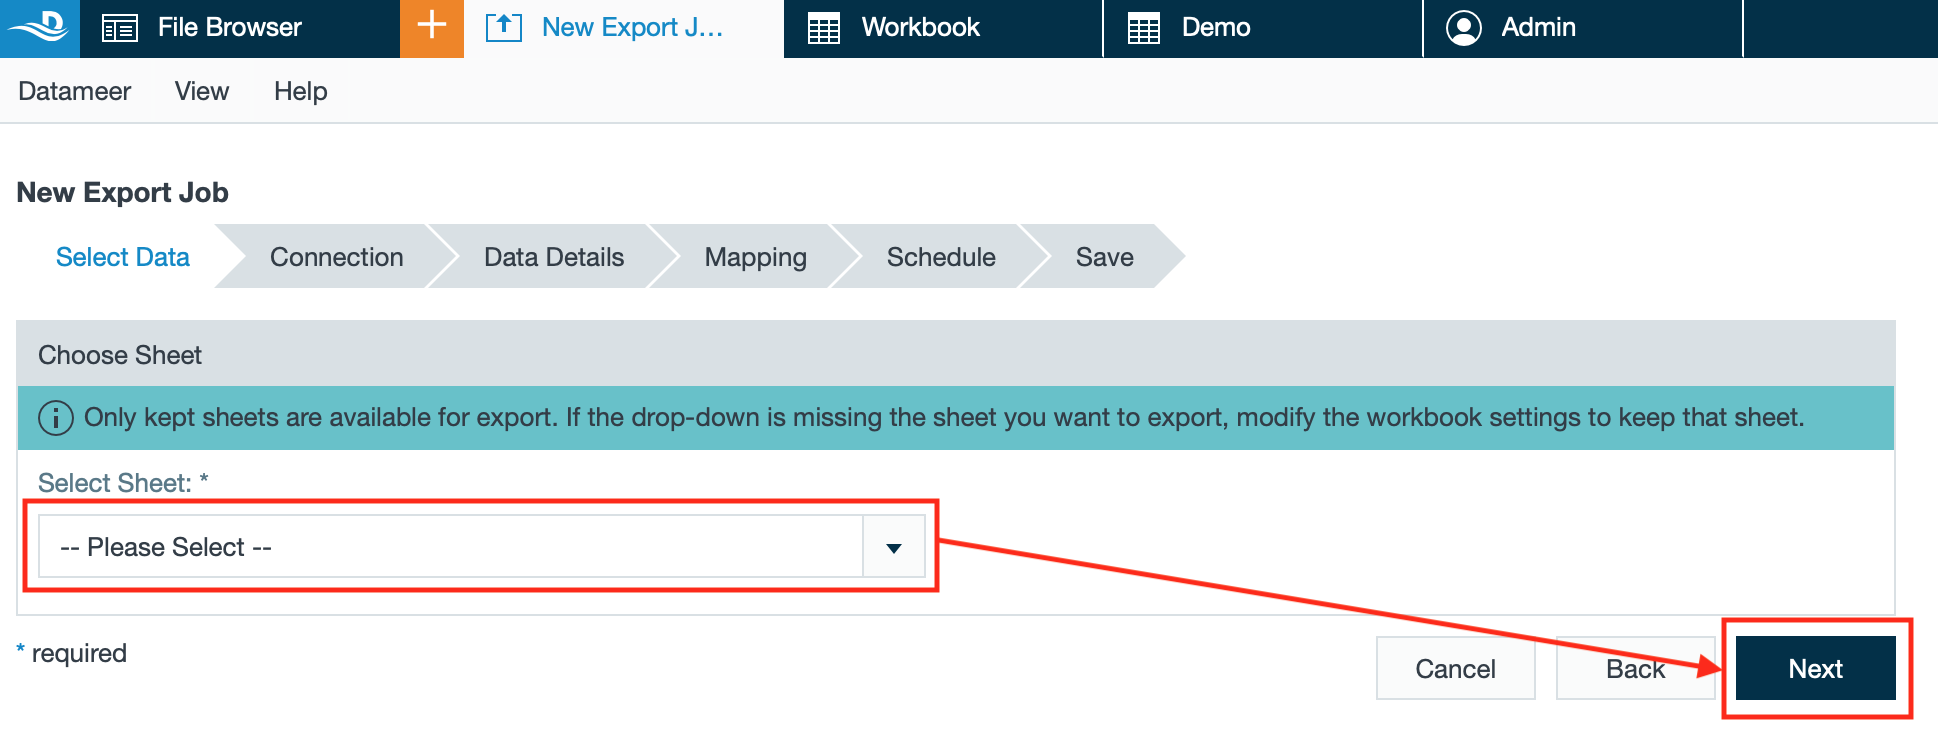
- Select the worksheet to export from the drop-down menu. You will be guided to 'Connection' settings. INFO: Only kept sheets are available for export. If the drop-down is missing the sheet you want to export, modify the workbook settings to keep the sheet.
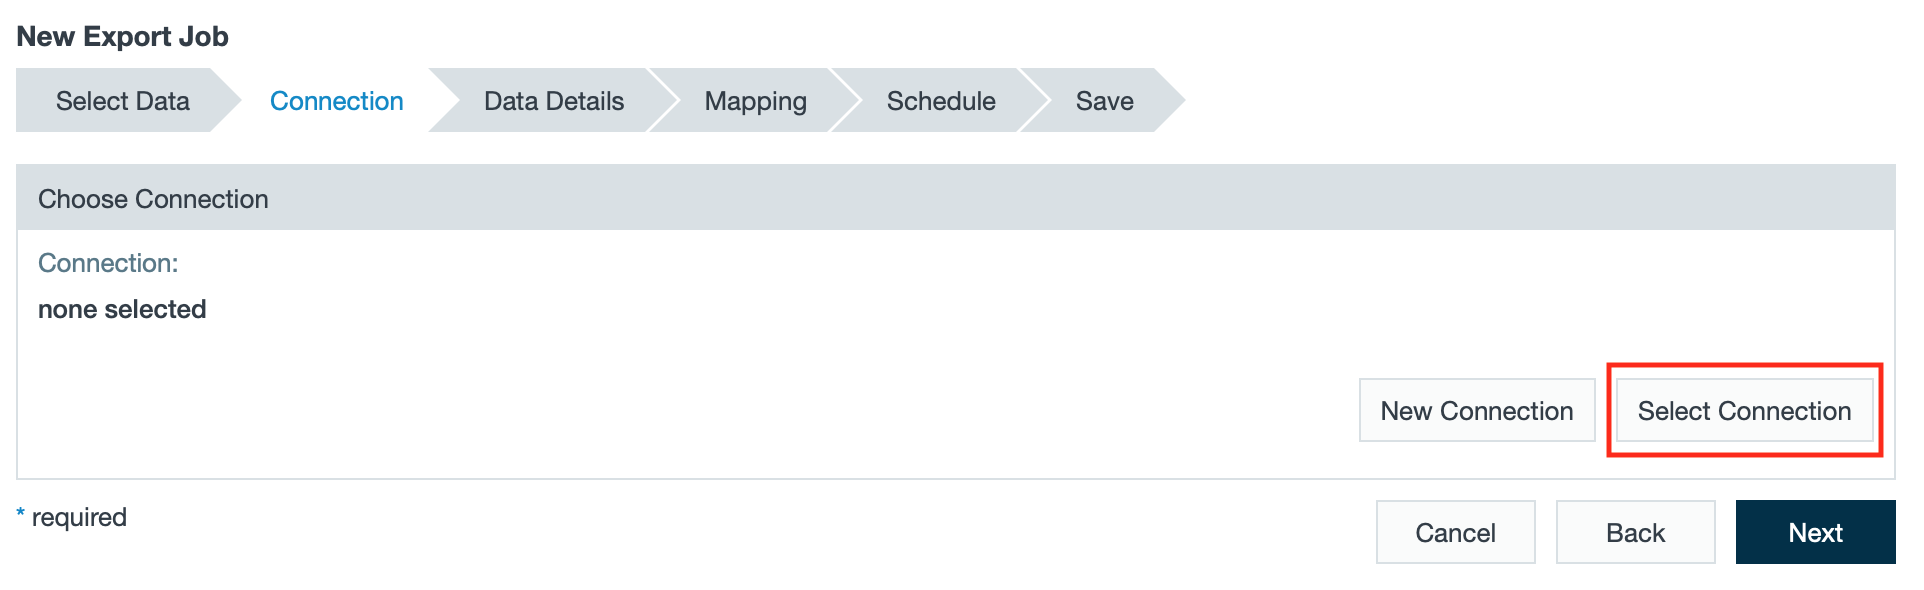
- Select the GCS connector by clicking on "Select Connection". The dialog 'Select Connection' opens. INFO: If there's a preselected connection, you'll find it listed under 'connection'. INFO: If you haven't create the connection to GCS yet, you can do it here by clicking on "New Connection".
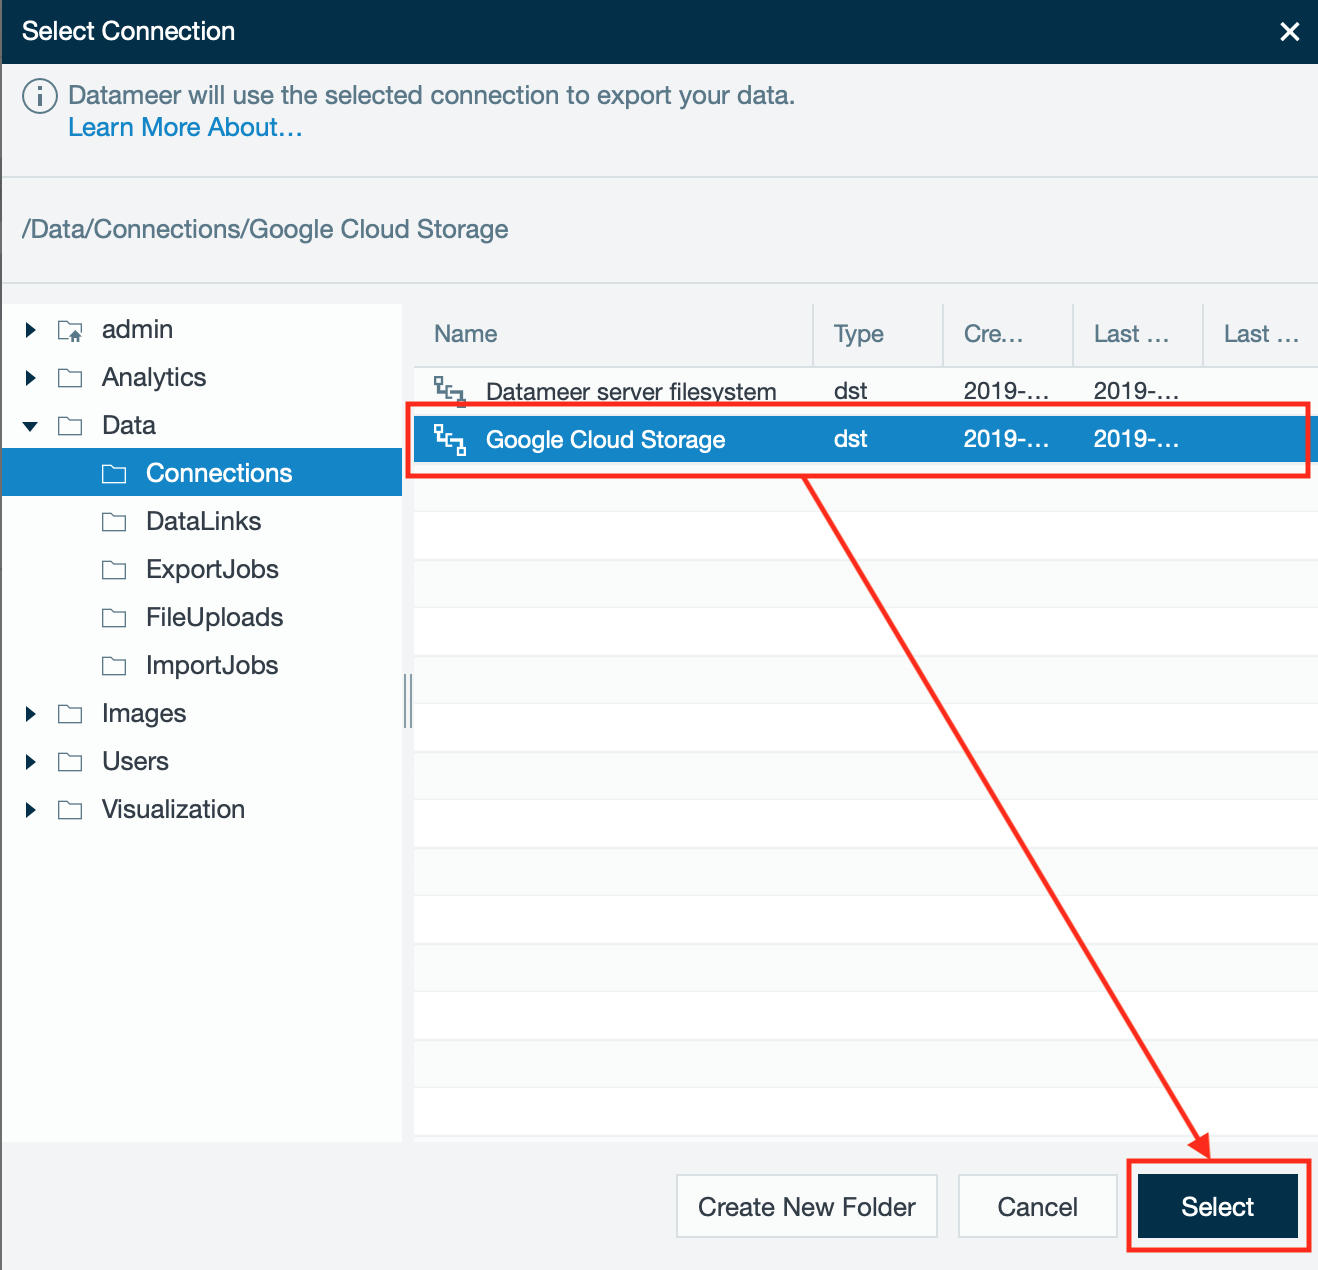
- Select the relevant GCS connection and confirm with "Next". The selected connection is displayed under 'Connection'.
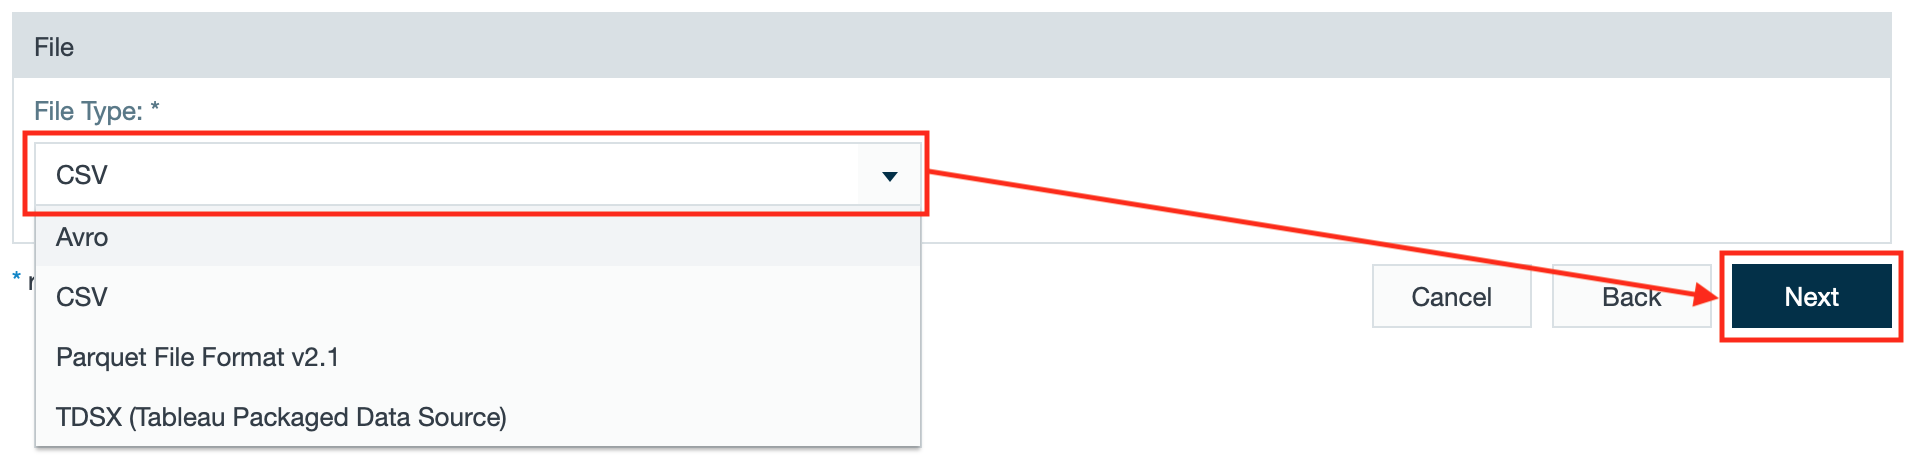
- Select the file type in the drop-down and confirm with "Next". You will be guided to 'Data Details'. INFO: The selected file type must be congruent to the file type of the workbook.
Fill in the file path in the GCS. Activate the 'Replace data' checkbox optionally. INFO: If the data is being exported to an existing file path, the previous data is written over by the current export.
Example:
/exports/%year%%month%%day%T%hour%:%min%/12354-%id%.csv→ This file is being written to a new directly each time the export job runs. A new file is created each time and the old file is not deleted./exports/12354/%year%%month%%day%T%hour%%min%-%id%.csv→ This file is being written to the same directly each time the export job runs. The incoming export job overwrites the previous export job.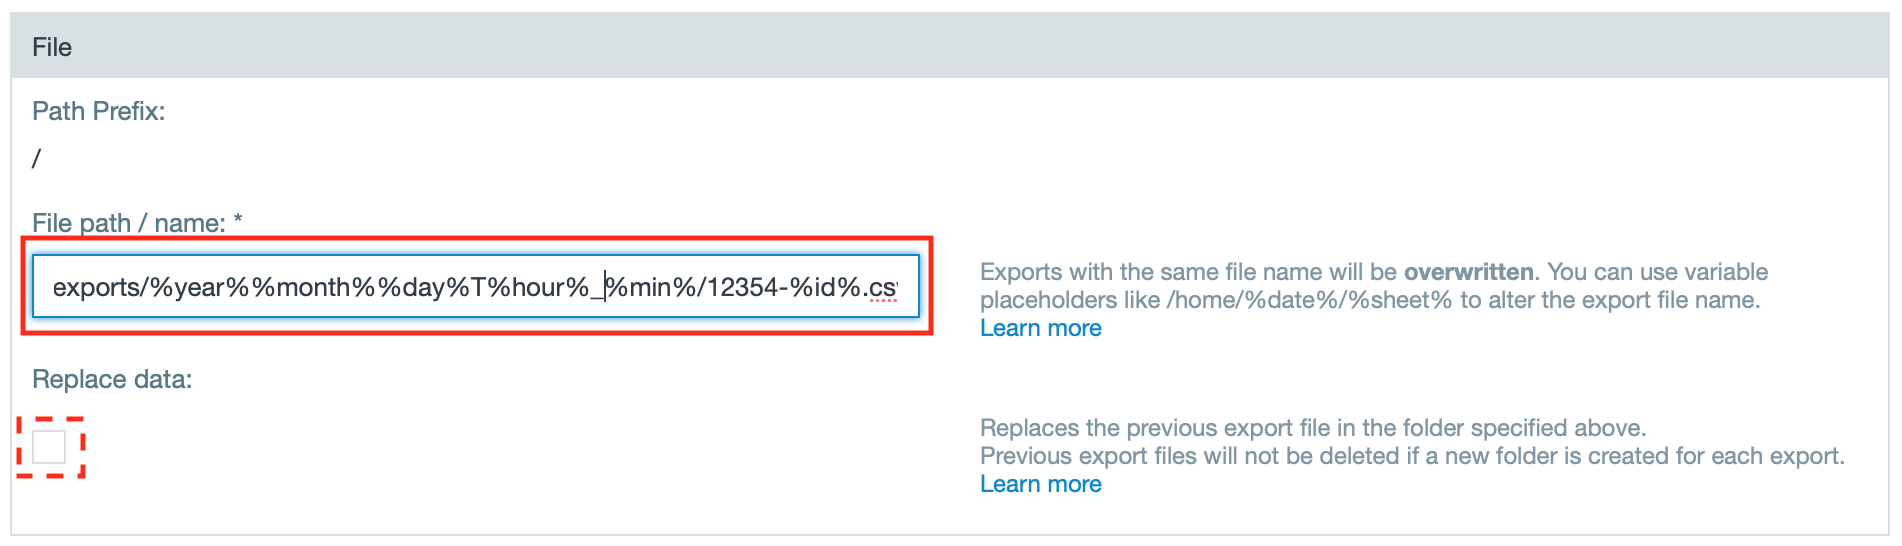
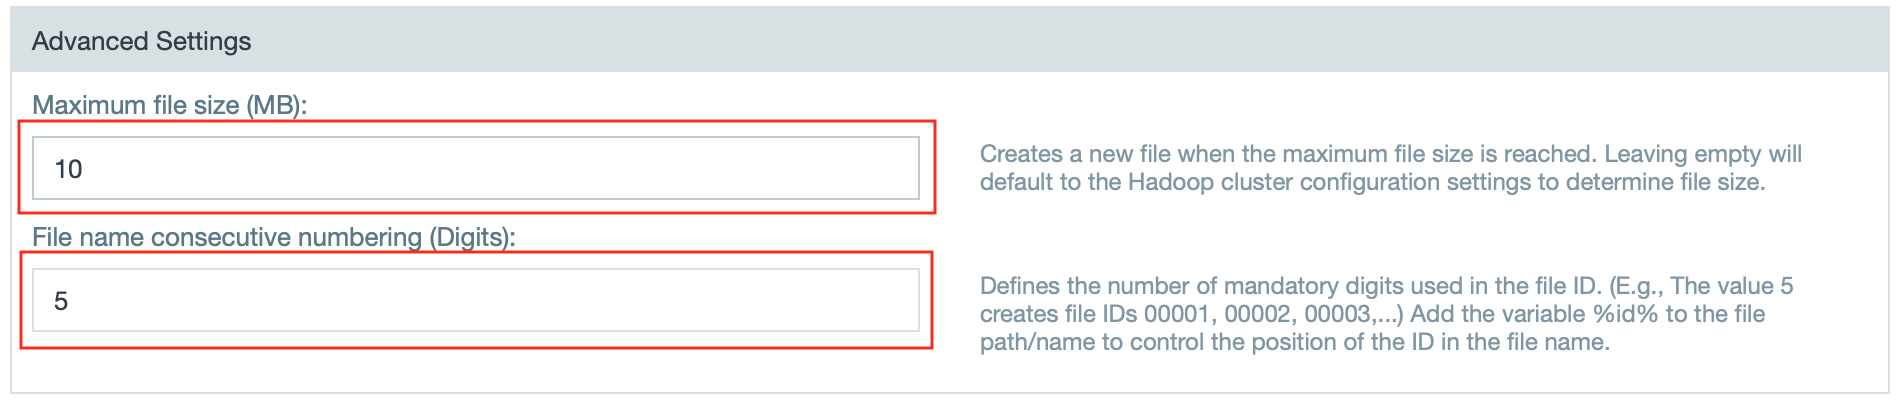
- Fill in the advanced settings within 'Maximum file size(MB) and 'File name consecutive numbering(Digits)'.
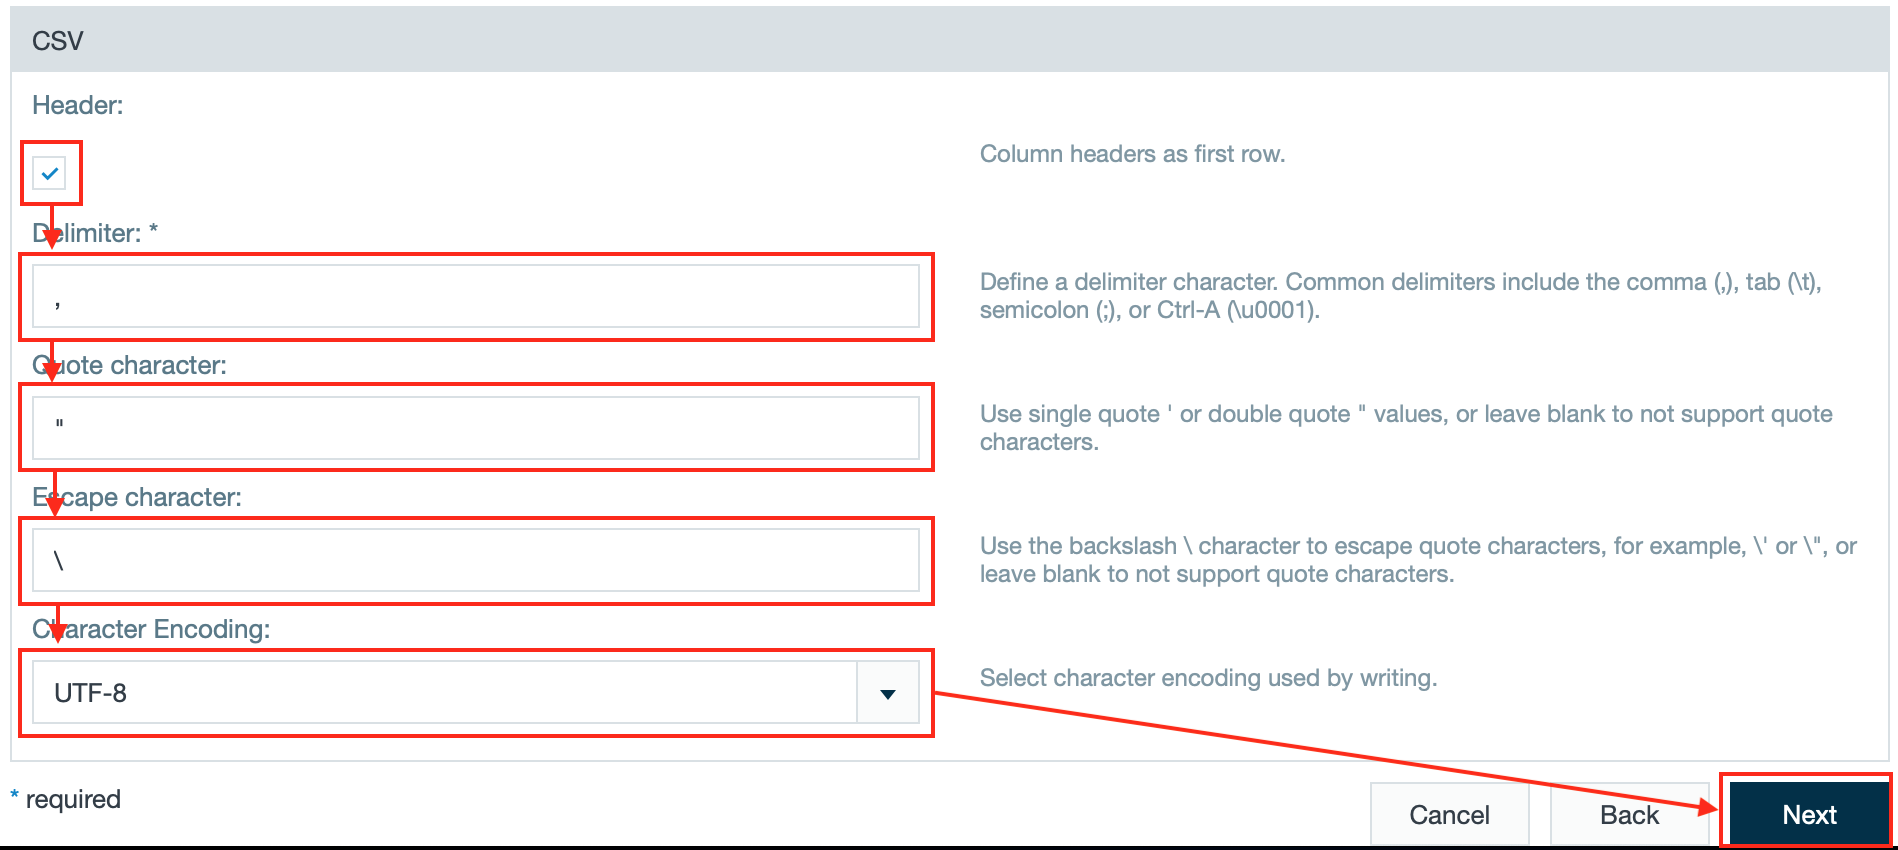
- Adjust the prefilled input within the section 'CSV', if needed and confirm with "Next". You will be guided to 'Mapping'.
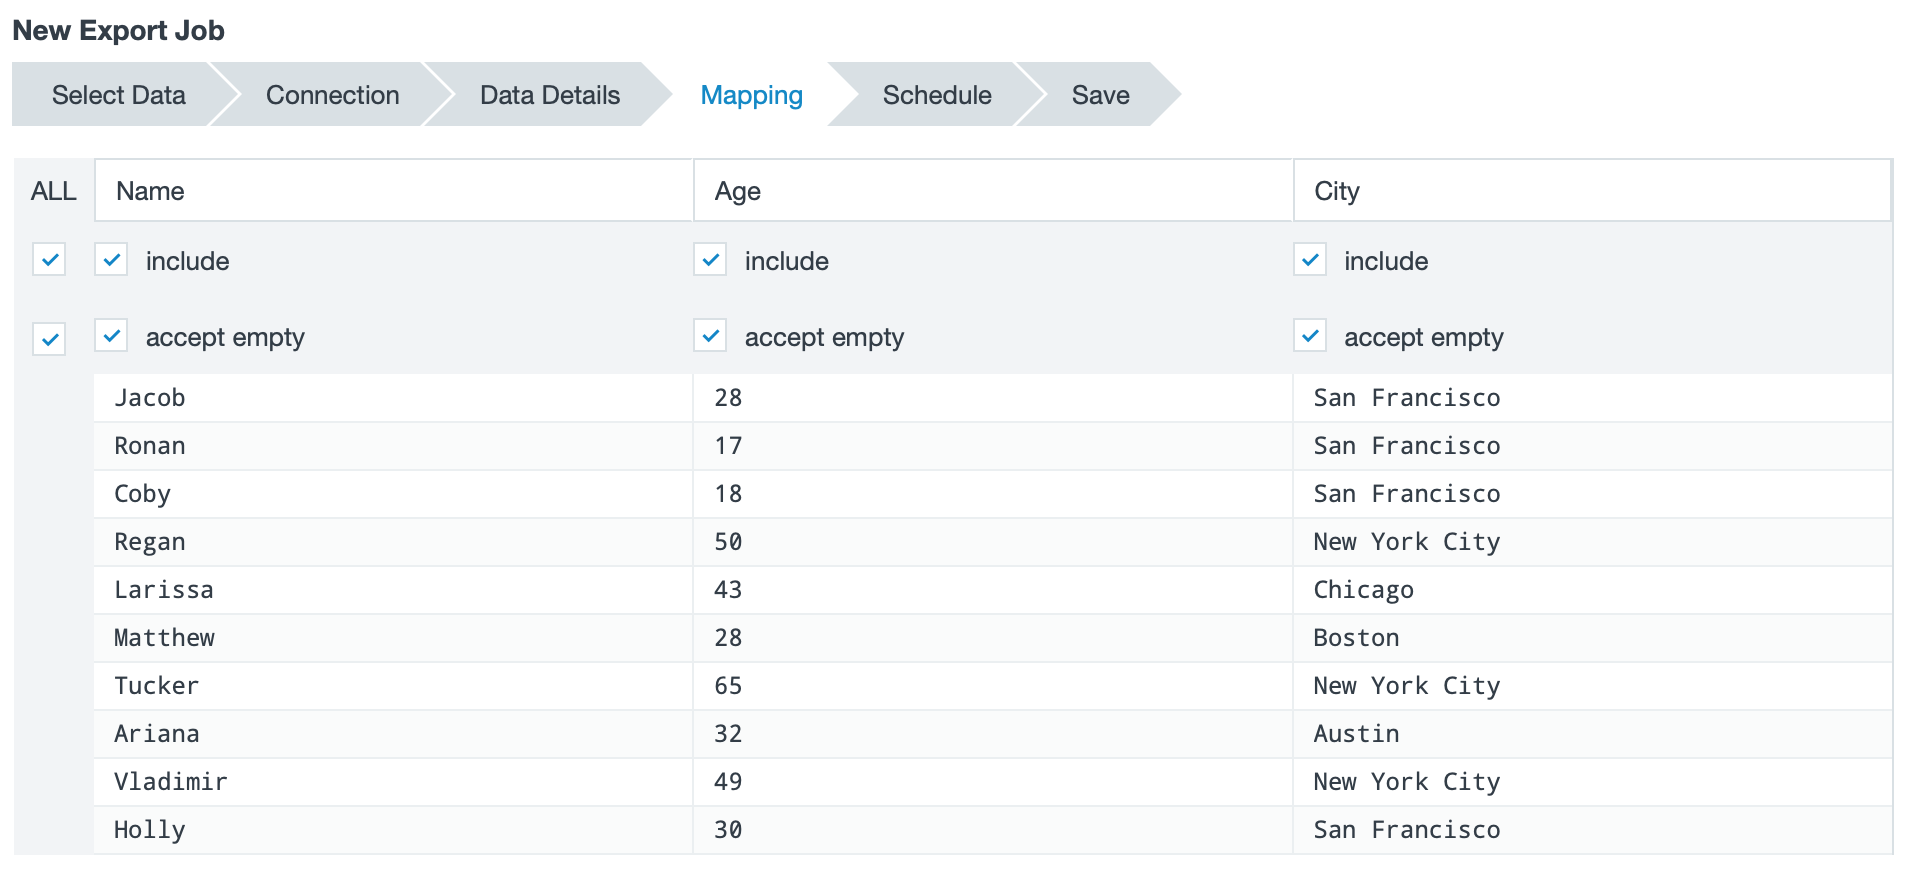
- Have a look a the preview and decide which columns will be included and whether empty data is being accepted. INFO: All checkboxes are activated by default.
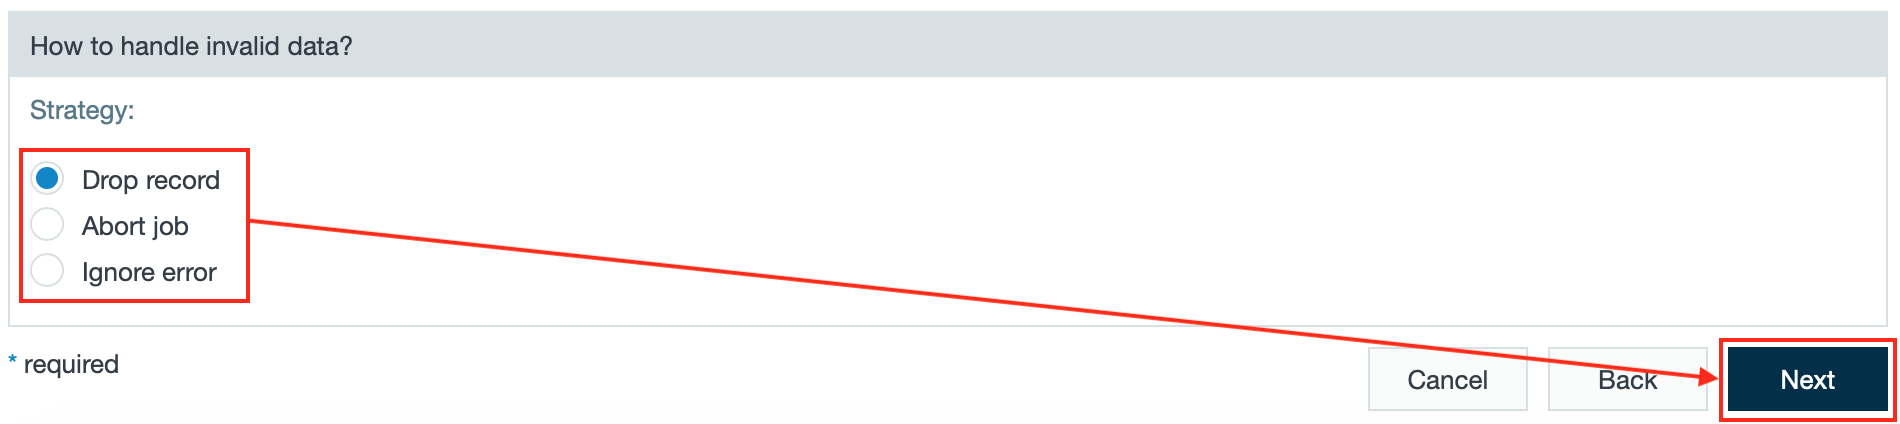
- Decide how to handle invalid data and confirm with "Next". You will be guided to 'Schedule'.
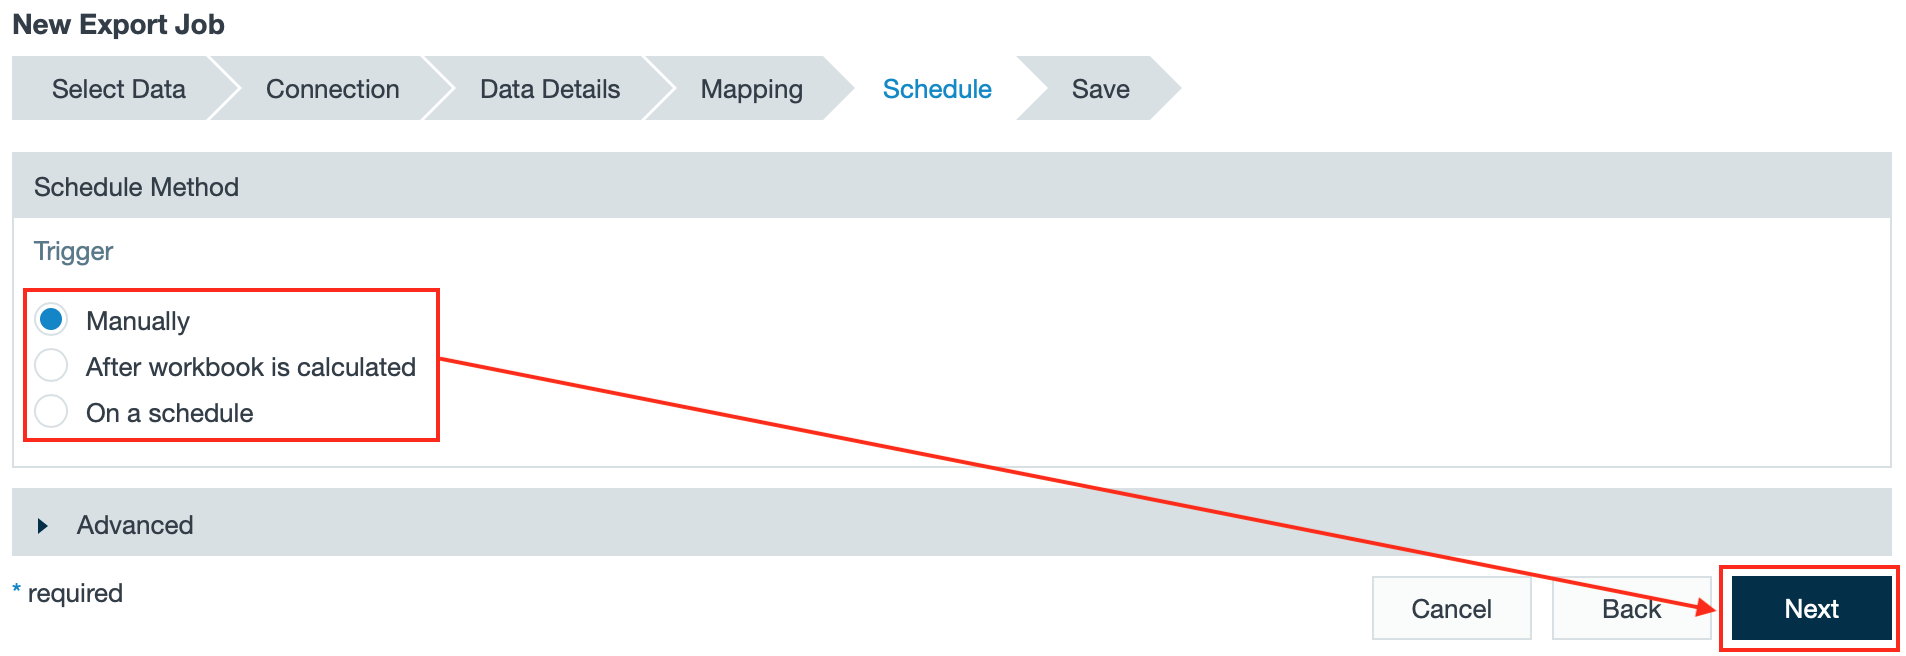
- Select the schedule method for when the export job runs. You will be guided to 'Save'. INFO: You can add advanced schedule information, if needed.
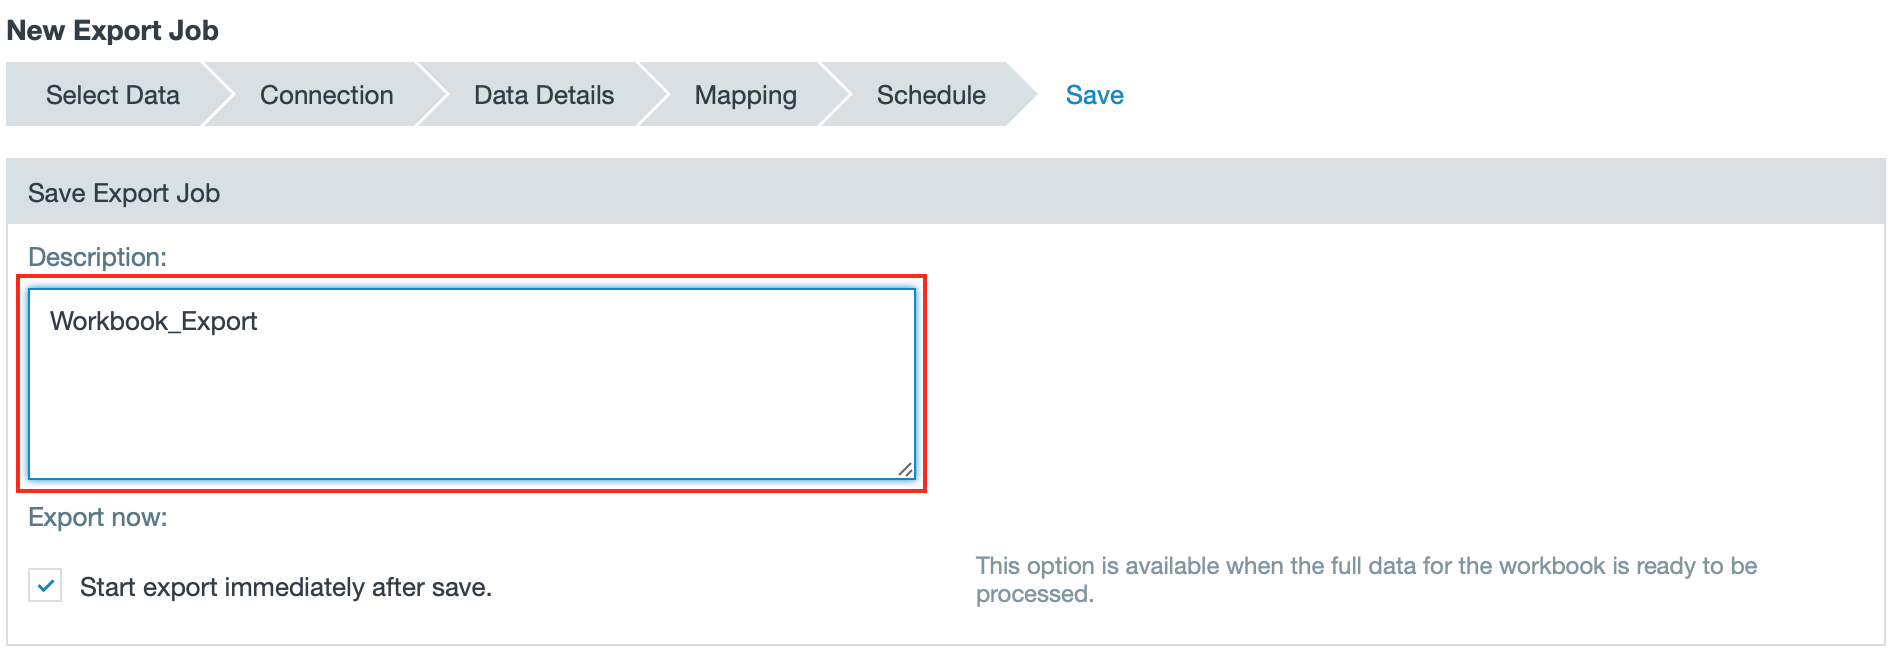
- Add a description. INFO: Activating the checkbox 'Export now' will start the export immediately after saving.
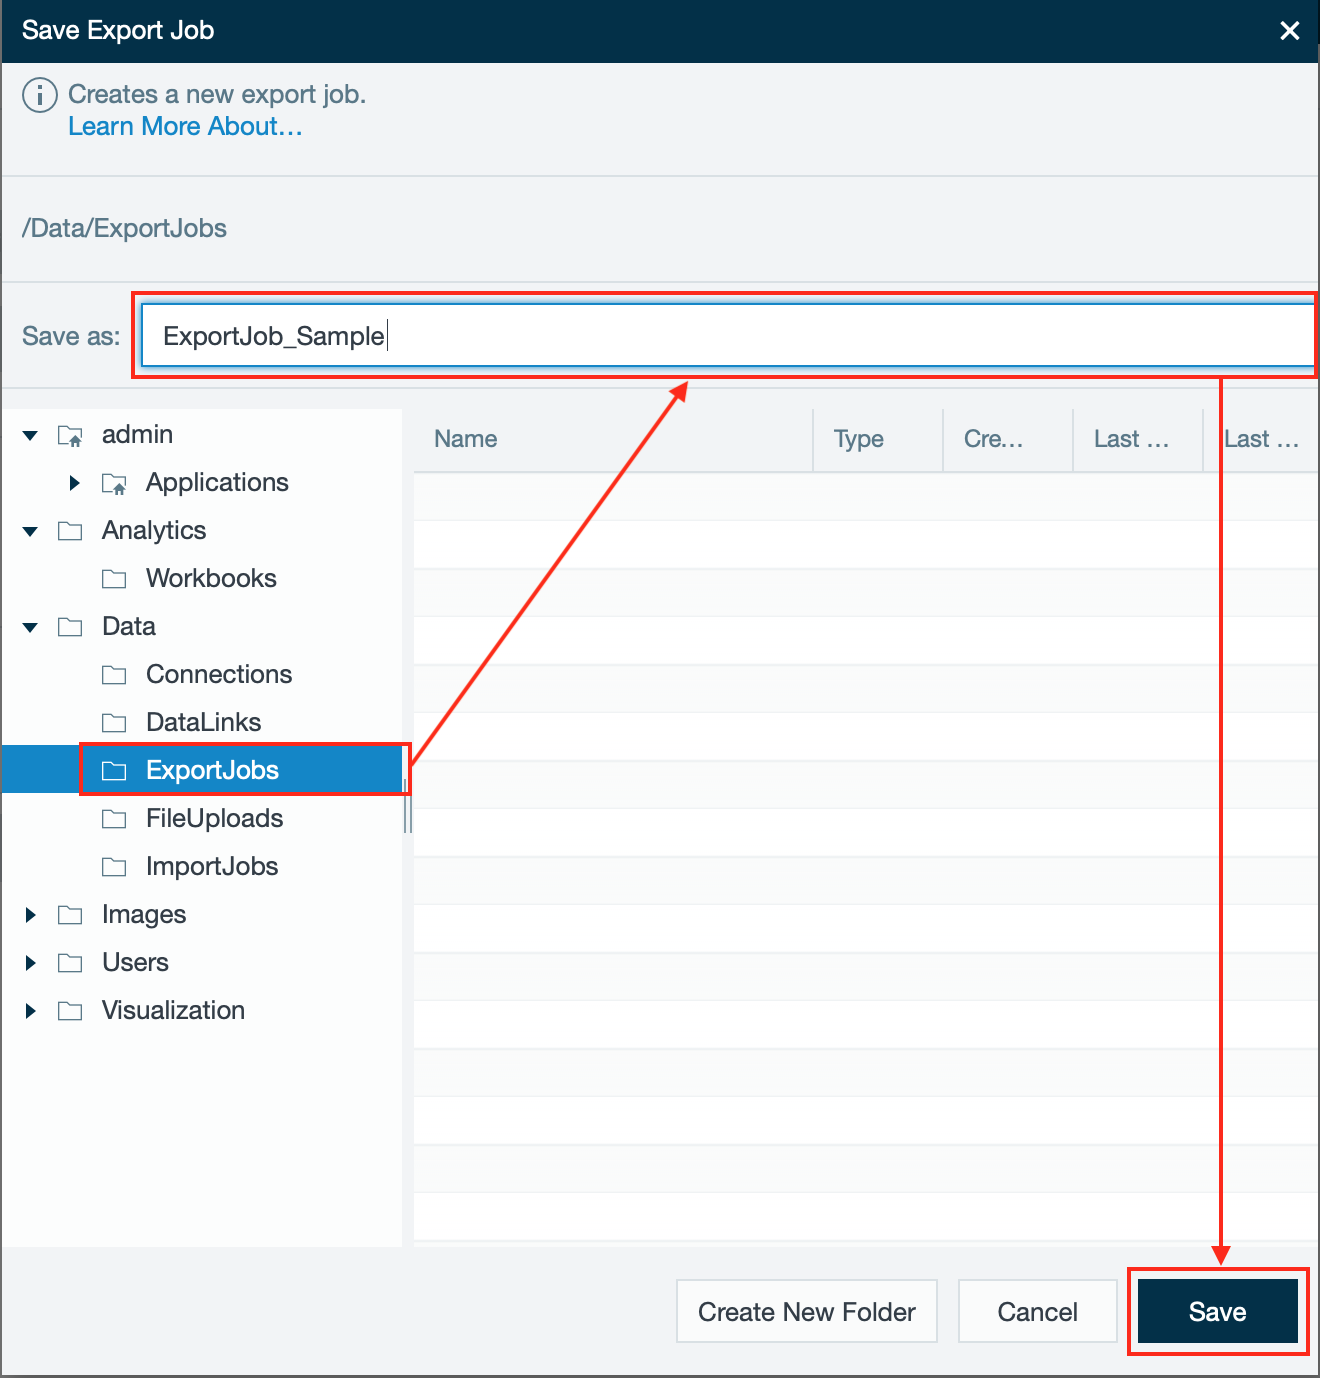
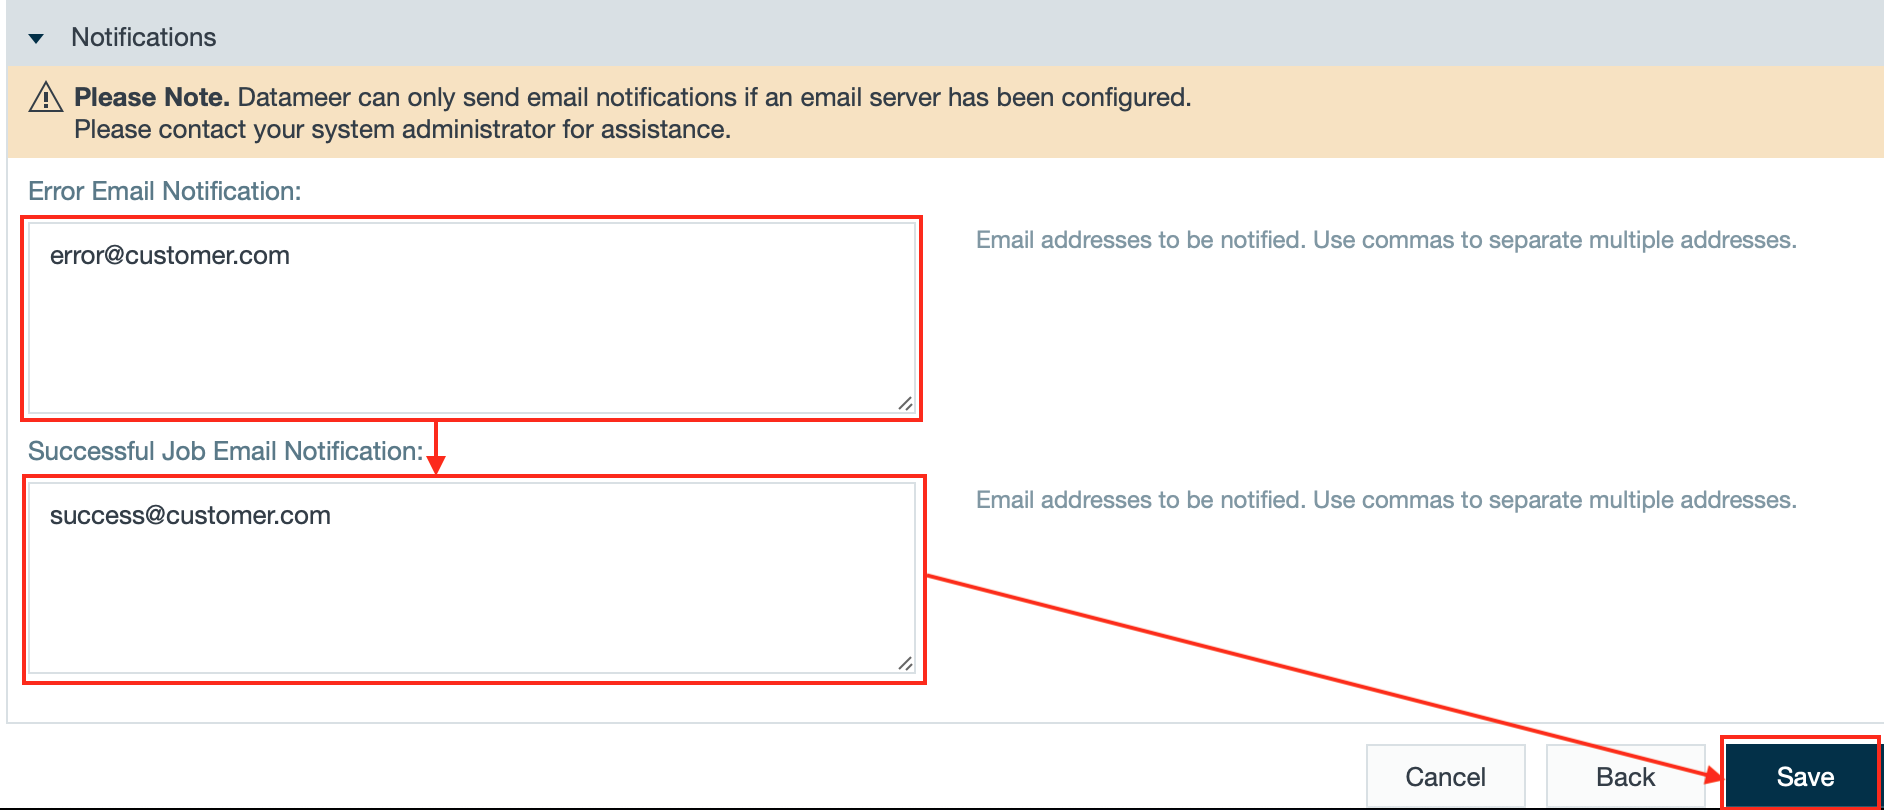
- If needed, add your email address in section 'Notification' and confirm with "Save". The dialog 'Save Export Job' opens. INFO: Datameer X can only send email notifications, if an email server has been configured.
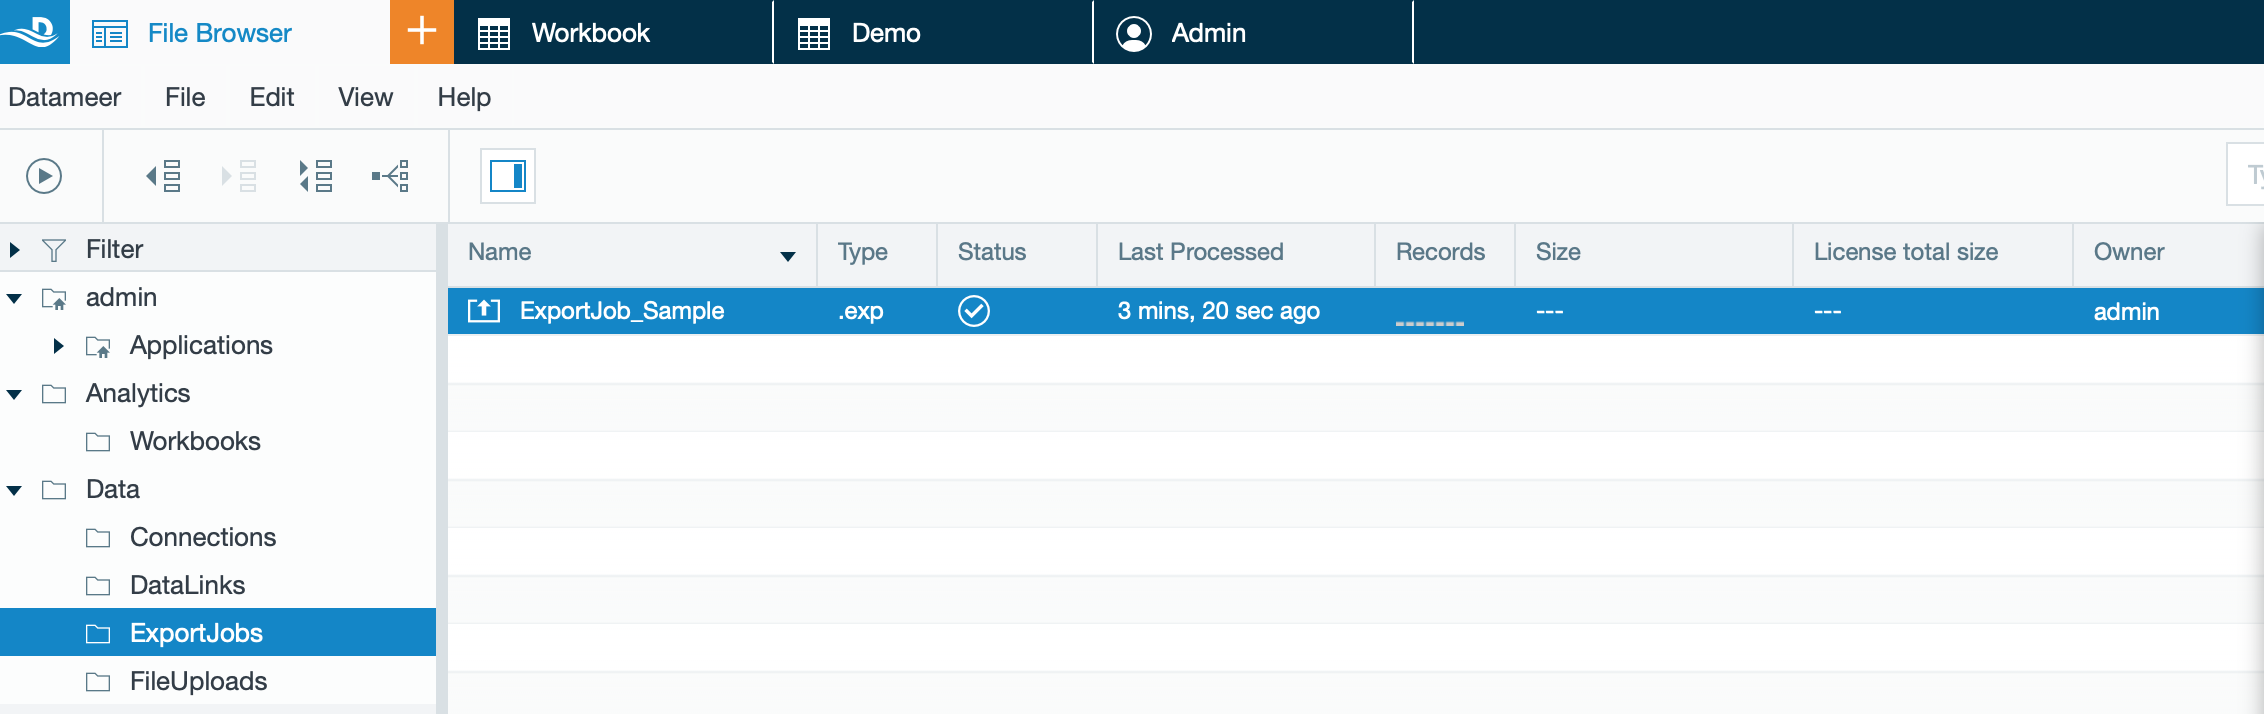
- Select the place to save the export job under 'Data' → 'Export Jobs' and name the export job, confirm with "Save". The export job is shown in the file browser.