INFO
Find here the information about configuring a secured LDAPS authentication.
Connecting to an LDAP/ Active Directory Service Over SSL
INFO
You can keep LDAP traffic confidential and secure by using SSL/ Transport Layer Security (TSL) technology where the protocol is running over SSL.
To configure to an LDAPS:
- Import the server's public key certificate into the Java Virtual Machine (JVM) used by Datameer X.
- Restart Datameer X.
- Configure the Datameer X LDAP Authenticator server URL to use the appropriate protocol and port.
Importing the Server's Public Key Certificate into the JVM
To import the server's public certificate into the Java Virtual Machine:
Retrieve the server's public key certificate by running the following command from a properly configured SSL library, e.g. OpenSSL, and with network access to the LDAP/ Active Directory service.
INFO: If you don't have access to a similar tool, contact your LDAP/ Active Directory administrator to get the certificate.LDAPopenssl s_client -connect ldap.datameer.local:636
Active Directoryopenssl s_client -connect win2012.datameer.local:3269
Copy the public key certificate contents from the output of this command, as in this output snippet example shown.
INFO: Copy the information from '-----BEGIN CERTIFICATE-----' and '-----END CERTIFICATE-----' (inclusive).... Certificate chain 0 s: i:/DC=local/DC=datameer/CN=datameer-WIN2008-CA --- Server certificate -----BEGIN CERTIFICATE----- MIIGPTCCBSWgAwIBAgIKI3DaRAAAAAAABjANBgkqhkiG9w0BAQUFADBPMRUwEwYK CZImiZPyLGQBGRYFbG9jYWwxGDAWBgoJkiaJk/IsZAEZFghkYXRhbWVlcjEcMBoG A1UEAxMTZGF0YW1lZXItV0lOMjAwOC1DQTAeFw0xMTEwMTgyMjE1MjVaFw0xMjEw [...] yBcPZU3Xk/ouciWGpVmuO3X/UZvGPYDQ6XryqHBNzpfv2LMXHXw1P8xHGEMh8PbT qBSoa9Q+SysqdNUNO8rwawHBtQ86/kIydbjto/UR3qN7Pr11lGlSKGmBKbmxT6p/ K6oqUZHmJi3BZpUt1Ii1oOOJOU0vqq5KAnroLzcdMm0US9T8wCdzp/++01HflP53 A5tUxC+lY4tprMtLkVLcy88= -----END CERTIFICATE----- subject= issuer=/DC=local/DC=datameer/CN=datameer-WIN2008-CA --- Acceptable client certificate CA names /CN=win2008.datameer.local ....
- Paste the snipped into the file 'das_ldap.pub'.
Use the Java Key tool utility to add the certificate to the JVM's KeyStore by running the command:
INFO: Ensure to run the command using the keytool binary and JRE paths for the JVM used by Datameer X. Check 'JAVA_HOME' for your setup and ensure it points to the Datameer X JVM and that '$JAVA_HOME/bin' is the first JDK/ JRE on your path. The command should be run as root or with sudo unless the JDK is wholly owned by the Datameer X user.sudo keytool -import -alias <LDAP.YOURDOMAIN.COM> -keystore ${JAVA_HOME}/jre/lib/security/cacerts -file das_ldap.pub- If KeyStore asks for a password upon running the keytool command, enter the default value "changeit" or "changeme".
INFO: If it does not work, ask the system administrator. - Ensure hat 'JAVA_HOME' is the same Java installation that Datameer X is currently leveraging.
- Choose an appropriate alias for your service and replace <LDAP.YOURDOMIAN.COM>.
INFO: You might need to manually expand 'JAVA_HOME' and use the fully qualified path to ensure the command succeeds depending on your environment. The command should output some metadata about the certificate and then prompt you to trust the certificate. Enter "yes". The response 'Certificate was added to KeyStore' appears. The server's public key is installed successfully.
Trust this certificate? [no]:  yes
Certificate was added to keystore
Restarting Datameer
Restart the Datameer X conductor service for changes to take effect:
${DAS_HOME}/bin/conductor.sh restart
INFO: If you are running a Debian or RPM based installation enter:
sudo /etc/init.d/das-conductor restart
Configuring the Authentication
To enable LDAPS:
- Follow the instructions from 'Active Directory/ LDAP'.
- Adjust the configuration in the following two steps.
- Select "Active Directory/LDAP" as the authentication system from the drop-down in section 'Authentication' and confirm with "Next". The fields below adapt.
- Enter the server URL in the field "Server URL" in section 'Server Connection'.
INFO: Make sure to begin the URL with 'ldaps' and select the port '3269' for Active Directory or the port '636' for LDAP.
- Execute the remaining configuration as described in 'Active Directory/ LDAP'. Configuring LDAPS is finished. You can start loading users securely over LDAPS now. .
Saving Changes to the Cache
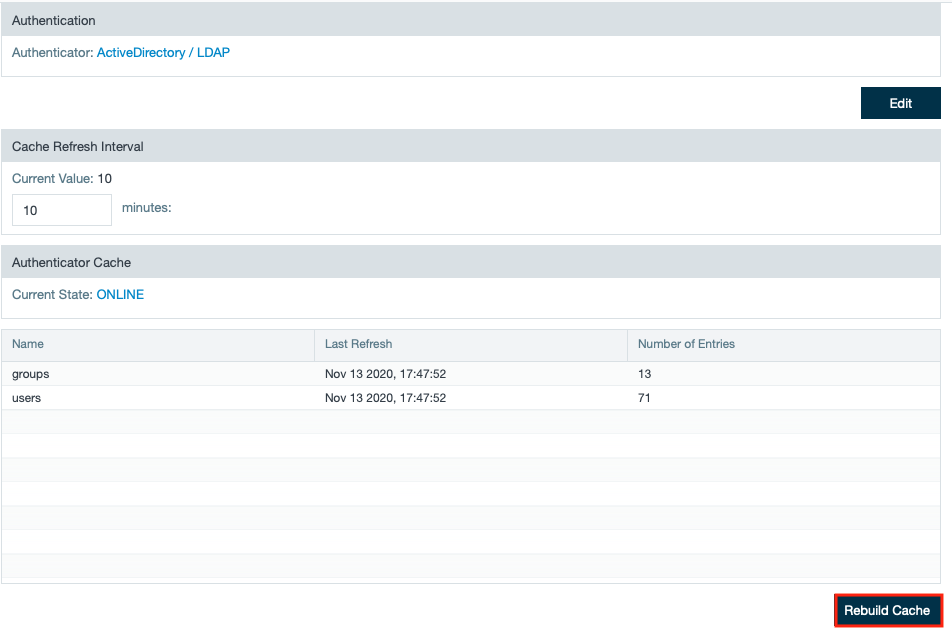
If you update the refresh interval of the cache to a different number of minutes, you need to save the new value. To do so, click Rebuild Cache.


