| Info | ||
|---|---|---|
| ||
Datameer X supports to connect to Kubernetes clusters as well as to Hadoop clusters. You can also configure the cluster to be used locally or Kerberos secured. Find here all information about the cluster configuration. |
...
| Info | ||
|---|---|---|
| ||
First decide which type of Datameer X mode you are using and the appropriate settings for that mode, such as file system or root directory within the HDFS. |
...
| Info | ||
|---|---|---|
| ||
This Datameer X mode is not available with Enterprise. |
...
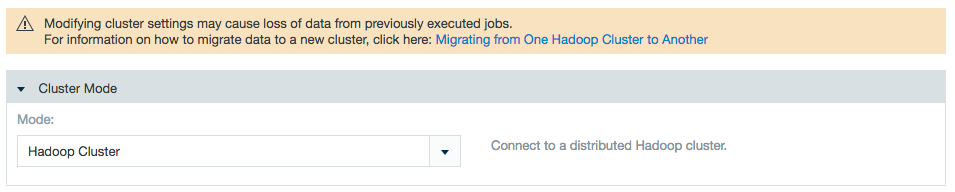
- Click the Admin tab.
- Click the Hadoop Cluster tab at the left side. The current settings are shown.
- Click Edit to make changes.
- Select Hadoop Cluster for the mode.
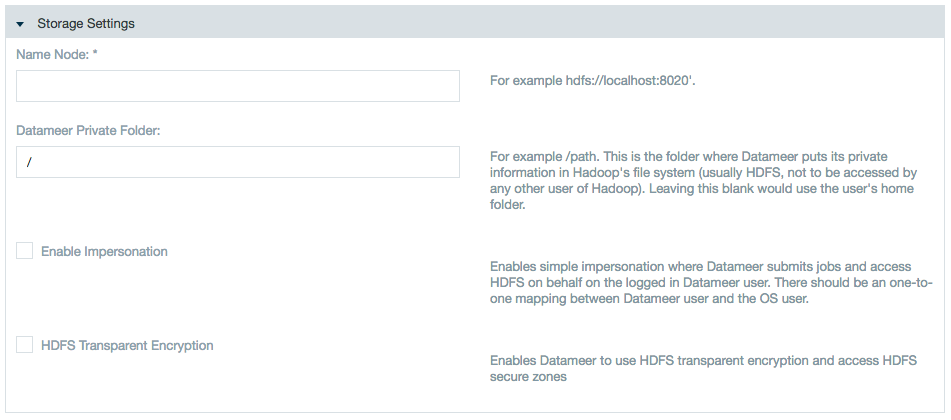
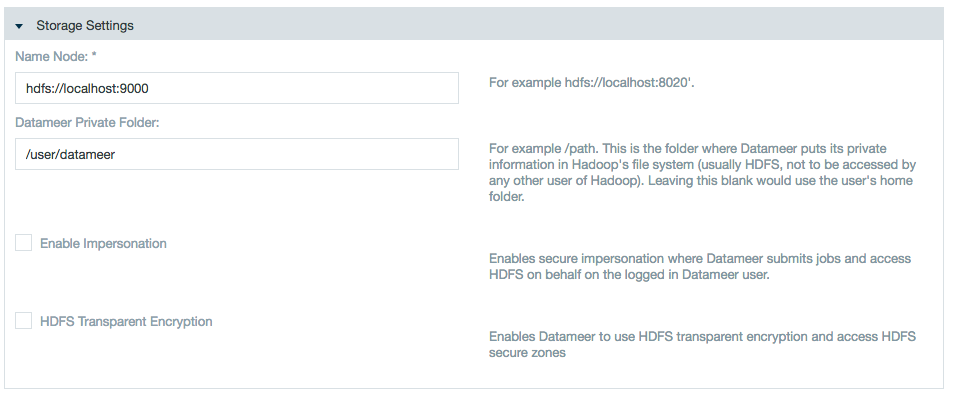
Specify the name node and add a private folder path or use impersonation if applicable.
Whitespaces aren't supported for use in file/folder paths. Avoid setting up Datameer X storage directories (storage root path, temp paths, execution framework specific staging directories, etc.) with a whitespace in the path.Note Impersonation notes:
- There is one-to-one mapping between the Datameer X user and the OS user.
- The OS user who is launching the Datameer X process must be a sudoer.
- The temp folder for the Datameer X installation local file system as well as in the Hadoop cluster (for Datameer) should have read/write access.<Datameer_Installation_Folder>/tmp(Local FileSystem)<Datameer_Private_Folder>/temp(Hadoop Cluster and MapR)
Learn about /wiki/spaces/DASSB70/pages/33036121028 with Datameer.
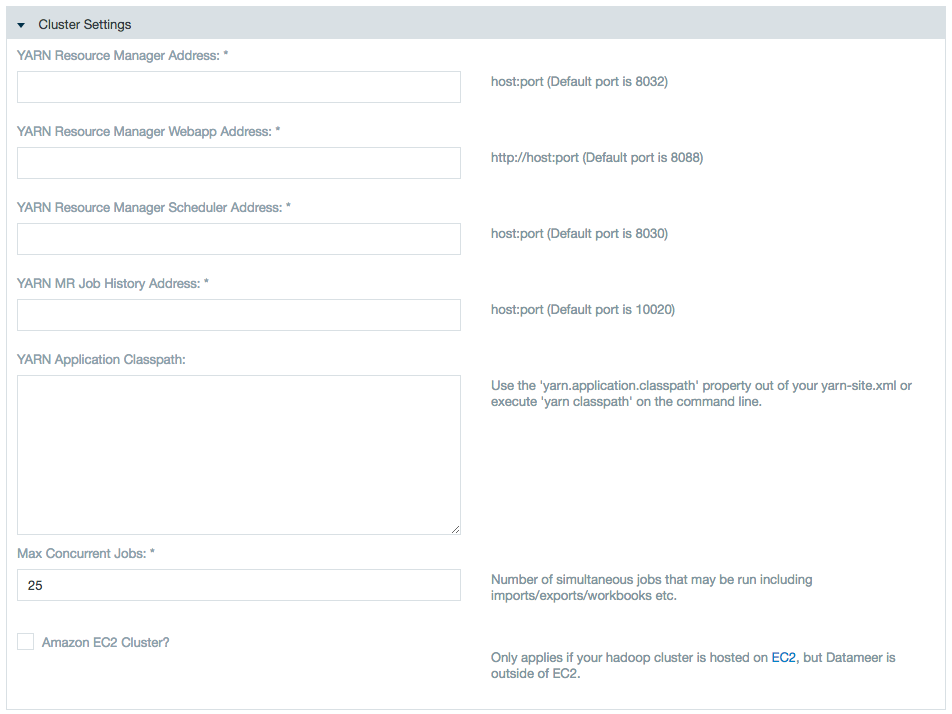
- Specify YARN settings.
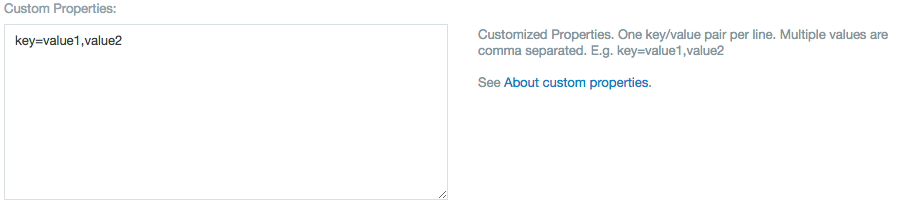
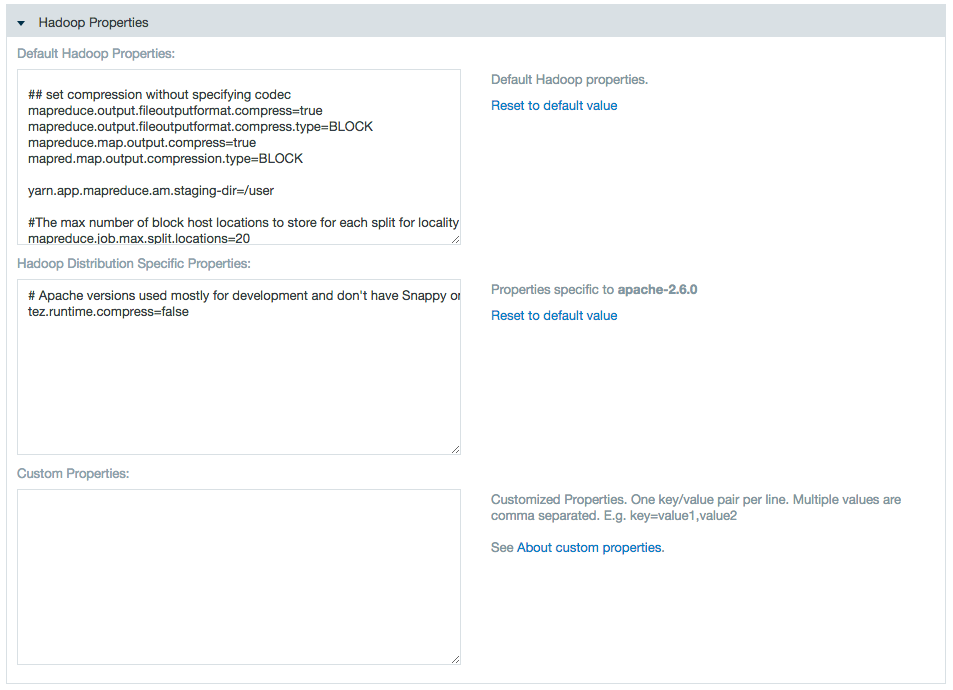
Use the properties text boxes to add Hadoop and custom properties.
Enter a name and value to add a property, or delete a name and value pair to delete the property.Note Within these edit fields, backslash (
\) characters are interpreted by Datameer X as an escape character rather than a plain text character. In order to produce the actual backslash character, you have to type two backslashes:Code Block language text example.property=example text, a backslash \\ and further text
The second backslash is needed as you are effectively editing a Java properties file in these edit fields.

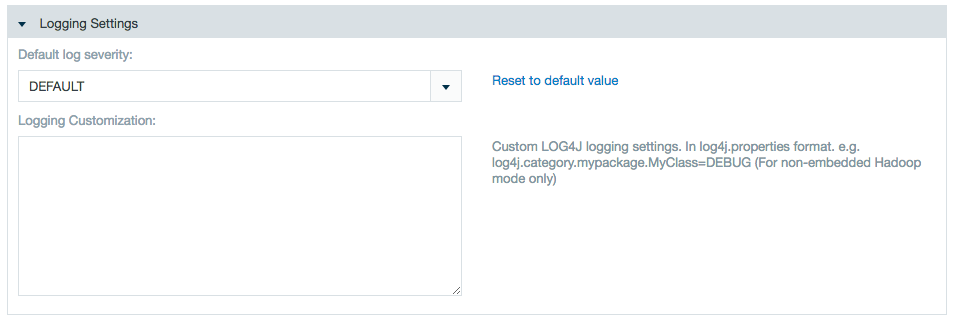
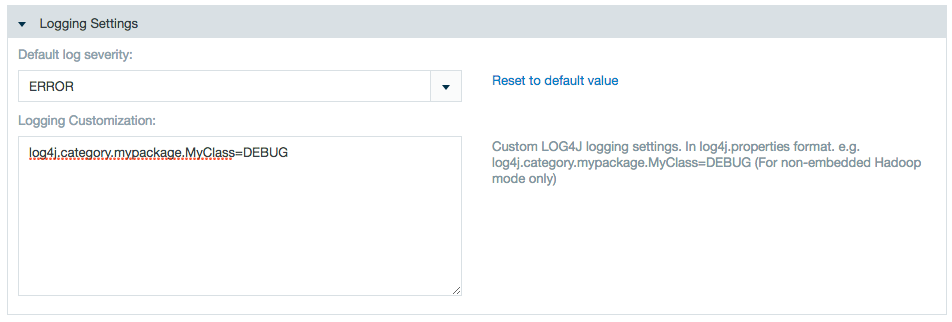
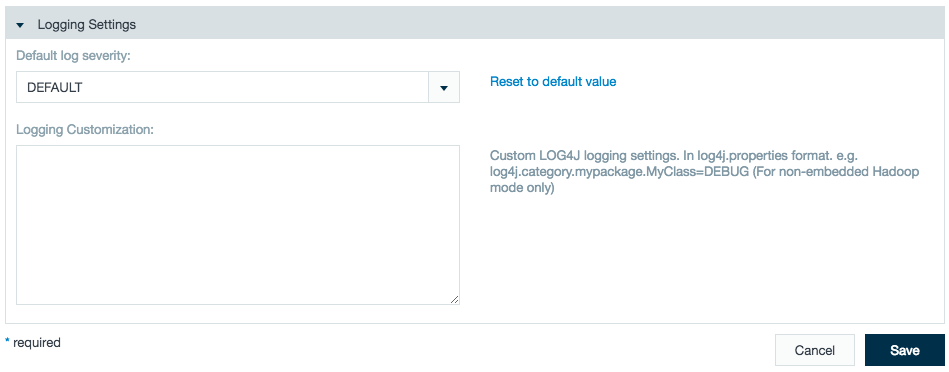
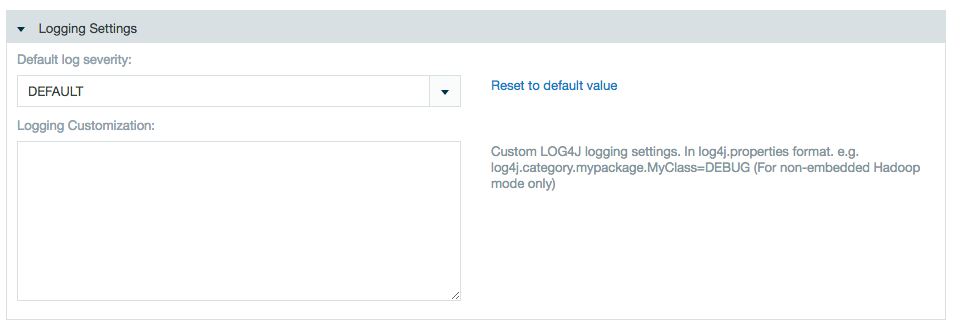
- Logging options. Select the severity of messages to be logged. The logging customization field allows to record exactly what is needed.
- Click Save when you are finished making changes.
...
Prerequisites:
- Mapping 1:1 the Datameer X Service Account between hosts (Datameer X and all HDFS nodes)
- Adding the Datameer X service account to the HDFS supergroup
Utilizing the correct
krb5.confin order for Datameer X to communicate with the key distribution center (KDC) correctly. By default, Datameer X assumes that the file is in/etc/krb5.confon the Datameer X application server. If the file is in another location, specify the path.Code Block language bash title etc/das-env.sh export JAVA_OPTIONS="$JAVA_OPTIONS -Djava.security.krb5.conf=/home/datameer/krb5.conf"
...
- Click the Admin tab
- Click the Hadoop Cluster tab at the left side. The current settings are shown.
- Click Edit to make changes and choose Kerberos Secured Hadoop in the Mode list if needed. Click the link in the dialog box to learn more.

- Specify the URI for the name node, the private folder Datameer X should use, whether impersonation should be enabled, and whether to enable HDFS transparent encryption.
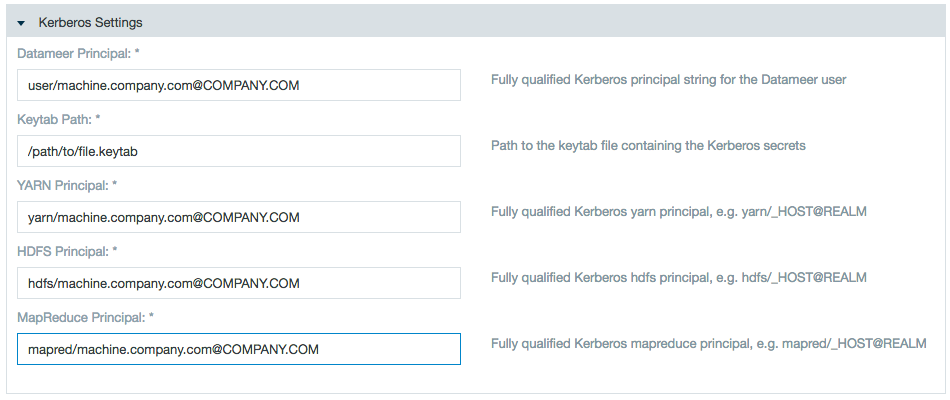
- Enter the necessary Kerberos information: the Kerberos principal for the Datameer X user, the path to the keytab containing Kerberos secrets, the Kerberos principal for YARN, the Kerberos principal for HDFS, and the Kerberos principal for MapReduce.
- Use the Custom Properties text box to add custom properties. Enter a name and value to add a property, or delete a name and value pair to delete that property.
- Logging options. Select the severity of messages to be logged. It is also possible to write custom log settings to record exactly what is needed.
Click Save when you are finished making changes.
...
In Autoconfigure Grid Mode, Datameer X evaluates your cluster and automatically configures the optimal Hadoop cluster settings. You connect Datameer X to your Hadoop cluster by installing a properly configured Hadoop client package on the Datameer X server (using an installation manager such as ClouderaM or Ambari or manually) and then providing Datameer X with a path to that client.
...
| Code Block |
|---|
spark.master das.yarn.available-node-memory das.yarn.available-node-vcores spark.yarn.am.cores spark.yarn.am.memory spark.yarn.am.memoryOverhead spark.driver.cores spark.driver.memory spark.yarn.driver.memoryOverhead spark.executor.cores spark.yarn.executor.memoryOverhead das.spark.context.max-executors das.spark.context.auto-scale-enabled spark.executor.memory spark.submit.deployMode |
You can connect Datameer X to a Hadoop cluster by installing a properly configured Hadoop client package on the Datameer X server (using an installation manager such as ClouderaM or Ambari or manually) and then providing Datameer X with a path to that client.
- Go to Admin tab > Hadoop Cluster.
- Select Autoconfigure Cluster in the Mode field.
- In the Hadoop Configuration Directory field, enter the directory where the configuration files for Hadoop are located.
- Enter the path to the folder where Datameer X puts its private information in Hadoop's file system in the Datameer X Private Folder field.
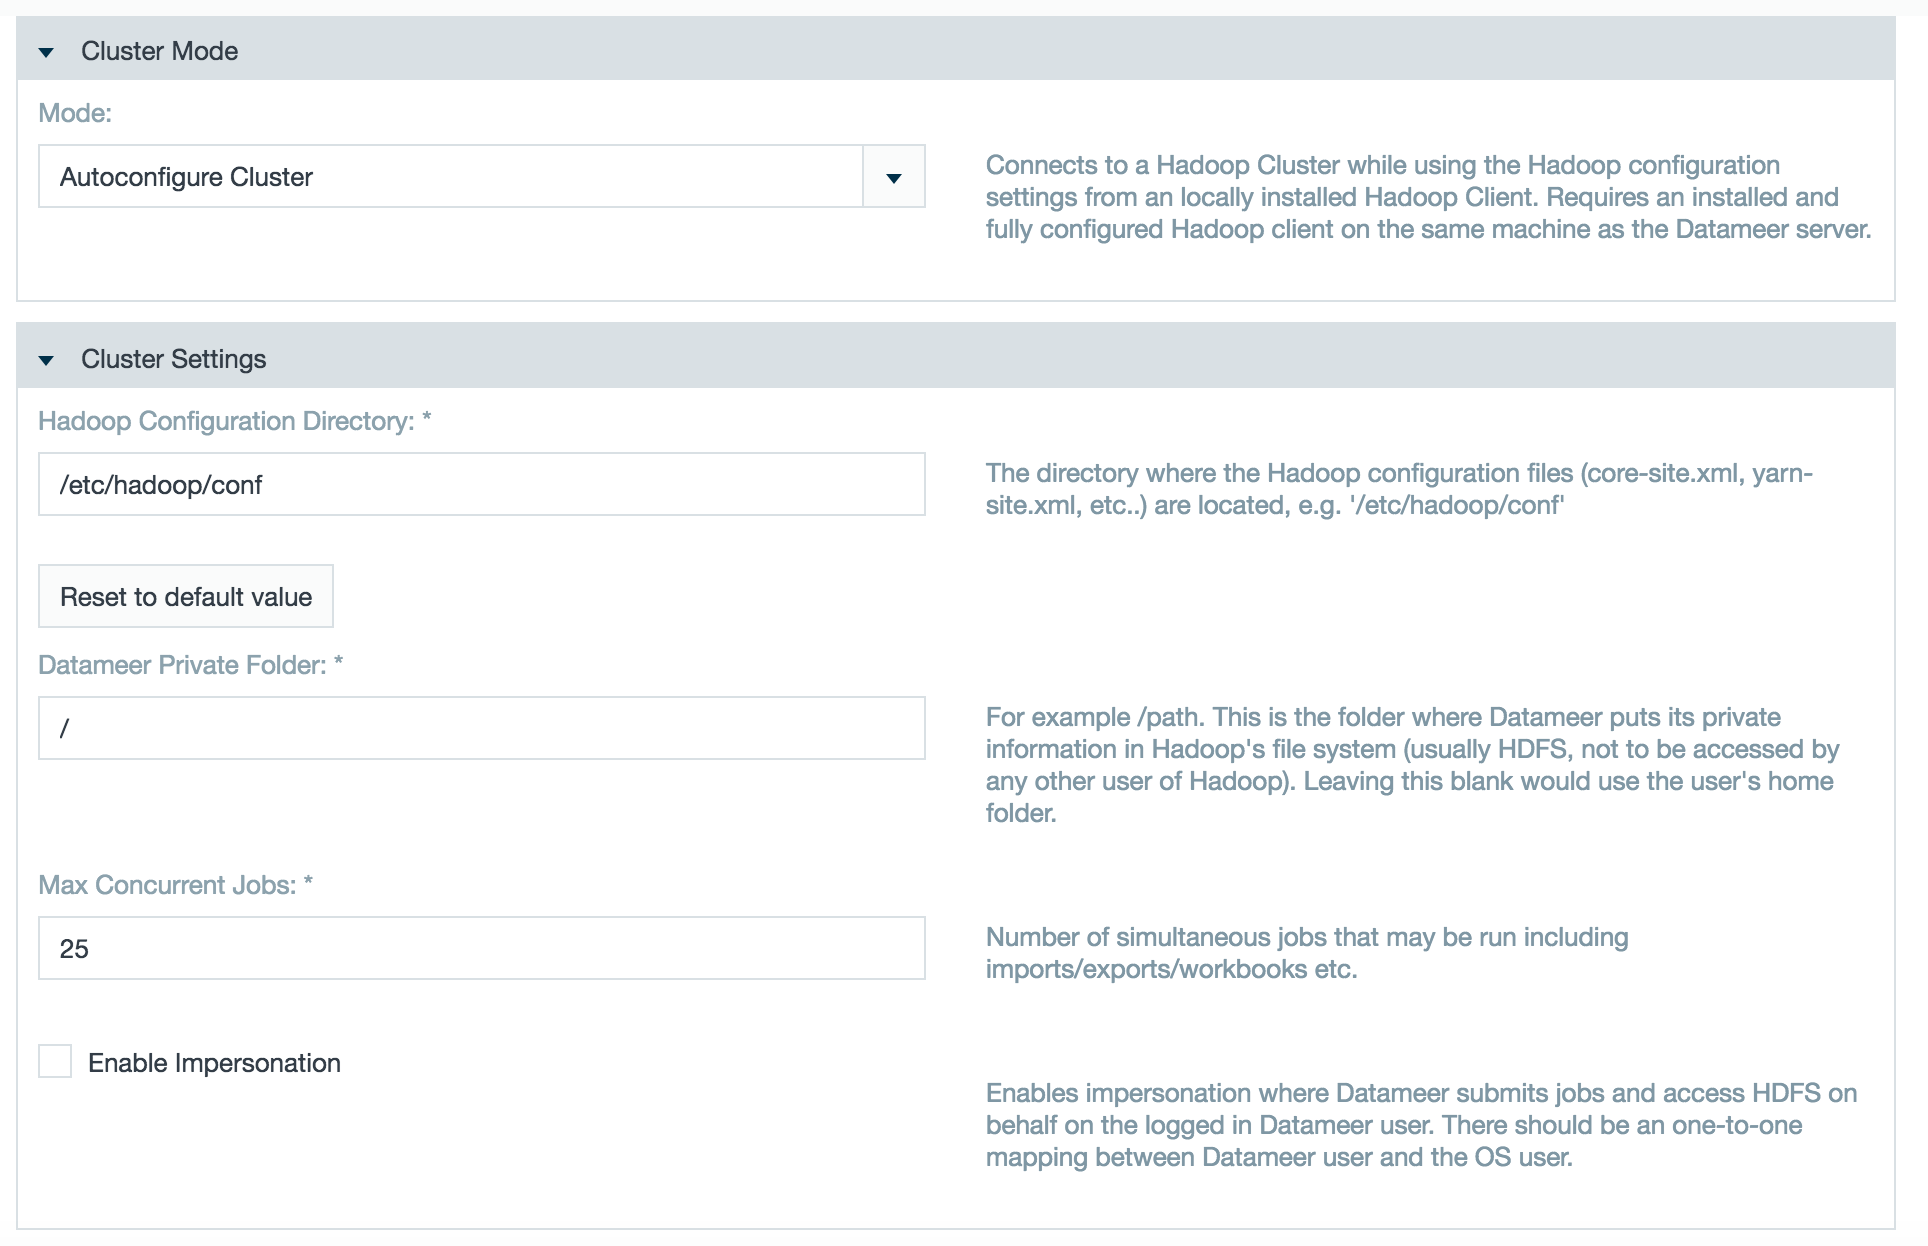
- Enter the number of concurrent jobs.
- Select whether to use secure impersonation.
- Edit the Hadoop or custom properties as necessary.
If theyarn.timeline-service.enabledproperty is true in the Hadoop conf files, setyarn.timeline-service.enabled=falseas a custom property. (This change is not needed as of Datameer X v6.1)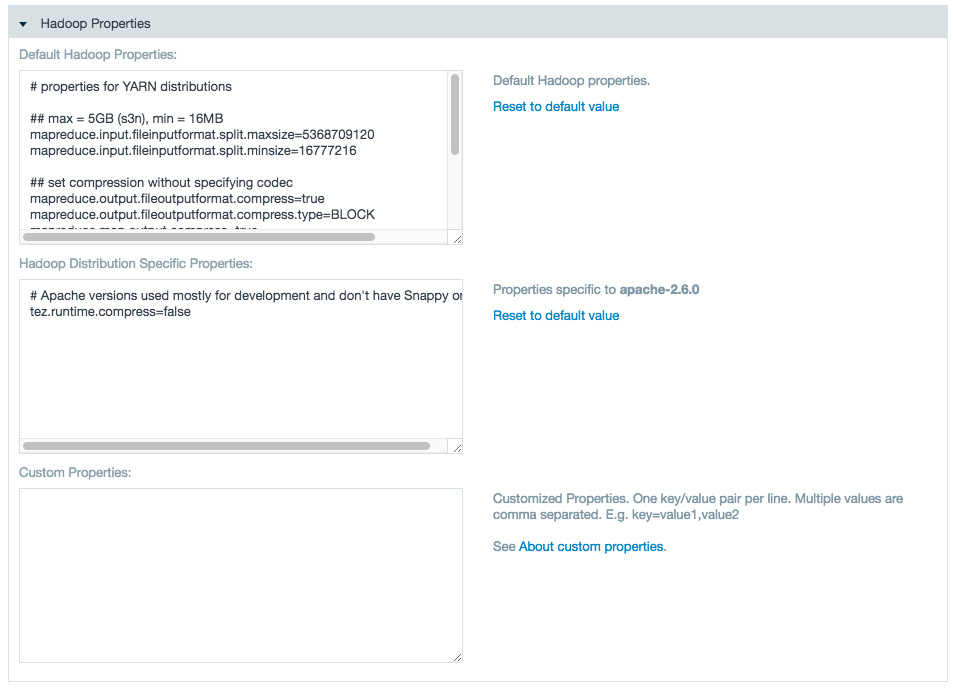
- Click Save.
To update your Datameer X Autoconfig Grid Mode cluster configuration, click Edit on the Hadoop Cluster page and click Save. After saving has been completed, the updated configuration has been applied. New updates to the settings are not shown in the conductor.log but are displayed when clicking again on Edit for Autoconfigure Grid Mode under the Hadoop Properties label.
...
- Click the Admin tab at the top of the page.
- Click the Hadoop Cluster tab at the left side. The current settings are shown.
- Click Edit to make changes and choose MapR in the mode list.

Add the cluster name, the Datameer X private folder, and check the boxes if using /wiki/spaces/DASSB70/pages/33036121047 for Datameer X to submit jobs and access the HDFS on behalf of Datameer X user, and the Max Concurrent jobs.

There is one-to-one mapping between the Datameer X user and the OS user.
The OS user who is launching the Datameer X process must be a sudoer.
The temp folder for the Datameer X installation local file system as well as in the hadoop cluster (for Datameer) should have read/write access.<Datameer_Installation_Folder>/tmp(Local FileSystem)<Datameer_Private_Folder>/temp(Hadoop Cluster and MapR)
Note
Connecting to a secure MapR clusterAnchor secure_mapr secure_mapr 1) Obtain the MapR ticket for the user who is running the Datameer X application. Execute the following command on the shell:
Code Block maprlogin password -user <user_who_starts_datameer>
2) Install Datameer X and open
<Datameer_Home>/etc/das-env.shand add the following system property to the Java arguments:Code Block -Dmapr.secure.mode=true
3) Start and configure Datameer X using MapR Grid Mode.
The option to connect using Secure Impersonation is now available.

4) (Optional) If there is a failure in saving the configuration:
Code Block Caused by: java.io.IOException: Can't get Master Kerberos principal for use as renewer
Add the following custom Hadoop properties under the Hadoop Admin page:
Code Block yarn.resourcemanager.principal=<value>
The value for this property can be found in the
yarn-site.xmlfile in your Hadoop cluster configuration.The steps to achieve impersonation are same as for a secured Kerberos cluster.
- If required, enter properties. Enter a name and value to add a property, or delete a name and value pair to delete that property.
- Logging options. Select the severity of messages to be logged. It is also possible to write custom log settings to record exactly what is needed.
- Click Save when you are finished making changes.
...
Setting a HA enabled Hadoop cluster with Datameer X is almost same as setting an ordinary Hadoop Cluster with following customizations:
- Specify the NameService to which the Datameer instance should be working with in HDFS NameNode text box: hdfs://nameservice1
Specify the following Hadoop properties in Custom Property field:
Code Block language bash title Custom Properties ### HDFS Name Node (NN) High Availability (HA) ### dfs.nameservices=nameservice1 dfs.ha.namenodes.nameservice1=nn1,nn2 dfs.namenode.rpc-address.nameservice1.nn1=<server-address>:8020 dfs.namenode.rpc-address.nameservice1.nn2=<server-address>:8020 dfs.client.failover.proxy.provider.nameservice1=org.apache.hadoop.hdfs.server.namenode.ha.ConfiguredFailoverProxyProvider
If HDFS HA is configured for automatic failover by using Quorum Journal Manager (QJM), you need to add the following additional custom properties:
Code Block ### HDFS HA Autotmatic Failover # By using the Quorum Journal Manager (QJM) dfs.ha.automatic-failover.enabled=true ha.zookeeper.quorum=<zookeepperHost1>.<domain>.<tld>:2181,<zookeepperHostn>.<domain>.<tld>:2181
Check the current NameNode (NN) setting within the database:
Code Block mysql -udap -pdap dap -Bse "SELECT uri FROM data" | cut -d"/" -f3 | sort | uniq
The command above should have only one result, the former <host>.<domain>.<tld>:<port> value configured under Admin tab > Hadoop Cluster > Storage Settings > HDFS NameNode.
Update the paths to the new location in the Datameer X DB:
Code Block ./bin/update_paths.sh hdfs://<old.namenode>:8020/<root-path> hdfs://nameservice1/<root-path>
Check to ensure the new NameNode has been applied to the database and that the path is correct:
Code Block mysql -udap -pdap dap -Bse "SELECT uri FROM data" | cut -d"/" -f3,4,5 | sort | uni
The command above has only one result, the virtual NameNode value including the path configured under Admin tab > Hadoop Cluster > Storage Settings > Datameer Private Folder.
...
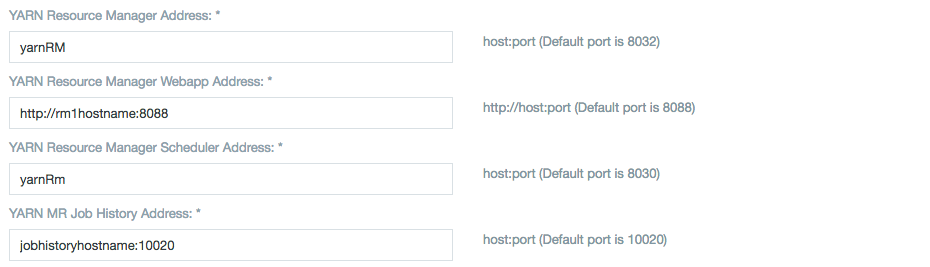
Specify the resource manager with which the Datameer X instance should be working in Yarn Resource Manager Address field: yarnRM.
YARN Application Classpath is a comma-separated list of CLASSPATH entries.
Specify the following Hadoop properties in Custom Property field:
Code Block language bash title Custom Properties ### Resource Manager (RM) YARN High Availability (HA) ### yarn.resourcemanager.cluster-id=yarnRM yarn.resourcemanager.ha.enabled=true yarn.resourcemanager.ha.rm-ids=rm1,rm2 yarn.resourcemanager.recovery.enabled=true yarn.resourcemanager.store.class=org.apache.hadoop.yarn.server.resourcemanager.recovery.ZKRMStateStore yarn.resourcemanager.zk-address=<server-adress>:2181 ## RM1 ## yarn.resourcemanager.hostname.rm1=<server> yarn.resourcemanager.address.rm1=<server-adress>:8032 yarn.resourcemanager.scheduler.address.rm1=<server-adress>:8030 yarn.resourcemanager.webapp.address.rm1=<server-adress>:8088 yarn.resourcemanager.resource-tracker.address.rm1=<server-adress>:8031 ## RM2 ## yarn.resourcemanager.hostname.rm2=<server> yarn.resourcemanager.address.rm2=<server-adress>:8032 yarn.resourcemanager.scheduler.address.rm2=<server-adress>:8030 yarn.resourcemanager.webapp.address.rm2=<server-adress>:8088 yarn.resourcemanager.resource-tracker.address.rm2=<server-adress>:8031
Configuring Number of Hadoop Cluster Nodes
Datameer , X per default, utilizes all nodes within the Hadoop cluster. This might conflict with Datameer X users under a node-based license that have more nodes in their cluster than their contract allows. Control the number of nodes Datameer X interacts with using a VCore (virtual cores) allocation method.
...
Comply with a node-based license by configuring Datameer X to recognize a specific number of vcores from nodes within the Hadoop cluster.
...
Encrypting Data on Transport
Datameer X doesn't require any configuration changes when working with an SSL enabled cluster, however in MR2 architecture Datameer X uses the ResourceManager webserver to get node and cluster metrics.
For this to work properly, the Java TrustStore and its password must be accessible to the Datameer X application.
Add the following system properties:
Code Block language bash title etc/das-env.sh export JAVA_OPTIONS="$JAVA_OPTIONS -Djavax.net.ssl.trustStore=${JAVA_HOME}/jre/lib/security/cacerts -Djavax.net.ssl.trustStorePassword=<password>"Optional: To configure the HTTP endpoint for YARN daemons, set the following values:
Code Block language bash title Custom Properties linenumbers true ### HTTP Policy ### yarn.http.policy=HTTPS_ONLY
Optional: If Resource Manager (RM) High Availability is configured, set the following properties:
Code Block language bash title Custom Properties ## RM1 ## yarn.resourcemanager.webapp.https.address.rm1=<server-adress>:8090 ## RM2 ## yarn.resourcemanager.webapp.https.address.rm2=<server-adress>:8090
Optional: If your key management server (KMS) also serves using HTTPS and is configured to do so in
/etc/hadoop-kms/conf/kms-site.xml, set in the following properties:Code Block language bash title Custom Properties hadoop.security.key.provider.path=kms://https@<host>:16000/kms dfs.encryption.key.provider.uri=kms://https@<host>:16000/kms tez.dag.recovery.enabled=false
For more information see Hadoop in Secure Mode - Data Confidentiality, Securing the Key Management Server (KMS), and Managing Key Trustee Server Certificates.
...
If the /tmp folder is consuming too much space and other files are present in the folder, Datameer X suggests it is safe to purge files that are older than three days.
...
This dfscache grows in size as the number of sample records from import jobs and data links is increased. Follow the troubleshooting guide if the Datameer X filesystem is full due to excessive reduce-part-#### files generated in dfsCache folder.
...
In conf/default.properties you can change the value designating the time zone:
system.property.das.default-timezone=default |
If the time zone is changed on the machine where Datameer X is running, Datameer X must be restarted to show the new default time zone configuration.
Examples
Time zone | Description |
|---|---|
| default | Local server time |
PST | Pacific Standard Time |
PST8PDT | This time zone changes to daylight saving time (DST) in the spring. The GMT offset is UTC/GMT -7 hours (PDT) during this time. In the fall it changes back to standard time, the GMT offset is then UTC/GMT -8 hours (PST). |
CST | Central Standard Time |
America/Los_Angeles | Time zone for Los Angeles (USA), this time zone changes to daylight saving time (DST) in the spring. The GMT offset is UTC/GMT -7 hours during this time. In the fall it changes back to standard time, the GMT offset is then UTC/GMT -8 hours. |
EST5EDT | This time zone changes to daylight saving time (DST) in the spring. The GMT offset is UTC/GMT -4 hours (EDT) during this time. In the fall it changes back to standard time, the GMT offset is then UTC/GMT -5 hours (EST). |